The following instructions document setting up Account Profile records on your system.
The following is a list of generalized steps followed by sections with more details on each step:
1. Gather information on the account
2. Add/update Account records available to Account Profile records (Account Setup)
3. Add/update Customer records available to Account Profile records (Microsoft Dynamics GP or Account Setup)
4. Establish services offered by the account (Account Profile Service Setup and Account Profile Service Status Setup)
5. Establish document groups and types to categories Account Profile documents (Account Profile Document Group Setup and Account Profile Document Type Setup)
6. Create Account Profile records (Account Profile Setup)
7. Update personnel records to access Account Profile functionality (Personnel Setup and Security Profile Setup)
8. Establish email notifications to Account Profile contacts (Monitor Orders Email)
STEP 1: Gather Information on the Account
Obtain information for the account needed for the remaining setup. This information includes the following:
•Account information, such service branch, address, custom field information for User Defined Labels
•Contact information, including email addresses, phone numbers, physical address, etc.
•Invoice Terms
•National Account representing the account
•Customer representing the account
•Default Task Definition, personnel, Special Instructions at the origin and destination locations, and other order defaults
•Services offered by the account
•List of site addresses and site contacts associated to the account (for Office & Industrial moves)
•Related documents such as pricing, sales agreement, contracts, policies, etc.
•And other information needed to support order processing for the account
STEP 2: Add/Update National Account Records
If your profile ties to a national account that operates under van line and own authority orders, then setup needed information for the account within Account Setup. The national account links a profile to a branch of service needed to support accounting transactions associated to an order.
Figure 8: Account Setup
If you need to specify on national account orders that is not available as a MoversSuite data field, then you can establish User Defined Fields within the Account Setup as well. A company federal or employer identification number is one such example.
Utilize Branch Setup to manage branches.
STEP 3: Add/Update Customer Records
If your profile ties to a customer, then setup needed information for the account within Microsoft Dynamics GP or within Customer Setup (depending on setup). The customer is needed to support accounting transactions associated to an order.
The billing address associated to the customer links to the profile. This is a default address set for the order and for invoicing.
STEP 4: Establish Account Services
If the account offers services that you wish to display on the Account Profile tab, then you can define a service description and default status within Account Profile Service Setup and Account Profile Service Status Setup. The descriptions and status values are available when you define available services through the Services tab in Account Profile Setup.
Items established within Account Profile Service Setup automatically show for services on all profiles.
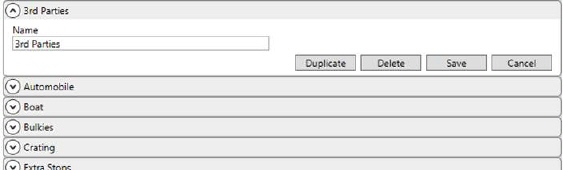
Figure 9: Account Profile Service Setup
Also available to every profile are the status values assigned within Account Profile Service Status Setup.

Figure 10: Account Profile Status Setup
Once services are defined, they automatically show on the Service tab for all Account Profile Setup records. From this setup, you can select the default Status value and provide any comments needed for the service.
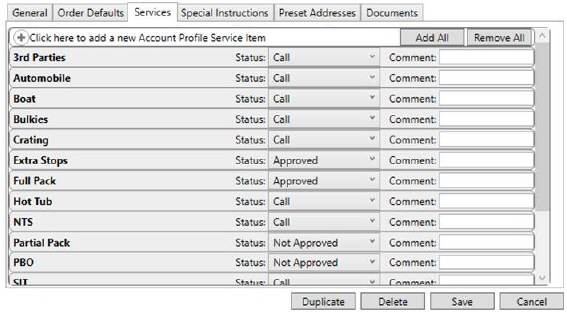
Figure 11: Services tab in Account Profile Setup
STEP 5: Establish Document Groups and Types
If you wish to list and have available documents on the Account Profile tab, then define document groups and types for classification. Establish groups first using the Account Profile Document Group Setup.

Figure 12: Account Profile Document Group Setup
Once document groups are available, establish types for each group within Account Profile Document Type Setup.

Figure 13: Account Profile Document Type Setup
Assign document types to files added to the profile through the Documents tab within Account Profile Setup.
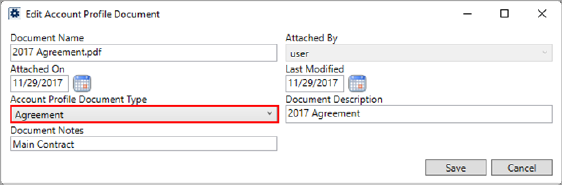
Figure 14: Add Account Profile Document screen
STEP 6: Create Account Profile Records
With information available from prior steps, you can create profiles within Account Profile Setup. These records are assignable to orders through the Account Profile tab and through the Select an Account Profile function when creating a new account order. NOTE: For specific field usage and information for this step, reference the Account Profile Setup topic.
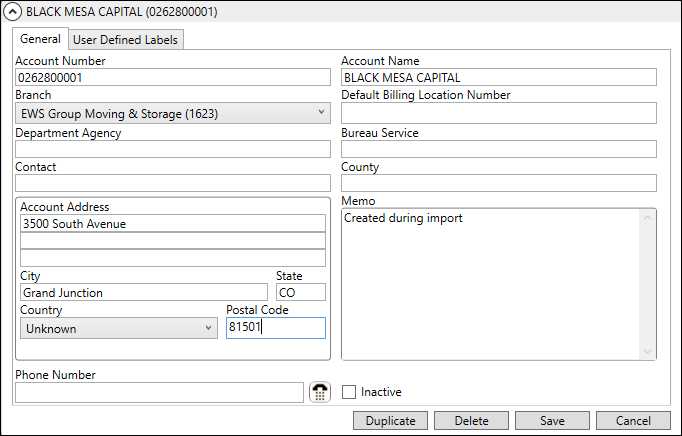
Provide the initial defaults for the profile on the General tab. This includes setting appropriate Customer, Invoice Terms, and Account.
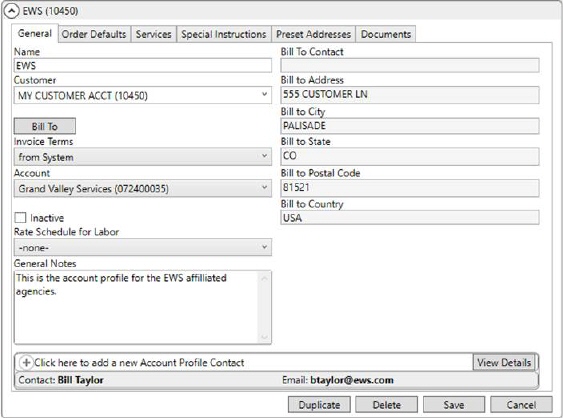
Figure 15: General tab of Account Profile Setup
You can assign any number of contacts to the profile through the Account Profile Contact section (bottom of Figure 15). Add or edit contacts using the Add Account Profile Contact screen.
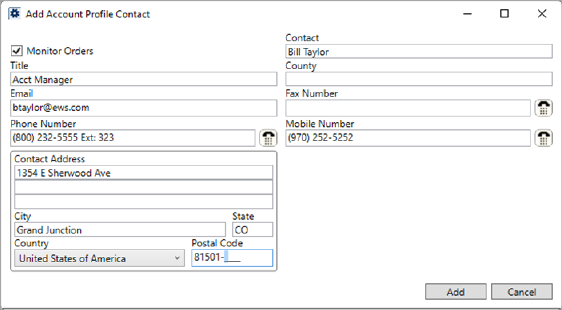
Figure 16: Add Account Profile Contact screen
The contact information displays within the Account Profile tab. You can email personnel through this tab if the Email address is set. Further, you can take advantage of the Monitor Orders Email by checking the Monitor Orders flag.
Set more defaults an order through the Order Defaults tab.
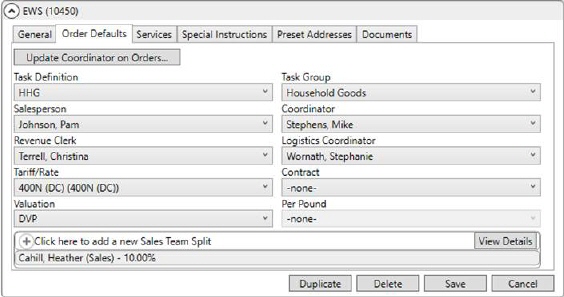
Figure 17: Order Defaults tab in Account Profile Setup
You can offer a Sales Team Split by setting the Salesperson and establishing a Sales Team Split. Only Commissionable Employees available for this functionality.
Modify the list of services available and provide default status and comments within the Services tab.
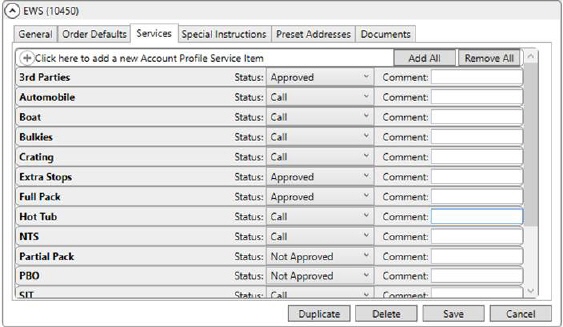
Figure 18: Services tab in Account Profile Setup
Define default instructions for a profile order through the Special Instructions tab.
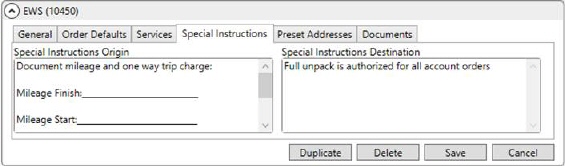
Figure 19: Special Instructions tab in Account Profile Setup
Use the Preset Addresses tab to document any building associated to an Office & Industrial move. Establish addresses through the Add Account Profile Preset screen.
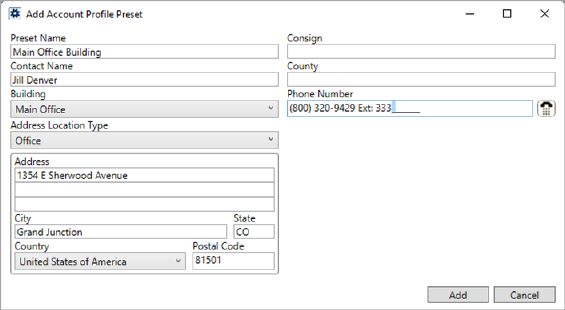
Figure 20: Add Account Profile Preset screen
Refer to Office & Industrial Initial Setup for related setup information.
If you wish to have documents available for the profile, then add them through the Documents tab. Utilize the Add Account Profile Document screen to create documents visible within the Account Profile tab.
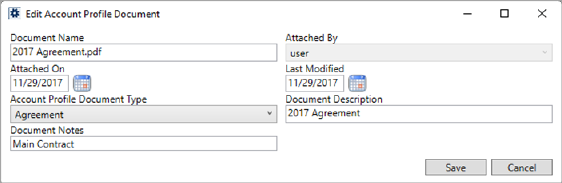
Figure 21: Add Account Profile Document screen
For field description and related setup, see field descriptions for each tab within the Account Profile topic.
STEP 7: Update Personnel Records
Access to functionality available through the Account Profile tab is controlled through the Order Information module. Personnel assigned to full access to this module can perform all functions, including the ability to override services. The security is branch-specific, which means that you can control which users can access and create orders based on the branch assignment.
Update which branches a user can access through the Branch tab within Personnel Setup.
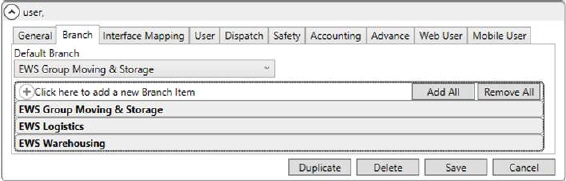
Figure 22: Branch tab in Personnel Setup
Control over functionality available to assigned branches is determined by the Security Profile assigned to the user. Set the Security Profile on the User tab accordingly.

Figure 23: User tab in Personnel Setup
Determine branch functionality for a profile through Security Profile Setup.

Figure 24: Detail item within Security Profile Setup
Refer to the Order Information listing within the Security Profile Setup topic for more information.
STEP 8: Establish Email Notifications to Account Contacts
The Monitor Orders Email is available that sends an email message to each account contact when the actual load or actual delivery date changes on orders associated to the profile. To enable this functionality, ensure that each contact you wish to receive this notification has a valid Email address set and that the Monitor Orders flag is checked on their contact record, managed through the Add Account Profile Contact screen.
NOTE: Multiple email addresses may be entered in Email. Separate email addresses with a comma or semicolon. Field accepts up to 120 characters.
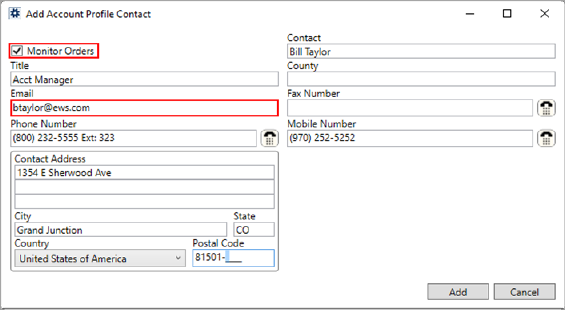
Figure 25: Add Account Profile Contact screen
Additionally, the Monitor Orders Email relies on the Database Mail utility within Microsoft SQL Server Management. Refer to Database Mail Setup for details on the setup needed to support Monitor Orders Email.
Related to this feature is the ability to send email messages to key personnel when an event occurs on an order, such a claim alert, dispatch status change, sales lead, etc. Refer to Automatic Email for more information.
|
NOTE |
|
The email is sent from MoversSuite’s DBMail, using the First Name, Last Name, and Email Address from the General tab of Personnel Setup, as the sender. |
RELATED TOPICS:
International Orders Setup and Administration
Order Information Setup and Administration
Special Services Setup and Administration