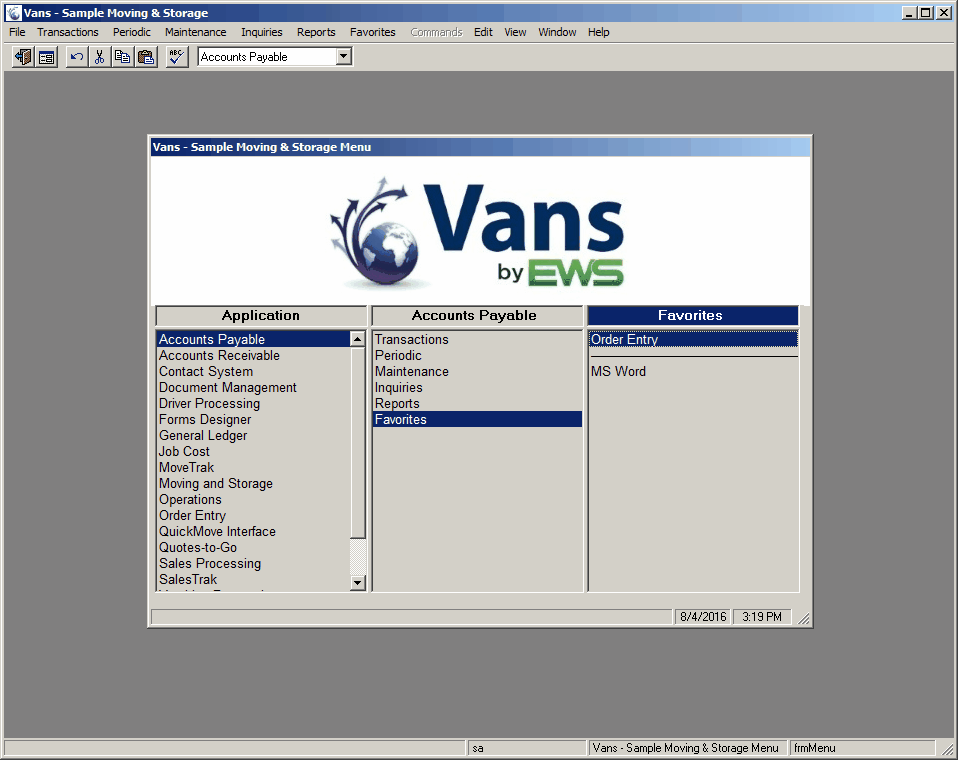
This form is used for adding and removing user records, or changing user information. It is only available to Vans administrators.
Screens
Name |
Description |
Set up general information about the user on this sreen. |
|
Define which menu options that user can run and also restrict any toolbar functions within that option. |
|
Define specific field restrictions within selected forms/fields. |
|
Copy security for this user from another company. |
General Tab
To add a new user:
1.From the System menu group. Click on the Maintenance menu and select the User menu option.
2.Enter the user's Login name. This name will be used to log the user into the VanS VS system. Although the login accepts 16 characters, the first 5 characters should match the VanS user ID and should be unique.
3.Enter the user's general information ( First Name, Last Name, and Email Address).
4.Select the Current Company (if applicable) for which you wish to change the enabled applications.
5.Select the Current Application you want to enable for the user. The application will be highlighted.
6.Enter the user's security information (Password and Group).
7.If the user is an administrator, check the Administrator box.
8.Click the  icon on the toolbar on the toolbar to save the record.

Field Descriptions
Name |
Description |
Login |
Enter the login name for the user. The login is limited to sixteen (16) characters in length, but the first five (5) characters should match the VanS user ID. First initial and first four letters of last name is a common method for assigning login. |
General |
|
First Name |
Enter the first name of the user assigned to this login. |
Last Name |
Enter the last name of the user assigned to this login. |
Email Address |
Enter the user's e-mail address. |
Application Settings |
|
Auto Menu Display |
Select the menu style that will be automatically displayed when this user initially logs in. Select '(None)' if no menu should be displayed initially for this login. The valid choices are: •None •Standard Menu •Explorer Menu |
Current Application |
Select the Application group that this user will be using the next time they log into the system. When the user logs out of the system, this field will be updated with the application group they were currently working with. |
Current Company |
Select the Company that this user will be using the next time they log into the system. The user can change companies after the initial log by using the Select Company form. When the user logs out of the system, this field will be updated with the company they were currently working with. |
Prompt For Company |
The Select Company menu can optionally be set to be displayed when this user initially logs in by checking this box. Each user can also maintain this field for themselves, by checking or unchecking the ‘Show Menu at Startup’ box on the Select Company Menu. |
Security Profile |
|
Password |
Enter the password for the user. The maximum length is 16 characters. For security purposes, each character of the password is replaced with an "*" as it is entered. |
Verify Password |
The password needs to be re-entered in this box, to verify that it was entered correctly. |
Group |
Select the group to which the user is assigned. |
Administrator |
If this user is an administrator for the group, check this box. The user will then have access to the Tab Stop Maintenance form, the User Maintenance and Group Maintenance forms, and be able to do other administrator duties. As long as this box is checked, the user cannot be deleted from the system. |
Allow Custom Favorites |
Check this box if the current user will be allowed to add custom items on the Favorites Menu. If the Administrator box is checked, this box will be checked by default and cannot be changed |
Display Options |
|
Display Scripting |
Check this box to enable Scripting for this user. |
Display Daily Tips |
If the Daily Tips box should be displayed for this user upon login, check this box. Each user can also maintain this field for themselves, by checking or unchecking the ‘Show Tips at Startup’ box in the Daily Tips window. |

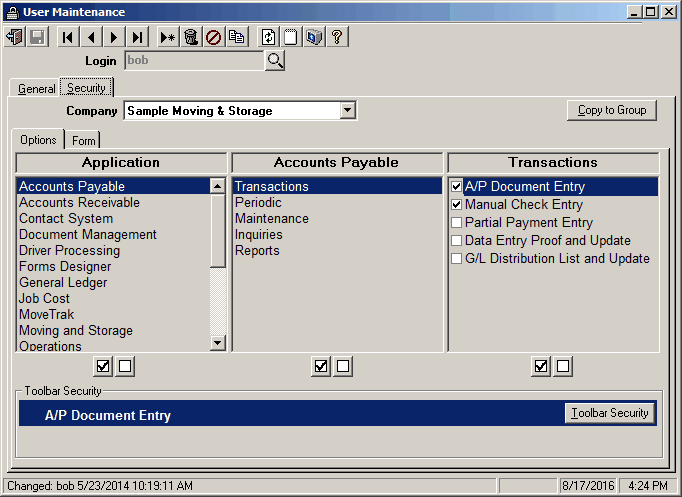
Menu Security Tab
This tab is used to select the specific applications that each user will have access to. Menu Security can be set differently for each company. The Menu Security tab is only accessible for users who are not set as administrators. If the administrators box is checked for a specific user, the Menu Security tab will not be accessible and that user will automatically have access to all registered applications for all companies.
Note: Changes to Menu Security are updated immediately and there is no way to Cancel or Undo any changes made to the menu security.
To setup menu security for a user:
1.After selecting a Login ID from the User Maintenance form, click on the Menu Security Tab.
2.In the Company box, select the company to setup security for. If multiple companies will have the same security, set the menu security in any one company, then use the Copy From function to copy the security settings to the other companies.
3.The 1st column, titled 'Application' lists all registered application groups that are available to choose from. The middle column lists all submenus within a specific application group. The last column lists the individual applications.
4.To add or remove access to an individual application, navigate to that application, by first selecting the Application group, then the submenu and finally, the application. Next to each application is a check box. To add access to this application, check this box and to remove access clear this box.
5.Displayed just below each column are the  Select All Applications and Clear All Applications icons. These icons are used to select or clear all applications within VanS VS, all applications within a specific application group or all applications within an application submenu.
6.To select all applications click the  Select All Applications icon below the desired column. Doing this for the 'Applications' Column will cause every application in VanS VS to be available for the user.
7.To remove all applications click the  Select All Applications icon below the desired column. Doing this for the 'Applications' Column will remove access to all applications for this user.
 Tip: When setting up menu security initially, it may be easier to select all applications, then remove only applications that a user should not have access to.
Field Descriptions
Name |
Description |
Company |
Be sure to select the proper company that you want to adjust security for. |
Application |
Select the Application that you want to adjust security for. Use the |
Submenu |
(Under the heading Accounts Payable in the above example) Select the submenu item that you want to adjust security for. Use the |
Menu Item |
(Under the heading of Transactions in the above example) Manually check or uncheck those items that you do not want the user to have access to. Unchecked items will not be displayed on the menu. Use the |
Toolbar Security |
|
|
Use the Toolbar Security button to display the toolbar buttons for the selected menu item. Once the toolbar buttons are listed you can then click on a button to enable or disable that item. Note that some items when disabled/enabled will also disable/enable other items on the toolbar (for example the save button
|

 ). By disabling the save button the user will be able to view information, but will not be able to save any changes they make. The Exit and Help buttons are required and cannot be disabled.
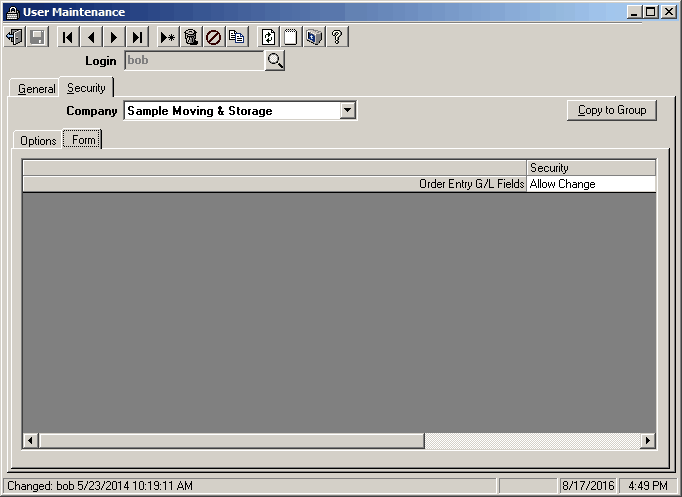
Security Form Screen
Field Descriptions
Name |
Description |
Company |
Be sure to select the proper company that you want to adjust security for. |
Order Entry G/L Fields |
Indicates what this user cna do with the G/L accounts in Order Entry. The valid choices are: •Allow Change (Default) - The user can view and change these fields. •View Only - The user can see, but not change these fields. •Hide - Will disable and hide these fields from the user |
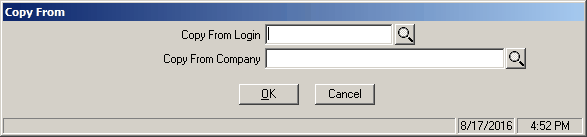
Copy From
The Copy From function is used to copy menu security settings from any user/company to any other user/company. The Copy From can also be used to copy menu security to another company for the same user.
1.After selecting a Login ID from the User Maintenance form, or after adding a new login, click on the Menu Security Tab.
2.Click the  icon the icon on the toolbar. The Copy From window will be displayed.
3.Enter the name of the user whose settings you want to copy in the box labeled 'Copy From Security for this Login' or click the  lookup icon to select from a list of all available logins.
4.Select the Company to copy the security from in the box labeled 'Copy From Security for this Company' or click the lookup icon to select from a list of all available companies.
5.Upon selecting OK, that users menu security settings will load. The user that the menu security was copied from will not change.
Field Descriptions
Name |
Description |
Copy From Security for this Login |
Enter the login name of user that you wish to copy the menu security settings from or use the lookup form to select from a list of logins. |
Copy From Security for this Company |
Enter the Company that you wish to copy the menu security from or use the lookup form to select from a list of available companies. If only one company is set up, that company will be selected by default. |
|
Saves any change you made, and closes the form. |
|
Cancels any change you made, and closes the form. |

