This section outlines the setup involved to support the QuickBooks Integration.
PREREQUISITES
Your company must purchase and be running Intuit QuickBooks Online.
You must have a QuickBooks account with Admin Tool privileges.
You have contacted MoversSuite and purchased the QuickBooks Integration. Contact information is available through Welcome to MoversSuite Software.
SETUP STEPS
The following steps are needed to establish the QuickBooks Integration with MoversSuite, followed by detailed information on each step:
1. Open QuickBooks Setup in the Admin Tool and verify connections and refresh settings
2. Open QuickBooks Item Mapping and link Item Codes to QuickBooks types
3. Open QuickBooks Online and add custom fields for MoversSuite data
4. Test and verify transactions
QuickBooks Integration is a built-in solution and is immediately available with all MoversSuite packages.
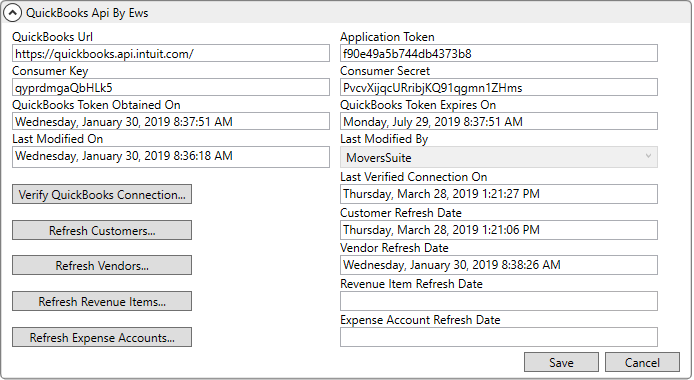
STEP 1: Update QuickBooks Setup
Once all the needed QuickBooks accounts, products, services, etc. are available, you can open the QuickBooks Setup within the MoversSuite Administration.
Figure 6: QuickBooks Setup
If the QuickBooks information for Url, Application Token, Consumer Key, and Consumer Secret are not set or if you cannot access the QuickBooks category, then contact EWS Group. EWS Group will need to run a script titled QuickBooksSetupProduction.sql that provides the initial settings needed to support the QuickBooks Integration.
Once these needed settings are established, press  . Upon the first attempt the MoversConnect Api Service
dialog appears and the application opens a web page prompting you to enter
your QuickBooks login information. You will also be prompted to confirm the
connection through QuickBooks.
. Upon the first attempt the MoversConnect Api Service
dialog appears and the application opens a web page prompting you to enter
your QuickBooks login information. You will also be prompted to confirm the
connection through QuickBooks.
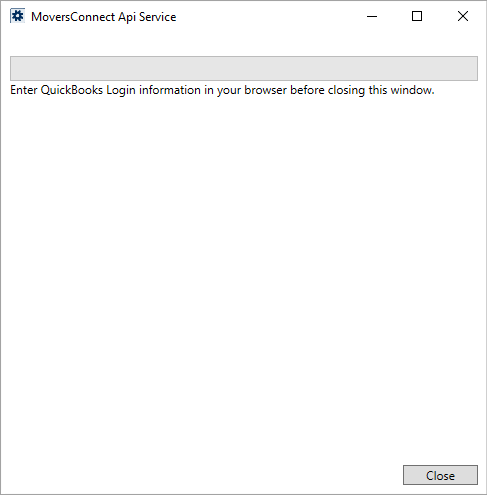
Figure 7: MoversConnect Api Service confirmation of verification for QuickBooks
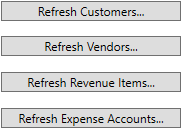
Once connected to QuickBooks, you can utilize the four Refresh options to pull in corresponding records from QuickBooks.
For the Verify and each Refresh option, you will receive a confirmation through a MoversConnect Api Service dialog.
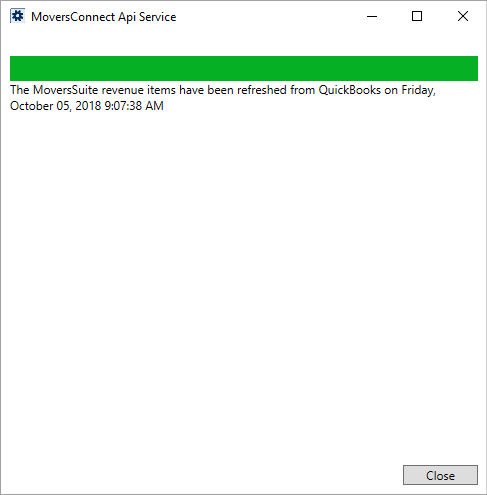
Figure 8: MoversConnect Api Service dialog for revenue item verification
IMPORTANT: The QuickBooks Token referenced within QuickBooks Setup is an access token that must be refreshed periodically. Take note of the expiration date, QuickBooks Token Expires On, and then schedule a time to refresh the token, which is done by pressing the Verify QuickBooks Connection button.
STEP 2: Update QuickBooks Item Mappings
Open the QuickBooks Item Mapping Setup to link MoversSuite records to QuickBooks services and expenses categories.
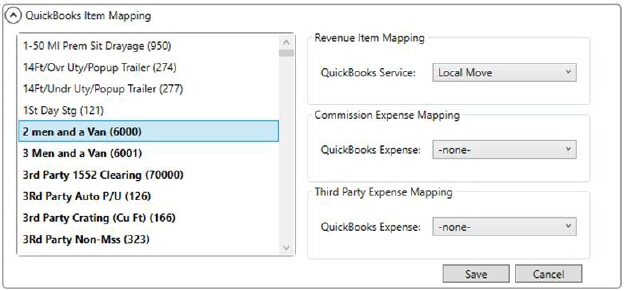
Figure 9: QuickBooks Item Mapping Setup
Highlight the Item Codes on the left and assign them to appropriate categories on the right. In the above example (Figure 9), the Item Code of 6000 is mapped to a Local Move category for revenue generation in QuickBooks.
An Item Code can only be assigned once per mapping category. For example, Item Code of 6000 is assigned to the Local Move service. You cannot assign it to another category within the Revenue Item Mapping section.
Item Codes that list in bold font are currently assigned to one or mapping category.
You can highlight and assign multiple records at a time by using the Ctrl and Shift keys. To select Item Codes individually, press and hold the Ctrl key and click on the records you wish to map. If you wish to select a range of Item Codes, click on the starting item, press and hold the Shift key, and then click on the ending item. Once highlighted, select the appropriate mapping category. Press the Save button after each assignment.
STEP 3: Add custom QuickBooks for MoversSuite data
In QuickBooks Online, open an invoice and press  to Customize what you see here.
Add three fields in the following order: Order Number, Shipper,
and MS Invoice.
to Customize what you see here.
Add three fields in the following order: Order Number, Shipper,
and MS Invoice.
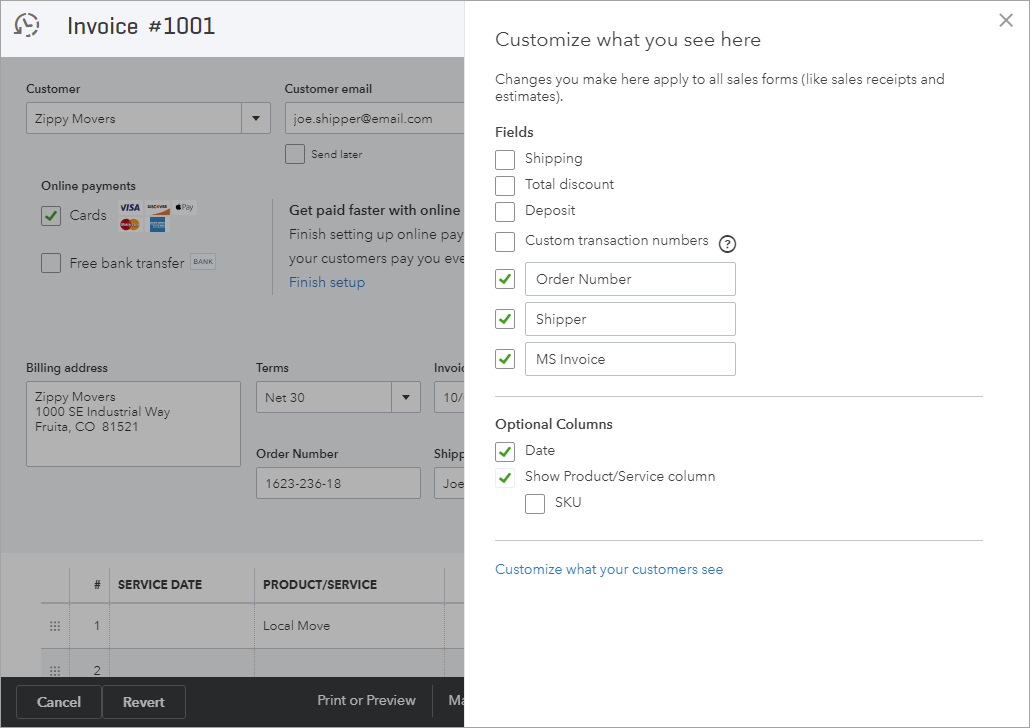
Figure 10: Customize options for invoices
STEP 4: Test and verify
Establish an order and verify that customers established within QuickBooks are available and assignable through the various Customer settings, such as on the Billing Information tab.
Verify that vendors established in QuickBooks are available and assignable. For example, establish a third-party item and assign a vendor through Add Third Party Item.
You can also test the entire setup by adding items through the Transactions tab. Add revenue items, third party items, and commissions.
Once Transactions are entered, open the Summary tab and press  . You are then prompted to provide the
transaction date for accounting transaction generated by the process.
. You are then prompted to provide the
transaction date for accounting transaction generated by the process.
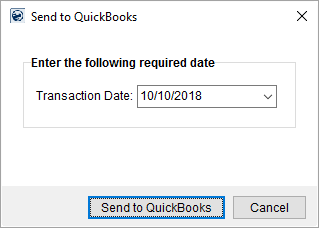
Figure 11: Send to QuickBooks prompt for transaction date for generated items
Access your Intuit QuickBooks Online company and verify that the process created invoices and that revenue and expense items are assigned correctly.
The QuickBooks Integration utilizes the QuickBooks API and WebApiService processes to communicate between MoversSuite and QuickBooks. There is no specific security related to the QuickBooks Integration, therefore any user that can access the Summary tab in Revenue Entry can perform the Send to QuickBooks function.