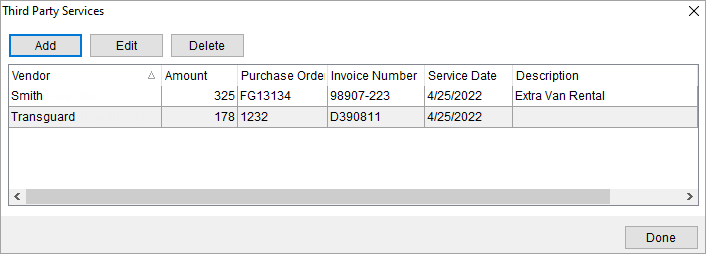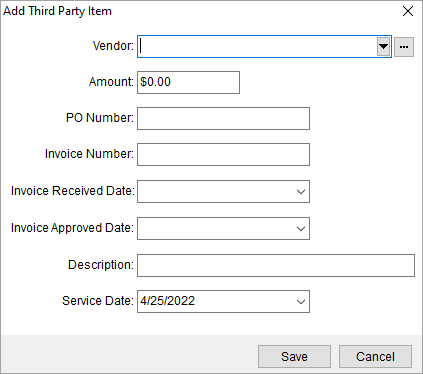
Use the Add Third Party Item dialog to document a billing item from a third-party vendor. Access to this screen is from the Billing Information screen. Click the Third Party Services button.
From the Third Party Services screen, click the Add or Edit buttons.

Figure 85: Third Party Services screen
Use the ellipses or the dropdown next to Vendor to find the needed vendor. Continue to enter data as needed and press Save.

Figure 86: Add Third Party Item
A similar function is available in the Add Third Party Item (Revenue Entry) screen available through Revenue Entry.
Technical Field and Function Information
Described in the table below are the fields available within the Add Third Party Item dialog.
|
Field |
Description |
|
Vendor |
Use the Vendor Quick Find to locate and select a
third-party vendor to associate this record. The list of options vendors
pulls from those defined within Microsoft Dynamics GP or from within Vendor Setup (depending
setup). You can also access a list of recent vendors through the |
|
Amount |
Enter the dollar amount of the service. |
|
PO Number |
Purchase order number supplied by the vendor for the service (up to 20 characters). |
|
Invoice Number |
Invoice number supplied by the vendor for the service rendered (up to 20 characters). |
|
Invoice Received Date |
Use this calendar dropdown to select the date when the invoice was received. |
|
Invoice Approved Date |
Use this calendar dropdown to select the date when the invoice was approved. |
|
Description |
Enter a detailed description of the services provided by the vendor (up to 60 characters). |
|
Service Date |
Provide the date of the service, which defaults to the current system date. |
|
|
Save Pressing Save will keep the changes made and will close the screen. |
|
|
Cancel Pressing Cancel will close the screen without saving changes. |
RELATED TOPICS:
Add Third Party Item (Revenue Entry)