
These instructions detail how to create an online payment link for Online Payments so that the customer can enter the payment information themselves in a secure hosted webpage:
1. From the Electronic Payments Menu, select Setup Online Payment.
2. Complete the Setup Credit Card/Bank Online Payment screen.
3. Email is sent with the payment hyperlink.
4. Payee clicks on the hyperlink and completes the payment page.
5. If successful, a receipt is generated.
STEP 1: Open the Setup Online Payment screen.
To associate the online payment to an order, open the order needed. Then from the Electronic Payments Menu, choose Setup Online Payment.

Figure 26: Setup Online Payment is found within Electronic Payments Menu.
STEP 2: Complete the Setup Credit Card/Bank Online Payment screen.
Complete the Setup Credit Card/Bank Online Payment screen according the instructions and details within Setup Credit Card/Bank Online Payment. Order Balance, Customer Balance and Invoice Number are auto filled and cannot be changed; however, all information can be updated. The balance fields indicate what is open for AR on the order or the customer record. Set the Max Payment Amount to the amount you wish the payee to pay and set the Email Address(es) accordingly. Separate multiple email addresses with a comma or semi-colon. Click Setup Online Transaction.
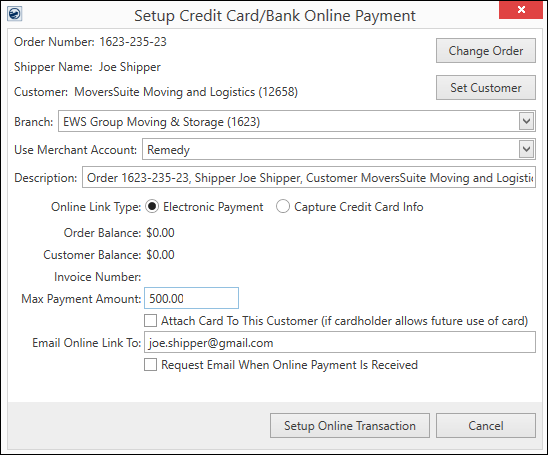
Figure 27: Setup Credit Card/Bank Online Payment
If you open the Setup Credit Card/Bank Online Payment screen without an open order or customer, such as when opening the screen from the Contents Screen or through AR Credit & Collections, then Order Number, Shipper Name, and Customer may not be set. This allows you to create a payment without referencing a customer or order number. Branch and Description must be set to activate the Setup Online Transaction button.
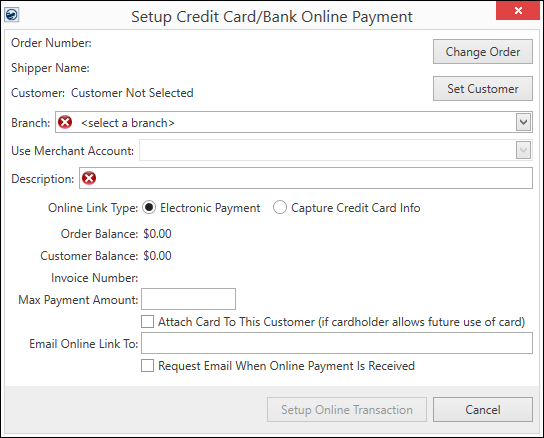
Figure 28: Setup Credit Card/Bank Online Payment screen with no default data
STEP 3: Email is sent with the payment hyperlink.
When you press the Setup Online Transaction button, an email is sent out to the recipient with a link to the Online Payment site. The content of the email message is customizable through the System Email Setup. The following is an example of the default message. When the customer receives this email, they can review the information and press here to open the payment link.
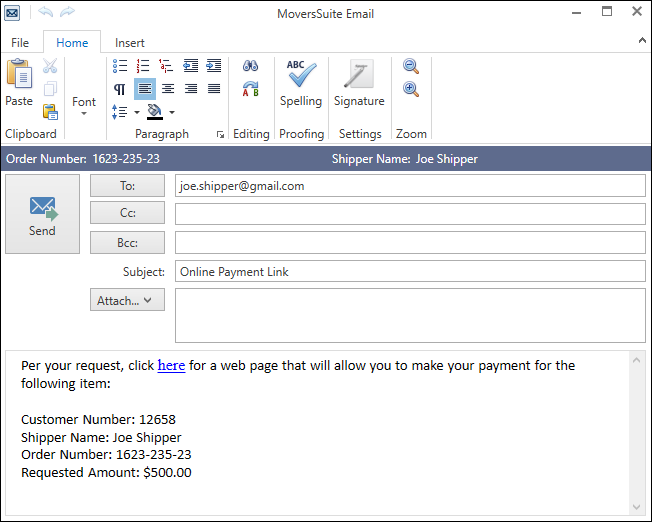
Figure 29: Sample email with payment link
STEP 4: Payee clicks on the hyperlink and completes the payment page.
Once the payee receives the email and opens the link, they are directed to the Online Payment site, where they can complete the payment. This site is hosted through MoversConnect.
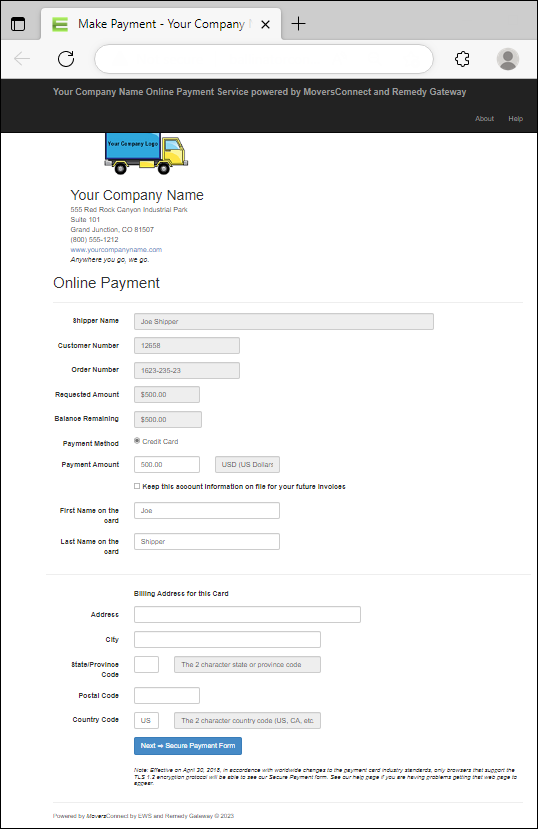
Figure 30: Online Payment site (Image size reduced)
The payee uses the Online Payment and enters the required information.
NOTE: When using PYXiS as the Electronic Service provider (set within the Use Merchant Acct dropdown) and choosing Electronic Payment for the Online Link Type, there will be an option on the Online Payment Page to decide to capture the financial information being used for the payment. The option is the checkbox that reads: Keep this information on file for your future invoices. When checked, the process will first attempt the capture and there will be another step required to complete the payment.
Refer to the Online Payment topic for detailed field descriptions. Once they choose options and press Next -> Secure Payment Form, the application directs them to the secured hosted payments page.
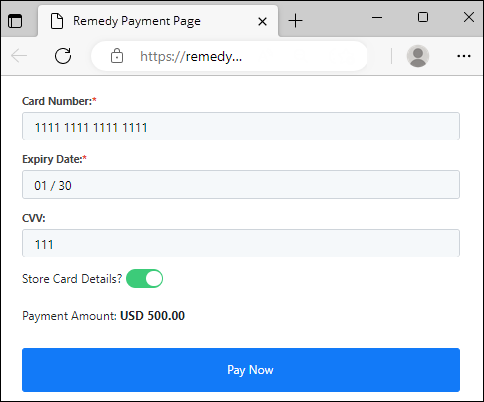
Figure 31: Remedy’s secure payments page, Remedy Payment Page
NOTE: If you, or your customers, are unable to open the hosted payment webpage, and receive a message back from your browser indicating that page cannot be displayed, then you are most likely not using a browser that supports TLS 1.2 encryption protocol. Refer to the Browser Security Settings topic for more information.
The option to Charge Credit Card or Charge Account are available to finalize the fund transfer after requested information is entered.
STEP 5: If successful, a receipt is generated.
Once the payment is processed, the Payment Receipt page appears. All information regarding the payment, including the option to Print Receipt are available.
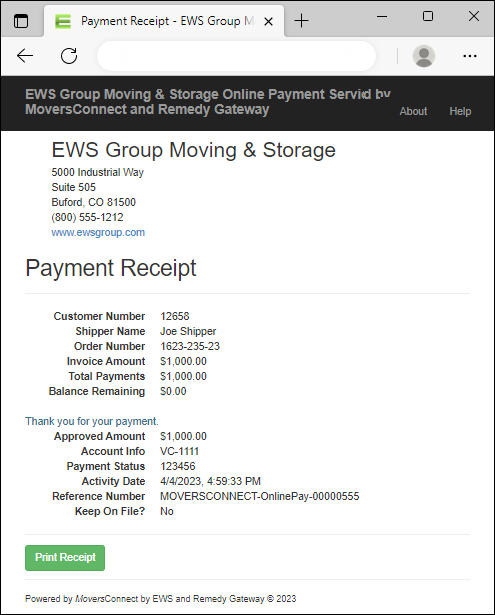
Figure 32: Payment Receipt page
If a payment was made and the Balance Remaining is greater than zero, then an additional option is presented to Make Additional Payments. A payee can make multiple payments on a payment item up to the limit set within Online Payments. There is also an administrative option for the minimum amount that a payment can be, such as $5.00.
In MoversSuite, the transactions for the payment is recorded as a Cash Receipts. The Reference Number of the online payment and other pertinent information is inserted as a Note on the cash receipt, which is visible within the Cash Receipts module.
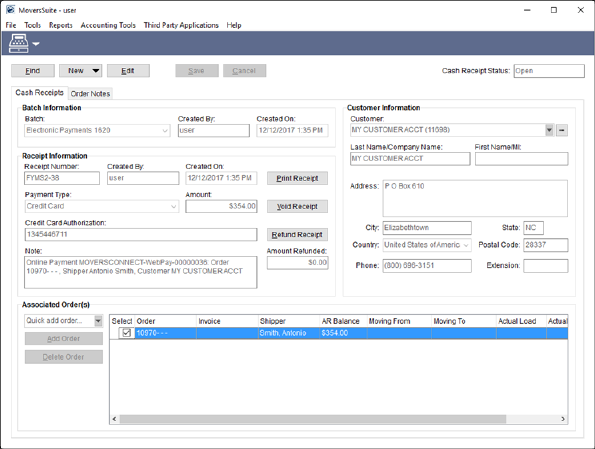
Figure 33: Cash Receipts
The cash receipt is also included in a batch for Electronic Payments for each branch of service. These batches automatically show as In Process within Payment Management. In the example above (Figure 33), the batch that the receipt shows under is Electronic Payments 1620 for branch associated to the receipt. Any other Electronic Payments associated to branch 1620 are also included in the daily batch.
The cash receipt for is treated as any other cash receipt and you can print, void, and refund the electronic payment as well. Refer to the following topics to learn more about handling the cash receipt for Online Payments:
Electronic Payment Void Receipt
A note is also attached to the order if the payment links to a specific order record. The note is of a type specified through the Order Note Type within Electronic and Online Payments and includes the details of the transactions made for the payment.
RELATED TOPICS:
Electronic Payments Data Transferred