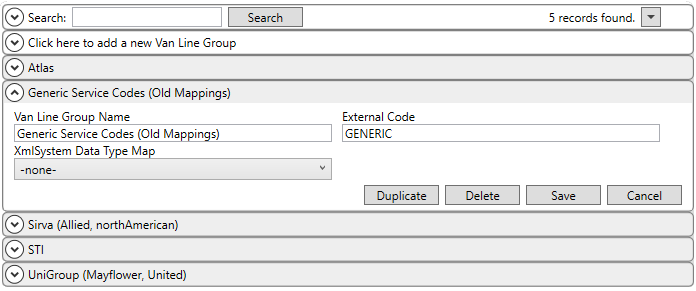
As part of the upgrade process for 2022 R11, a new Van Line Group Setup has been implemented and is populated with the following groups:
|
Van Line Group Name |
External Code |
|
Atlas |
ATLAS |
|
Generic Service Codes (Old Mappings) |
GENERIC |
|
Sirva (Allied, northAmerican) |
SIRVA |
|
STI |
STI |
|
UniGroup (Mayflower, United) |
UNIGROUP |
The initial upgrade creates mappings for all Item Codes to the “Generic” group. The Generic group is designed to work for all existing statement and revenue import processes.

Figure 73: Van Line Group Setup
Optionally, you can create a new Van Line Group or use a non-Generic group to assign mappings to. You can add the new group through Van Line Group Setup.
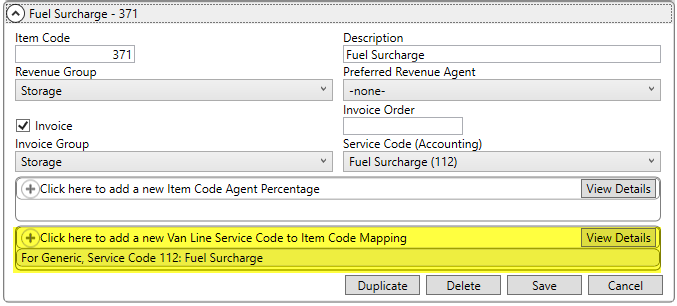
The mappings are found within the Van Line Service Code to Item Code Mapping section on Item Code Setup records. These mapping records are needed to support items imported as part of a Statement Imports or Revenue Import into MoversSuite. The codes documented in this section are needed to identify the Item Code necessary for generating transactions in MoversSuite.

Figure 74: Item Code Setup
The mappings are designed to allow you to use a single Item Code for referencing multiple codes from one or more supported processes. For example, if you wish to map all of the unpacking service codes from SIRVA to a single Item Code, you would create a mapping section on the Item Code similar to the following image.

Figure 75: New mappings example within Item Code Setup.
There are four ways in which you can create these mappings:
1. Manually add or update the existing mappings on Item Code Setup records.
2. When adding a new Item Code through the Item Code Generation screen, you can create an initial mapping through the Van Line Group Setup section.
3. You can use the Mass Copy Van Line Group Service Code to Item Code Mappings function to create duplicates from one group to another.
4. You can use the Import Van Line Service Code to Item Code Mappings function to build and import a list of these mappings using a spreadsheet.
Please refer to the links in the above listing for more information on each of these areas.
For the remainder of this discussion, we will walk through creating a new mapping manually. These steps apply to each of the four ways listed above. Each of these ways involve using the Inactivate Van Line Service Code to Item Code Mappings flag. What this flag does is control which set of mappings are in effect on your system. This allows you to create all the mappings without having to affect any current process until you are ready to implement all the mappings; In which case, you would open Van Line Group Setup and uncheck this flag to make all associated mappings active.

Figure 76: Example Van Line Group Setup record
Add a Van Line Service Code Manually
To define mappings, open the Item Code Setup record you wish to update and click on the “add a new” line within the Van Line Service Code to Item Code Mapping section to access the Add Van Line Service code to Item Code Mapping dialog. Use this mapping section to create mappings needed for the processor (van line).

Figure 77: Add Van Line Service Code to Item Code Mapping example.
In our example, we will assume that we have new Service Codes from SIRVA that need to be added to MoversSuite to support the SIRVA Agent Statement Import.
REMINDER: If you are defining the initial set of mappings for SIRVA, then you will need to make sure that the Inactivate Van Line Service Code to Item Code Mappings flag is checked on the SIRVA record within Van Line Group Setup until you have all these new mapping records defined. Once all the new mappings are defined, you can then uncheck the flag, and all newly imported statement items will be under the new mappings (and not the generic ones).
1. Select the “Sirva (Allied, northAmerican)” for the Van Line Group.
2. Enter the new SIRVA codes as the Van Line Service Code and provide a Van Line Service Description.
3. Van Line Carton Code are tied to UniGroup systems, so if you were adding a new UniGroup code and wish to break the item into a respective Carton Code, then you would add that code here.
4. Press Add.
5. Repeat this until all codes are defined.
RELATED TOPICS:
Atlas Settlement Statement Import