MoversSuite Administration > Accounting and Financial Services > Electronic Merchant Setup > Web Page Around Hosted Page tab
Reference Video: Electronic Payments – Customize Electronic Payment Page
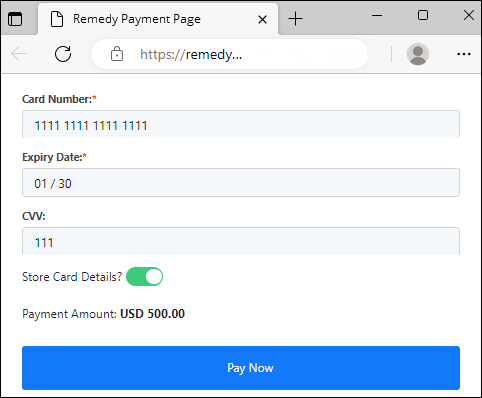
All providers enable the ability to “wrap” your company’s information and chosen options over the providers’ secure hosted page. Without using this option, the secure hosted payment page would look something like this:

When using the Render a Web Page Around Hosted Page option on your Electronic Merchant Setup record > Web Page Around Hosted Page tab, the web page can look customized and professional like this example:
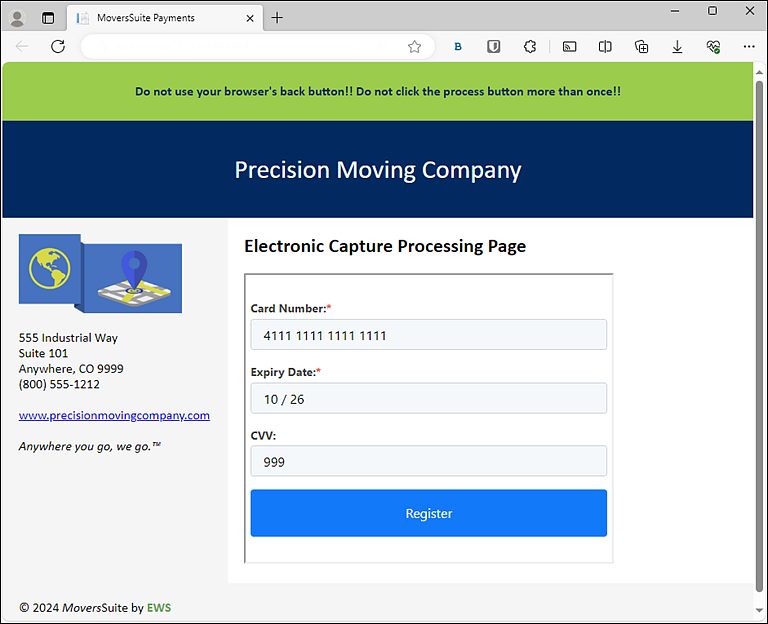
Though PYXiS offers customization of their Hosted Payment Web Page through the Hosted Payment Page Options (tab), this tab offers even more options for customization to create a professional, custom-look Web Page for your company. (PYXiS is selected within Electronic Service as Constellation Payments (PYXiS) within Electronic Merchant Setup > General tab.)
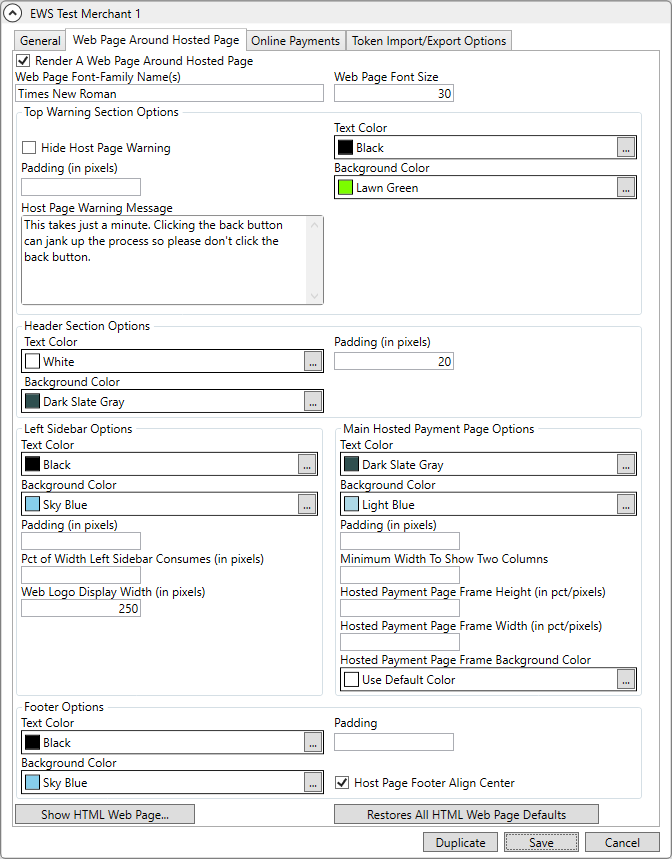
Figure 112: Customizations are set on the Web Page Around Hosted Page tab. Image with these settings show on the image indicated below.
To understand how information set on this tab affects the Hosted Page, this is an example of the Hosted Page without any customization set on the Web Page Around Hosted Page tab. All settings on this tab are the default settings. The information and image used are from the information set on the Online Payments (tab). This page is a “responsive” page so it will adjust and resize when viewed on smaller device, such as a cell phone.
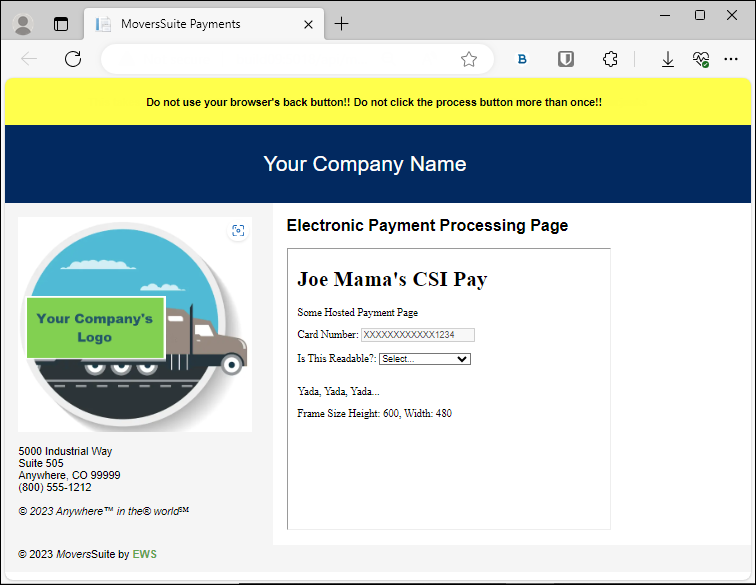
Figure 113: Default settings show on this Web Page Around Hosted Page tab.
This is an example of a result from using the customizations available on this tab. Notice the warning at the top is different, the font used in the webpage, the colors for font and background, and even the image size is customized. A very nice feature on this tab is the ability to see what your changes look like at any time. Make a change and see how your change looks on the webpage by clicking the Show HTML Web Page… button on this tab.
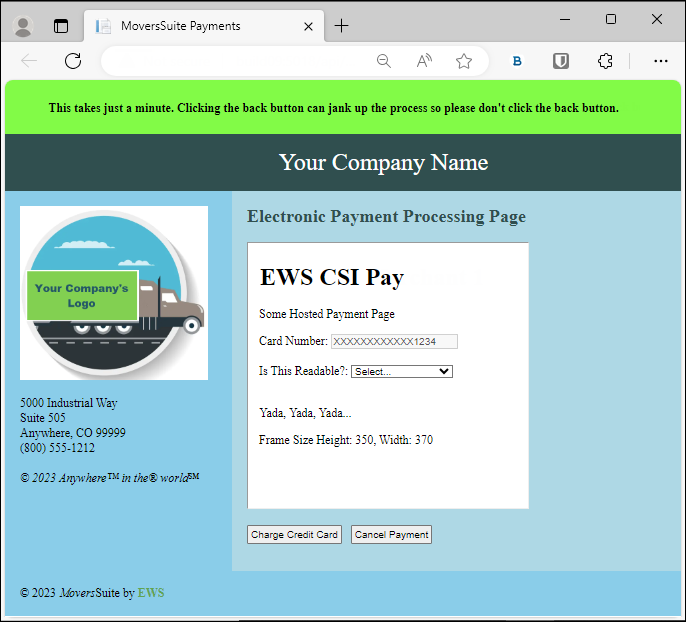
Figure 114: This image shows the customizations set on the Web Page Around Hosted Page tab shown at the beginning of this section.
Technical Field and Function Information
The following table describes the fields and functions within this setup.
NOTE: Each section of the Web Page can be customized and each section is grouped within this setup, such as Top Warning Section Options, Header Section Options, etc.
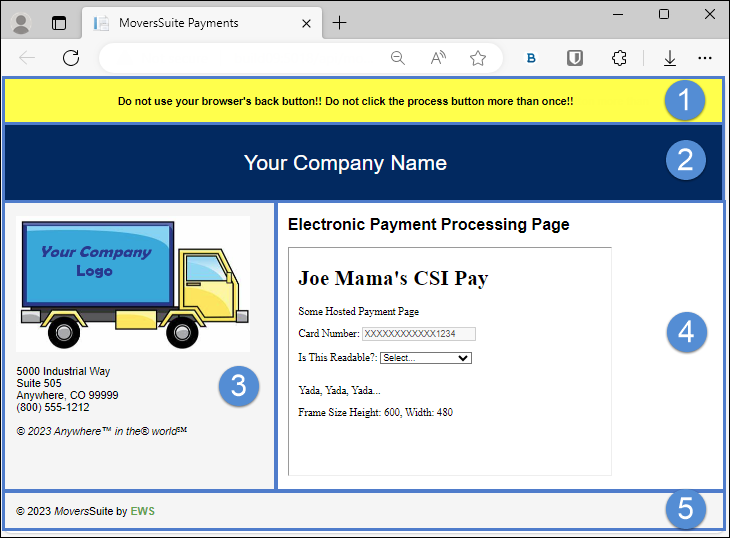
Figure 115: Image shows the sections referenced within this Web Page Around Hosted Page setup.
|
Field/Function |
Description |
|
|
Check this box to create a professional looking customized web page that is based on the functionality of your Electronic Merchant Service’s hosted web page. |
|
Web Page Font-Family Name(s) |
Customize the font used on the web page. It is recommended to use a common font, such as Calibri or Times New Roman. If a font is set that is not common and the page is opened on a device that does not support your chosen font, it may not render properly. |
|
Web Page Font Size |
(Anything set here does not affect image.) |
|
Top Warning Section Options | |
|
Section 1 in Figure 115 The following information will customize the very top banner on the web page. In Figure 114, it was customized to read: This takes just a minute… If nothing is entered, the message defaults to the one in Figure 115 which reads: Do not use your back browser button!!!........ | |
|
|
If unchecked, the default message or message entered within Host Page Warning Message will show. If checked, no message will show and the header that contains the message will not show either. |
|
|
The number entered determines how tall the header is for the message. |
|
Text Color |
Click the |
|
Background Color |
Click the |
|
Header Section Options | |
|
Section 2 in Figure 115 The following information displays will customize the header with your company name on the web page. Your company name will show as entered under the Online Payments (tab). | |
|
Text Color |
Click the |
|
Background Color |
Click the |
|
|
The number entered determines how tall the header is for the message. |
|
Left Sidebar Options | |
|
Section 3 in Figure 115 The following information will customize the section that contains your Company Name, Address/Phone/Other Info Line 1, Line 2, Line 3, Line 4, Web Logo, and the Service Mark Statement. Information that shows is the information set on the Online Payments (tab). Nothing shows in this section if nothing is set for on the Online Payments (tab). | |
|
Text Color |
Click the |
|
Background Color |
Click the |
|
|
The number entered determines how the height of this section. |
|
|
The number entered determines the width of this section. |
|
|
The number entered determines how wide your Company Logo (set on Online Payments (tab)) is rendered on the web page and in this section. |
|
Main Hosted Payment Page Options | |
|
Section 4 in Figure 115 See Color Selector Setup for information on choosing the Text Color and Background Color. See Figure 113 for the default colors. Note: In Figure 114,“EWS CSI Pay” is the name set on this Electronic Merchant Setup record > Hosted Payment Page Options tab > Title Text. | |
|
Text Color |
Click the |
|
Background Color |
Click the |
|
|
The number entered determines how tall the header is for this section. |
|
|
This determines how the minimum width required for the webpage to show on the screen with the Left Sidebar Section and the Main Hosted Payment Page Options side by side. Remember if the webpage is viewed on device with a small screen, such as a mobile phone, screen will place these sections in a vertical manner and provide a scrollbar to navigate the webpage. |
|
|
This determines the height of the Payment Information section, where the credit card information is entered. |
|
|
This determines the height of the Payment Information section, where the credit card information is entered. |
|
Hoste Payments Page Frame Background Color |
This determines the color of the background of this section only. |
|
Footer Options | |
|
Section 5 in Figure 115 The following information displays will customize the bar that runs along the bottom of the webpage. See Color Selector Setup for information on choosing the Text Color and Background Color. Padding is defined above and is the width of this footer section. | |
|
Text Color |
Click the |
|
Background Color |
Click the |
|
|
The number entered determines how tall the footer section is for the message. |
|
|
When checked the information in this section is centered on the bar. If not checked, it will have a left alignment in that section. |
|
(Bottom of tab) | |
|
|
Click at any time to see the customizations set on this tab. It is not necessary to Save before clicking this button. When clicked, a new tab will open on your web browser and show the way the web page looks with the options chosen.
TIP: Click to see changes and keep the webpage side-by-side with the Admin screen. Play with different colors and click this button to see how the selections look on the webpage. |
|
|
Click to restore all the settings to the default settings. |
|
|
This is for the Electronic Merchant Setup record. Click to duplicate the entire record. |
|
|
This is for the Electronic Merchant Setup record. Click to save any changes made to the entire record. |
|
|
This is for the Electronic Merchant Setup record. Click to cancel any changes made to record so they are saved. |