MoversSuite Administration > Accounting and Financial Services > Electronic Merchant Setup > Hosted Payment Page Options tab
Though all providers offer hosted payments page, only Constellation (PYXis) offers the ability to customize their Hosted Payment Page to better suit your company. When Constellation Payments (PYXiS) is chosen as the Electronic Service option on an Electronic Merchant Setup record, this tab becomes available. This tab does not show for other Electronic Service options they do not offer customization of their Hosted Page.
NOTE: All Electronic Service providers offer customization options within Web Page Around Hosted Page (tab). PYXiS customers can use this as well as it provides additional customization opportunities.
Technical Field and Function Information
The following table describes the fields and functions within this setup.
|
Field/Function |
Description |
|
|
For the layout of where information is entered, the Default is a Portrait orientation. Check to change the orientation of the Hosted Page to Landscape. |
|
For the fields that allow customizations, if a customization is not set in a field, the setting resorts to the default setting; therefore, no setting is required as there is a default setting. The options are provided should your company wish to use them. | |
|
Entire Page Text Color |
Click the |
|
Entire Page Font-Family Name(s) |
Customize the font used on the hosted page. It is recommended to use a common font, such as Calibri or Times New Roman. If a font is set that is not common and the page is opened on a device that does not support your chosen font, it may not render properly. |
|
Entire Page Font Size |
Enter to determine the size of the text used on the page. |
|
Title Text |
This is the name that will show on the Main Hosted Payment Page section. This is the section where the credit card information is entered. |
|
Title Text Color |
Click the |
|
Button Text Color |
Click the |
|
Button Background Color |
Click the |
|
Accept Sales Button Text |
Clicking this button immediately accepts the tokenization of the credit card for the charge. The default text on the button is “Charge Credit Card”. This field is customizable. |
|
Cancel Sales Button Text |
Defaults to read: Cancel Payment. This field is customizable. |
|
Accept Card Capture Button Text |
Defaults to read: Capture Credit Card. This field is customizable. |
|
Cancel Card Capture Button Text |
Defaults to read: Cancel Capture. This field is customizable. |
|
|
If unchecked, the buttons will have square corners. If checked, the buttons will have rounded corners. |
|
|
If checked, the Postal code is required. When checked, the Show Billing Address With Postal Code should be unchecked. |
|
|
If checked, the billing address and postal code are asked for on the web page and are required. If not checked, they are not required. |
|
|
This adds the Country of the Billing Address to either the Show Postal Code Only and Show Billing Address With Postal Code options. |
|
Click here to add a new Allowed Credit Card Type Item |
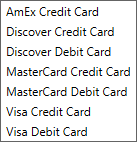
This section determines what type credit cards are accepted by your company. By default, all options within this dropdown are automatically set to as accepted. Currently, the options are:
Should one or more of the options not be accepted by your company, use thjs section to add each of the credit card types that are accepted. Click Click here to add a new Allowed Credit Card Type Item for each of the items accepted by your company. NOTE: It is not necessary to click Add All as all credit card items listed are accepted by default. |
|
|
This is for the Electronic Merchant Setup record. Click to duplicate the entire record. |
|
|
This is for the Electronic Merchant Setup record. Click to save any changes made to the entire record. |
|
|
This is for the Electronic Merchant Setup record. Click to cancel any changes made to record so they are saved. |


 to open the