Use the Reductions screen to define amounts to reduce the total of an allocated item, revenue group, or revenue item to recognize administrative fees, chargeback expense items, escrow, etc. Users have a variety of options to work with when defining a reduction, including the option to define an item reduced by percentage or a flat amount, select a base amount to reduce by, create an add back, etc.
Create reductions through the following:
MoversSuite can be set up to automatically apply reductions at the order level upon Revenue Entry. See Reduction Profile and Reduction Profile Setup for more information on this functionality. Using this Reduction Profile also applies the reductions parameters set within Reduction Templates when manually creating reductions through Add Revenue Group and Add Revenue Item.
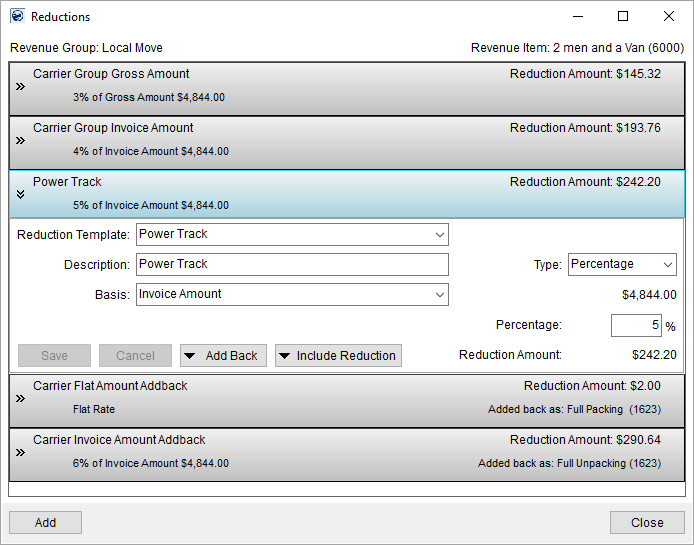
The screen displays each reduction record in a block form which includes the reduction name, amount and the data referenced to calculate the amount. Clicking on a reduction will allow the user to view and edit the details of the reduction.
Figure 29: Reductions screen
Described in the following table are the fields and functions available within the Reductions screen.
|
Field/Function |
Description | |
|
Reduction Template |
Select a template from the list of those defined within Reduction Template Setup to base the reduction on. Data will automatically populate the screen once a user selects a template. | |
|
Description |
Enter a description for the reduction item (up to 128 characters). The description entered here identifies the record in the selection grid. | |
|
Type |
Select a type of Flat Rate to manually enter a Reduction Amount or choose Percentage to base the Reduction Amount on a percentage of a selected Basis.
Figure 30: Type, Basis, and percentage fields
| |
|
Basis |
If the Type is “Percentage,” users can choose from the following to base the percentage reduction on: Non-allocated items have the following basis values available: Gross Amount Base the reduction percentage on the Gross Charges set for the group or item (see Add Revenue Group or Add Revenue Item); this is the total amount prior to discounts, reductions, or allocations. Invoice Amount Base the reduction on the Invoice Amount of the group or item (see Add Revenue Group or Add Revenue Item); this is the amount after discounts and prior to reductions.
Reductions on allocated items will have the following basis values available: Allocated Amount Base the reduction on the Allocated Amount set for the allocation; this amount is the Invoice Amount less the percentage amount allocated for the group. Group Gross Amount Base the reduction on the allocated percentage of the Gross Charges of the group. The following calculation is used:
[(Gross Charges X Allocation Percentage) X Reduction Percentage] Values based on: Gross Charges from Add Revenue Group Allocation Percentage from Add Allocation Item Reduction Percentage from this screen (see “%” field)
Group Invoice Amount Base the reduction on the allocated percentage of the Invoice Amount of the group. The following calculation is used:
[(Invoice Amount X Allocation Percentage) X Reduction Percentage] Values based on: Invoice Amount from Add Revenue Group Allocation Percentage from Add Allocation Item Reduction Percentage from this screen (see “%” field)
The amount pulled as the basis will appear adjacent to this field. Further, the computation of the basis will display as an English description in the selector bar, e.g. “1% of Invoice Amount ($5,000).” | |
|
% |
Enter the percentage (0 to 100 in decimal NNNNNNN.NNN format) of the selected Basis to compute the Reduction Amount. If the Type is Percentage, the application will compute the dollar amount of the reduction on the % of the selected Basis value. | |
|
Reduction Amount |
If the Type is Flat Rate, then the user can enter or update the gross dollar amount of the reduction. | |
|
Add Back as Item Code | ||
|
Item |
Select an Item Code from the list to apply the reduction as an add back item. An add back will be added as a separate revenue transaction for items such as credit card expense and national account escrow.
Note: Van line credit card expenses are not considered an add back item.
See Item Code Setup for information on defining Item Codes. | |
|
Branch |
If an Item is selected, the user will need to select a branch value from the list of these defined within Branch Setup to apply the add back towards for items such as company overhead expenses. By default, the branch of the transaction will display. | |
|
AR Branch |
Set the branch that will record the AR under for the reduction. By default, this is set to the branch of the transaction.
Note: AR Branch and AR Division are available if applicable functionality is enabled. Refer to the Revenue Entry AR Branch module in Security Modules for more information.
| |
|
AR Division |
If Divisions is enabled, this field will be available to set the appropriate division of the transaction (from values defined within Division Setup).
| |
|
|
Save (Alt+S) This option will submit changes made to an existing record or add a new record to the database. | |
|
|
Cancel (Alt+C) Reverts all changes made to an existing record or discards a pending, new record. | |
|
|
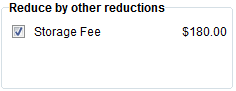
Include Reduction (Alt+R) Open the Reduce by other reductions section where a user can select existing reductions to reduce this item by.
Figure 31: Reduce by other reductions example When Include Reduction is in effect, the Reduce by other reductions section will list the other reductions belonging to the group or item than can further reduce the open reduction by. | |
|
|
Add back (Alt+B) Opens the Add Back as Item Code section allowing a user to set the Item Code and Branch and AR Branch for the add-back.
Figure 32: Add Back as Item Code section
| |
|
|
| |
|
|
Add (Ctrl+A) This option creates a new Reductions record by blanking out the data entry fields and creating a new line item to the data grid. | |
|
|
| |
|
Right-Click Options |
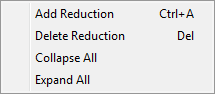
Right-Click Options The following options are available through right-click options in the Reductions screen:
Figure 33: Right-click options in Reductions
Add Reduction (Ctrl+A) This option opens a new reduction item within this screen. Delete Reduction (Delete) This option removes the selected reduction after prompting the user to confirm the request. Collapse All Close the display for all individual reduction records with this option. Expand All Open the display to view all reduction records with this option.
| |
RELATED TOPICS: