The Add Local Service screen defines a local service request based on a selected service, service date, and required logistical data. It provides a user the ability to calculate and implement a degree of difficulty to apply to the service and to set the estimated crew and hours per man values.
Access to this screen is through the Add Service button in Local Services and through the Dispatch Center.
Figure 64: Add Service button on Local Services tab
When the Add Service button is clicked, the Select a Branch screen is prompted. Enter the branch and click OK. This prompts the Add Local Service.

Figure 65: Add Local Service screen
If a Day Note exists for any Service Date associated to the service, then the application displays the note within a separate Day Note pane.
You can import the details of one or more services or plans directly into a Quote record through the Create and Insert menus. Refer to the Import from Local Services and Quote topics for more information.
Technical Field and Function Information
Described in the table below are the fields and functions of the Add Local Service screen.
|
Description | |
|
Operational Plan |
Create a plan or choose an existing plan associated to the order to assign the service to a particular Operational Plan.
New Choose New and type in the plan name you wish this service to be a part of. You can enter a name for the plan up to 64 characters.
Existing Choose Existing to select from a list of plans already associated to the order.
Refer to the Operational Plan topic for more information. |
|
Service |
Select a service from the list of available types as defined within Local Service Type Setup. This setting determines many variables for the service such as anticipated units and units per hour for rating and costing calculation, the default labor type of the service, branch of service, and more.
Origin/Destination For the selected service, assign the service to the origin or the destination address. Only services with the same origin or destination setting for the same service date under a particular order can combined on the same Work Ticket.
|
|
Unit/Quantity |
Once you select a Service, a label and quantity field appear based on the Units associated to the Local Service Type Setup. The application retrieves the quantity, if set on the order (only available for Weight and Carton types), and populates the field adjacent to the label. For example, if the service calculates based on unit of Weight, then the label displays “Weight (lbs)” and the weight of the order is pulled into the quantity field. You can update the quantity retrieved or set it depending on your needs. The information is used to calculate the anticipated crew and hours anticipated to needed for service, which is utilized in dispatching, rating, and in job costing functions. You can manually update the quantity. Pressing Tab allows you to save the setting without closing the screen. The application recalculates the needed Crew, Hrs/Man fields along with the computed Total Hours Required. The application retrieves quantities set for the order for the following two unit types: Cartons If the service is measured on the number of cartons handled, then the field is labeled “Cartons” and the application references the order quantities set or updated through the Containers, Packing and Unpacking (CPU) screen (available by pressing on the adjacent CPU button).
Weight (lbs) For weighted services, the field label reads “Weight (lbs)” and the field value defaults to what is set for the Estimated Weight in the Move Information tab. If the Estimated Weight is not available, the application checks the Hauled Weight field and references its value for the weight of the service.
The weight and carton counts can affect rates and dispatching. Refer to Job Costing, Local Dispatch, Import Actuals, and to Rating Systems for more information. |
|
|
CPU Open the Containers, Packing and Unpacking (CPU) dialog to add/modify the estimated counts utilized for this service. This setting affects the Crew, Hrs/Man fields along with the computed Total Hours Required. Refer to the Units/Quantity information (above) for details. Estimated counts are visible within Local Dispatch where dispatchers assign actual counts; these actual counts can import as revenue in Revenue Entry. This setting is referenced by Capacity Planning and Job Costing. |
|
| |
|
|
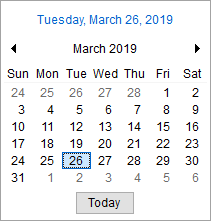
Service Date Select or enter a single date for a single service request by entering the date in this field or using the drop-down Calendar Control.
If you wish to generate a series or recurrence of services, then utilize the Options feature to update the Service Date Option.
Service Dates are referenced by Capacity Planning and Job Costing. |
|
|
Options (Alt+O) Utilize Service Date Option to create a series of services based on a date range or by selected dates. Also, if the service date is not yet known, you can indicate such through Service Date Option. |
|
|
Is Placeholder Checkmark this flag to prevent users from initiating a Local Service until all jobs are finalized. This flag allows you to plan services out without committing to them until they are approved by the customer. This flag is also available through the Edit Local Service screens. With this flag checked, you are not allowed to generate a Work Ticket. Once all the jobs are finalized, the Work Ticket can be generated by manually unchecking the flag. |
|
Service Time |
Provide a requested time range for the services generated. This information is included in the data available within Local Dispatch and provides a default time when a dispatcher enters crew and equipment times through the Set Service Time function. Data grids within Dispatch Center, Local Services, and Requested Services display the values set for this field as Requested Time Range.
Next Day Service If the service times cross the midnight boundary, i.e. runs into the next day, then the application displays Ends Next Day next to the time fields.
Service Times are referenced by Capacity Planning and Job Costing. |
|
Exclude Weekends |
When scheduling services over a date spread that includes weekends, you can check this option to instruct the application to not create services for Saturday or Sunday. This is the default setting. Optionally, you can uncheck this flag and the application will create services that include the weekend (based on crew availability and hours defined within the Dispatch tab in Personnel Setup). |
|
Branch |
This is the branch of your company that performs the service. The branch selected here affects dispatching and revenue. The Branch selector provides the name and identification number (as assigned through Branch Setup). The branch defaults to what was selected (through Select a Branch) when the service was defined. |
|
Difficulty Factor |
Displays the total factor applied to the service. A default difficulty of 1 indicates no additional difficulty applies. 1.25 indicates a 25% increase in difficulty applies to the service, etc. This setting directly affects the crew and man hours of the service. This value computes automatically based on the service and can be manually set through the Calculate option (Calculate Difficulty Factor). The total Difficulty Factor displays within the main Local Services grid and the details list within the Local Service Quick View. |
|
|
Calculate (Alt+U) Opens Calculate Difficulty Factor screen to manually compute and apply a factor used to increase the amount of time needed to perform the service based up the difficulties involved. See Difficulty Factor Setup for more information. |
|
Hours Drive One Way |
Enter the amount of time (in hours) anticipated for the
crew to get to the scheduled service location. Use the arrows keys ( The amount entered here is added twice to the hours per man value (Hrs/Man) to compute the Total Hours Required, taking into consideration the drive time to and from the service. This field defaults to what is set for the branch of the order, as administrated through the Local Service Default Drive Time setting within Branch Setup. If no default is specified for the branch, then the system default of “0.25” (or 15 minutes) applies. |
|
Crew and Hours Calculations The crew and hours required information assists dispatching to allocate resources correctly when making crew and equipment assignments within Local Dispatch. The application automatically computes the crew and time needed for the anticipated services. The calculation is based on the selected Service. Once the Service is set along with the corresponding quantity, such as weight of the order, the application utilizes information from the Difficulty Factor and Hours Drive One Way to calculate the Crew, Hrs/Man, and Total Hours Required. Changes made to any of these settings cause the application to recalculate. Additionally, you can manually update these settings which also triggers a recalculation. Setup areas related to these calculations are found within the following:
| |
|
Crew |
This is the anticipated number of crew needed to perform the service. The number calculated is based on preset assignments for the selected Service. You can manually set a different amount, however changes made to other settings within this screen may instruct the application to recalculate the crew. A minimum number of crew assigned is managed through the Local Service Unit Type Setup. |
|
Hrs/Man |
Displays the calculated number of hours needed per crew member to perform the scheduled task. A minimum number of crew assigned along with the number of units needed before additional crew is assigned is managed through the Local Service Unit Type Setup. This setting is referenced by Capacity Planning. |
|
|
Reset Crew and Hrs/Man Clicking the calculator button resets the Crew and Hrs/Man settings back to the original estimate values computed by the application. |
|
Total Hours Required |
Displays the total computed hours needed to complete this service for the give day. |
|
|
Labor Request Provide dispatching the information they may need on the number of people by their role that a particular service may need. Pressing this button opens the Labor Request dialog from which you can provide the anticipated number of personnel for a service. This setting is referenced by Capacity Planning and Job Costing. |
|
|
Equipment Request Provide dispatching the information they may need on the number and type of equipment/supplies that a particular service may need. Pressing this button opens the Equipment Request dialog from which you can provide the anticipated items needed for a service. This setting is referenced by Capacity Planning and Job Costing. |
|
|
Extra Stops Link this service to one or more Extra Stops on the order by accessing the Select Extra Stops screen through this button. Only stops that associate to a service display on the Work Ticket Report. You can remove a stop from as service if the service has a status of Void or Cancelled. Remove the stop through Delete feature within the Extra Stops tab. Extra Stops is available for non-Office & Industrial orders. The stops added through the Extra Stops option are listed on the report based on their assigned Stop Number with Pickup items followed by Delivery items. Here’s how the Extra Stops sections would display:
However, the display order can be customized through the Extra Stops option. |
|
Service Instructions |
Provide information specific to this service (up to 1024 characters). This information is available to dispatchers and prints on the Work Ticket Report.
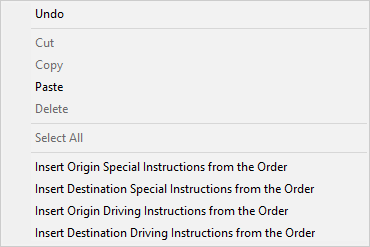
Right-Click Options Available through a right-click menu are the following functions.
Figure 67: Service Instructions right-click options
Undo Reverses the last text entry made. If you make multiple changes to the text, this function reverses only the last change made.
Cut Removes selected text.
Copy Places the selected text in temporary memory where it can be into a different location, such as in a different location within the Service Instructions or within a note, etc.
Paste Places text that may exist in temporary memory into the body of the message at the location of the cursor.
Delete Removes all selected text.
Select All Selects, or highlights, all text within the body of the Service Instructions.
Insert Origin Special Instructions from the Order Pulls in the text set for the order through the Special Instructions section set for the Origin location on the Move Information tab. The function attempts to place the text in the location of the cursor and up to the maximum number of characters allowed (1024).
Insert Destination Special Instructions from the Order Pulls in the text set for the order through the Special Instructions section set for the Destination location on the Move Information tab. The function attempts to place the text in the location of the cursor and up to the maximum number of characters allowed (1024).
Insert Origin Driving Instructions from the Order Pulls in the text set for the order through the Directions section set for the Origin location on the Move Information tab. The function attempts to place the text in the location of the cursor and up to the maximum number of characters allowed (1024).
Insert Destination Driving Instructions from the Order Pulls in the text set for the order through the Directions section set for the Destination location on the Move Information tab. The function attempts to place the text in the location of the cursor and up to the maximum number of characters allowed (1024).
|
|
|
Add Address This function opens the Add Extra Stop dialog, where you can define a new extra stop for the order and, optionally, select it as one of the addresses associated to this service (Origin Address, Destination Address). Add Address is available for non-Office & Industrial orders. |
|
Origin Location |
Link this service to a starting location available to the Office & Industrial order. Use the Additional Locations to specify locations in addition to this starting location on the order. The location prints on the Work Ticket Report and Work Ticket (O&I) Report. See Add Local Service (Office & Industrial). |
|
Destination Location |
Link this service to an ending location available to the Office & Industrial order. Use the Additional Locations to specify locations in addition to this ending location on the order. The location prints on the Work Ticket Report and Work Ticket (O&I) Report. See Add Local Service (Office & Industrial). |
|
|
Add Location Available for Office & Industrial orders, the Add Location function opens the Add/Edit Order Location dialog, where you can define a new location for the order available to the Origin Location and Destination Location settings as we well as being available through the Contacts and Locations tab and the Select Locations screen. |
|
|
Save (Alt+S) Saves the changes made and closes the screen. |
|
|
Cancel (Alt+C) Discards any changes made or a newly created record and closes the screen. |
|
Day Note |
Day Note If a Day Note exists for any Service Date associated to the service, then the application displays the note within a separate Day Note pane. |


 ) to increase or decrease the time in
15 minute (.25) increments.
) to increase or decrease the time in
15 minute (.25) increments.