Introduction
The process of running checks for people receiving commissions should be done quickly, as errors can occur in statements, if not. Movers Suite and Great Plains applications are used to process the final check to the person receiving the commissions.
Depending on how the person is paid (live check, ACH/Wire/CommData, or sent to payroll), will determine the checkbook used later in this document.
IMPORTANT!!!!! Once a check/invoice (real
or clearing) has been issued in Great Plains and the Statement has been
Finalized in Movers Suite, DO NOT void the check/invoice. It will not show
on the statement correctly and the balance forwards will not adjust. Please see
the document on handling commission statement voids/adjustments.
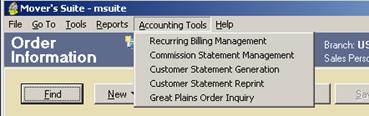
To start the process, login to MoversSuite and click on Accounting Tools > Commissions Statement Management
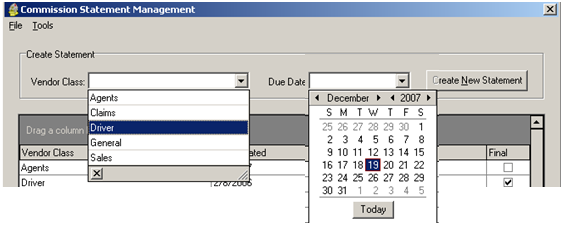
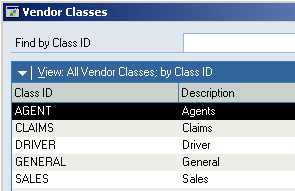
Select the vendor class from the dropdown. Examples are listed below, but may be different for different company setups. Also select the Due Date from the Calendar dropdown. Click on Create New Statement.
View Reports window will open. To view each person click on the name on the left and highlight. Their statement will show on the right in detail.
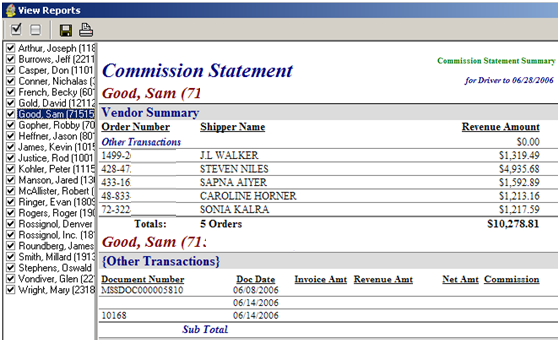
Click on the green “Commission Statement Summary” (upper right hand corner of the report), it will take you to a summary of the commissioned people.
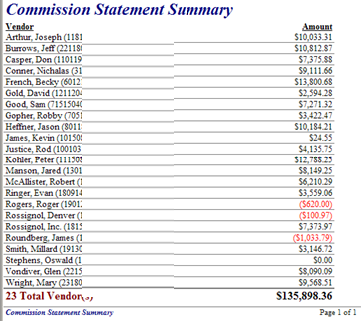
This is the summary to use when comparing payment numbers in Great Plains.
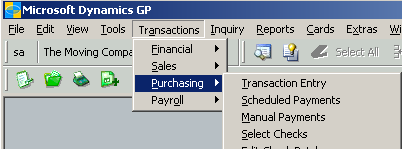
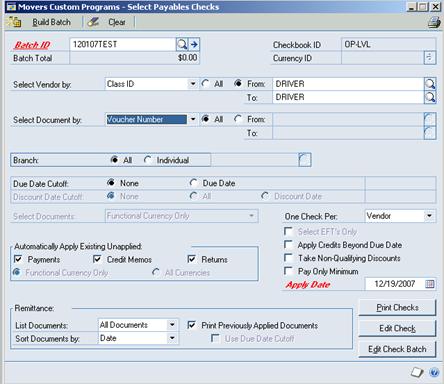
In Great Plains go to Transactions> Purchasing> Select Checks and the window will open.
Type in your Batch ID. Use the 6 digit date, with user initial format.
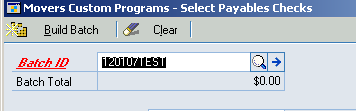
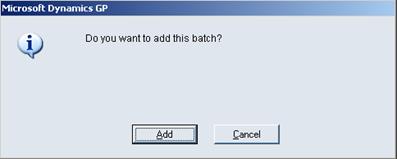
A window prompting to add this batch will open. Click Add.
Here is where the checkbook that will be used for the check run is entered. Be sure to follow the practice of the company. Type in or look up with the magnifying glass. Click Save.
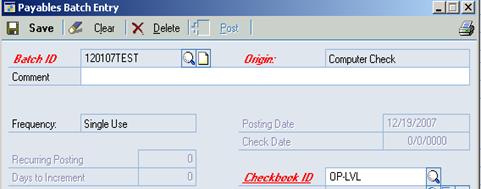
A “real” check is normally generated from the operating checkbook. For checks that are more for clearing the commissionable persons account, use the clearing or dummy checkbooks.
Move to the Select Vendor by dropdown box. Select Class ID.
Click the radio button next to From. Use the look up and select the class id for the commissionable people. Make this the To: also.
Enter the Due Date for cutoff to match the Commission Statement Date.
The Select checks screen should look something similar to this one.
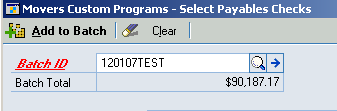
Click on the Build Batch button, upper top left
corner. Then wait!!!!! Until the amount shows in the Batch Total
field, the process has not completed. If the process is not complete and
other buttons are clicked, the batch can build in error and accidently pull all
checks.
When the amount is in the field, click on the printer icon in the top Right corner for review.
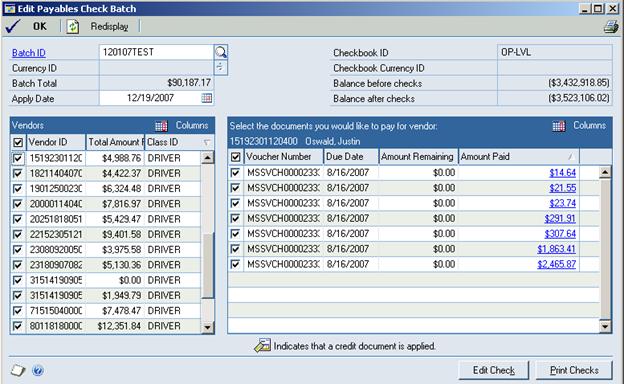
If any changes need to be made, click on the Edit Check Batch button.
In the Edit Check Batch window, the vendors and the invoices associated to the check can be edited for payment. This should not need to be done for most of the commissionable people, this is done more on regular vendors. Use the check boxes next to the Vendor ID to add/remove a vendro entirely. Use the check boxes next to the voucher number to remove the individual invoices.
From either the Select Checks window, or the Edit Checks Window, checks can be printed. Click the print checks button.
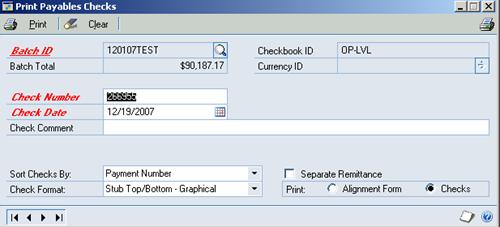
Input the check number, if it should be different then displayed. If checks were ran on a clearing account checkbook, then let the number default into the field.
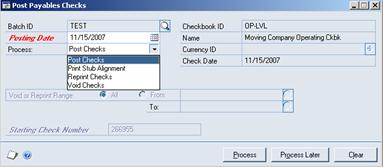
Click Print. The Post Payables Checks window will open. In the dropdown there are four options. Post, Print Stub Alignment, Reprint and Void. If the check printed correctly, or ran without errors, select the Post Checks. Click on Process. The checks will Post and you can select to pritn to screen or print out the Posting report.
For the other options and more details on the Select Checks Process, please review the Select Checks Document.
Commission Checks are now done in Great Plains. To finish the checks, the Commmission Statements will need to be finalized in Movers Suite.
Go back into Movers Suite and the Commission Statement Management. Find the statement that checks were just printed for. Highlight the Statement and click on Finalize.

When the Statement is is Finalized, there will be a checkmark in the box on the right of the date and the Finalze button will be greyed out. Commissions are done.
