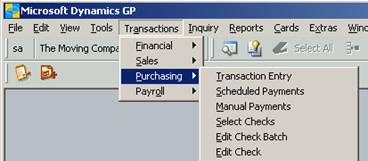
To enter a payables transaction, go to:
Transactions> Purchasing> Transaction Entry
The Payables Transaction Entry Form will open.

The Voucher number will be assigned through Dynamics GP.
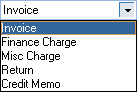
The entry will start with the Document Type. Select from the dropdown. Only Invoice and Credit Memo are used. Click Tab to move.
Fill in the Description. Tab.
Lookup/Enter the MSS Order Number, if it applies. To Lookup, click on the magnifying glass. Tab.
Enter the Branch Code. This is required. Type in or Lookup. Tab.
Enter the Batch ID.
Batch ID’s must be entered. There is no Transaction Posting, only Batch Posting.
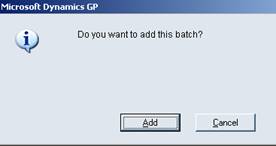
If this is the first transaction entry for the batch, a window will open with “Do you want to add this batch?” Click Add.
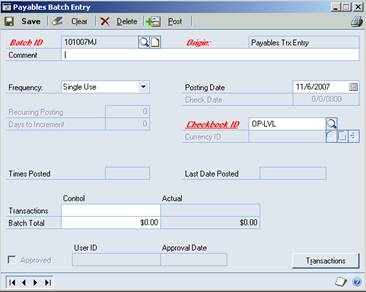
Enter a comment.
Select the Checkbook ID.
Click Save.
Tab off of the Batch ID field.

Enter the Doc. Date. This will be the date of the invoice, or the date due, depending on how Payablesare handled in the organization. This will be considered the Date for the calculation of the payment terms for Dynamics GP. Tab.
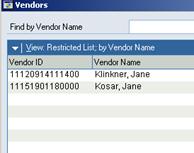
Enter the Vendor ID. Lookup can be used on this field. Click on the magnifying glass. Once in the window, place the mouse over the Vendor Name and click on it. This changes the search criteria to Name. Tab.
The Vendor name, Address ID, Remit-To ID and Payment terms will default in from the Vendor Card. Tab through to the Document Number.
Enter the Document Number. (Required field) This can be the invoice number, reference number, etc. Tab.
Enter the P.O. Number if it is available. Tab.
Tab through Shipping Method and Tax Schedule ID.
Enter the amount in Purchases field. Tab.
Click the Distributions Button.
The Purchasing (Accounts Payable) account will default in on the PURCH line. You will enter thePayables Expense account on the PAY line.
Click OK.
Click Save.
Parts of the Payables Transaction Entry Form
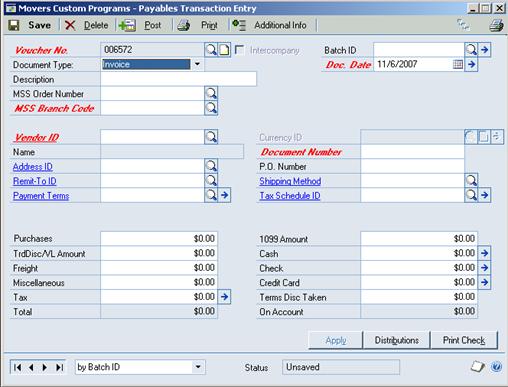
Voucher Number – (Required field) Automatically assigned by Dynamics GP
Document Type – Dropdown with 5 options (Invoice, Finance Charge, Misc Charge, Return, Credit Memo)
Description – Complete as needed
MSS Order Number - If it applies to a Vendor
MSS Branch – (Required field) Enter the Branch Code ID or use the magnifying glass to look-up
Vendor ID - (Required field) Enter the Vendor ID or use the magnifying glass to look-up
Batch ID – (Required field) Enter the Batch ID
If this is the first transaction in a batch, you will be prompted for more information.
The format is 6 digit date with the initials of the user. E.g 101007MJ
This makes it easier to search for reports later with Batch ID’s being date.
Document Number – (Required field) This is the number of the Payables invoice.
Purchases – The Invoice Amount
Note : If the Credit Memo was selected in the dropdown, this field changes to Credit Memo.
Apply Button – Use this if there is already a payment made in the system and you want to apply the
invoice to it. DON’T EVER APPLY ON DRIVERS OR SALESPEOPLE!!
Distributions Button – Use this to select the Payables account and the expense account the invoice/credit memo is to be charged to.
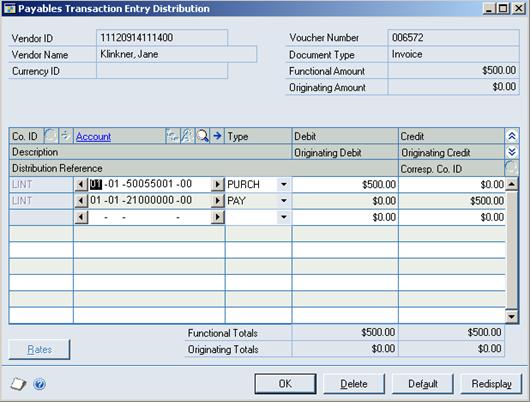
Payables Transaction Entry Distribution
PAY line will default in by the Branch selected. This account number is tied to the branch and company the branch is part of.
PURCH line is where the Payables Expense account is entered. The account can be entered directly, or use the magnifying glass to lookup.
The item circled in red is the Show Details buttons. If clicked, it will expand to show the name of the account and other details.