Navigation Menu > Communications > Send Email
To send an email from MSWeb that relates to the order on the screen, click “Send Email” from the Navigation Menu > Communications.
Figure 154: Send Email
Clicking “Send Email” opens the Send Email screen and auto-populates the Order Number and Customer Name list at the top of the screen as reference. The Order Number on the screen also populates the Subject line.

Figure 155: Send Email screen
The contacts that list when clicking the To, Cc, or Bcc buttons are the contacts established on the order through Customer Contact (found within MSWeb Order Story and MSWeb Move Information) and some from Order Personnel. Use a scroll bar on the right to view additional contacts in the list in that section. Click on one or more contacts and, when clicked, the contact turns blue to indicate it is selected. In Figure 156, “Graham Levy” and “Joe S Shipper” have been selected and highlighted in blue.

Figure 156: Add Email Recipients screen > Order related email address listing
Find additional contacts by clicking the anywhere on the sentence “Select addresses from the following list of contacts within your organization” (as shown in the Figure 157.) Clicking Add adds the email address to the email.

Figure 157: Add Email Recipients from company listing
To manually add an email address to the email, type in the
email address and click enter. No need to enter commas or semicolons between
email addresses. Click the delete icon  next to a name to remove that name
from the list.
next to a name to remove that name
from the list.
Enter, edit, or modify text within the text box. Use the edit options to customize the body of the email, if you like. A table with the detail of all the options is located at the end of this topic.
To add an attachment to the email, use the Add Attachment
icon  below the
text box. You may have to scroll to locate that icon. See MSWeb Add Attachment for details on this
feature.
below the
text box. You may have to scroll to locate that icon. See MSWeb Add Attachment for details on this
feature.
Should you wish to add a signature, use the Add Signature
icon  below the
text box. You may have to scroll to locate that icon. See MSWeb Add Signature for details on this
feature.
below the
text box. You may have to scroll to locate that icon. See MSWeb Add Signature for details on this
feature.
If you wish to use a template, use the Add Template icon  below the text box.
You may have to scroll to locate that icon. See MSWeb Add Template for details on this
feature.
below the text box.
You may have to scroll to locate that icon. See MSWeb Add Template for details on this
feature.
Click Send to send the email.
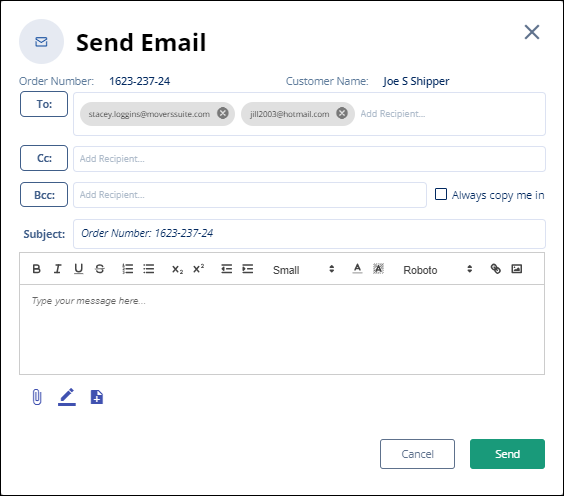
Figure 158: Attachments, Signature, and Template icons are below email message body text box.
Icon Bar Explanation Technical Table:
|
Send Email Options | ||
|
FIELD |
ICON |
Description |
|
Bold |
|
|
|
Italic |
|
|
|
Underline |
|
|
|
Strikethrough |
|
|
|
Numbering |
|
Click this icon to start numbering line items. |
|
Bullet |
|
Click this icon to start adding a bullet to line items. |
|
Subscript |
|
An example is H20. |
|
Superscript |
|
An example is 10010 |
|
Indent Left |
|
|
|
Indent Right |
|
|
|
Font Size Selector |
|
Click anywhere within this field to open the Font Size menu. Scroll through the list and click the font to be used. |
|
Font Color |
|
The default font color is black. Highlight character(s) and click on the icon to choose a color to apply to the highlighted characters. |
|
Field Color |
|
The default field color is white. Highlight an area and click on the icon to choose a color to apply to that area. |
|
Font Selector |
|
Click anywhere within this field to open the Font Selector menu. Scroll through the list and click the font to be used. Or, highlight characters and then click on the selector to choose and apply a different font. |
|
Insert Link |
|
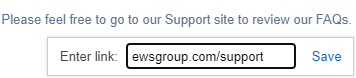
This icon allows you to apply a URL to text. In the example below, the words Support Site are highlighted and then this icon is clicked.
Then, another box opens where you insert the URL that is to be linked to the highlighted copy. It can be different from the highlighted words.
Click Save. The link will look like this for this example:
|
|
Insert Picture |
|
Click this icon to open your file directory. Click on the picture that is to be inserted into the body of the email. Use this icon to insert a picture, such as your company logo, into your signature when creating a signature. See MSWeb Add Signature for details. |