Please watch the video MSWeb Local Services that relates to this topic. Click the video name to open the video. This video, along with other MSWeb videos, are located within the Training Center.
MSWeb > Order Information > Local Services
|
|
Please watch the video MSWeb Local Services that relates to this topic. Click the video name to open the video. This video, along with other MSWeb videos, are located within the Training Center. |
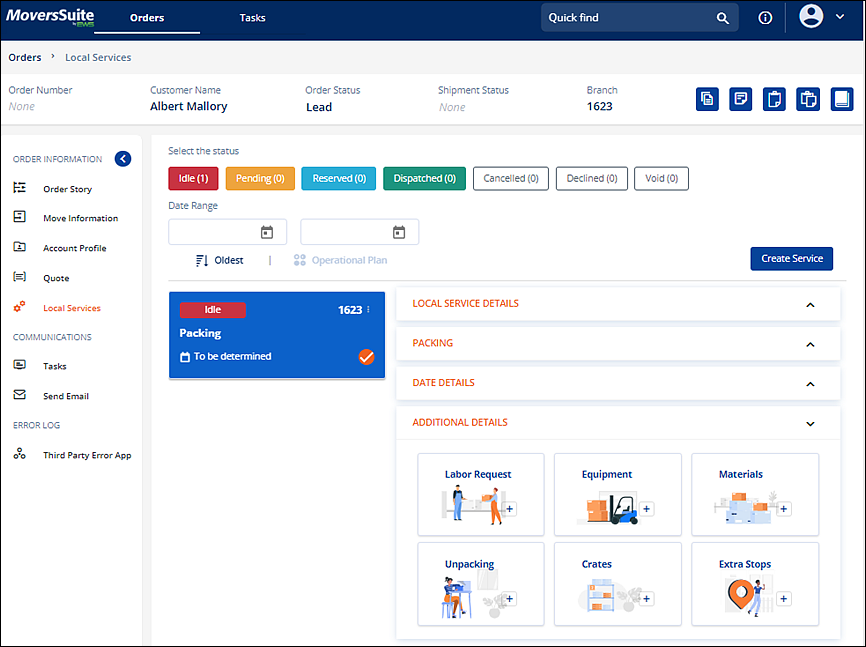
From Order Information > Navigation Bar, choose Local Services. The Local Service page, shown in Figure 89, features:
•A Status selector to filter the services. Select one or more to list the services that meet those criteria. In Figure 89, Idle, Pending, Reserved, and Dispatch are selected. Cancelled, Declined and Void are not – apparent as they are white. Unselect any filter, as needed, as well.
•Use the blue Create Service button to add a new service to the transaction. See MSWeb Add Local Service for details.
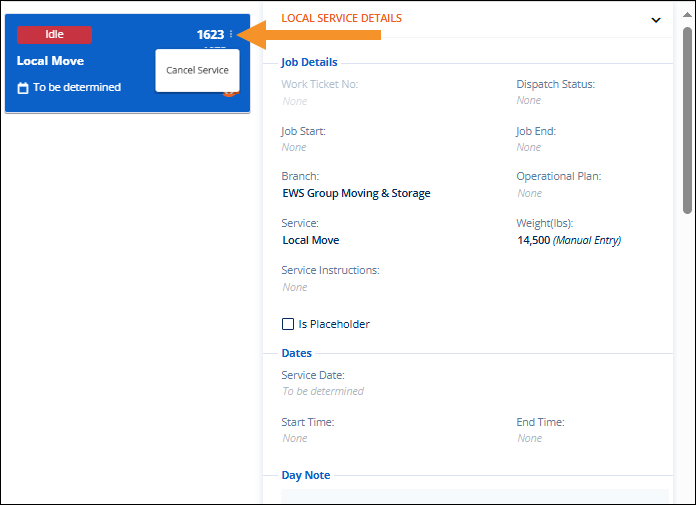
•The services that have been added list on cards, with their status indicator. Figure 89 shows a blue card named “Packing”, which shows the red status indicator of Idle. To see the service, click on the card for service you wish to view and expand the Local Service Details section to view the details (Figure 90). To cancel a service, click the three dots in the corner of the service card, also indicated in Figure 90, to prompt the Cancel Service option. Click that option to cancel. Or click outside the box to cancel. To view another service, if applicable, click on that card then view those details under Local Service Details.
•Any Date Details and Additional Details (added through the Additional Detail section and tiles) list in their own sections under the active card’s Local Service Details.
•The Additional Details section, where service tiles are located, is at the bottom of the screen. Click on a tile to quickly add any of those options to the active card’s service. See MSWeb Additional Details for information.

Figure 89: Local Services screen

Figure 90: The three dots that are clicked to prompt the Cancel Service option. Also note that this is the expanded view of Local Service Details.