
Please watch the video MSWeb Local Services that relates to this topic. Click the video name to open the video. This video, along with other MSWeb videos, are located within the Training Center.
MSWeb > Order Information > Local Service
|
|
Please watch the video MSWeb Local Services that relates to this topic. Click the video name to open the video. This video, along with other MSWeb videos, are located within the Training Center. |
To add a local service to a transaction, go to the order using the MSWeb Quick Find or MSWeb Orders List.
If this is the first service for an order, from Navigation Menu > Order Information > Local Service, then the screen will look like Figure 91. Click the blue New Local Service button, which opens the Local Service Details page, where the service will be created.
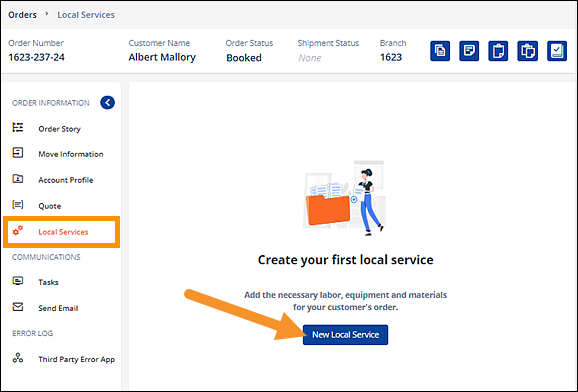
Figure 91: Local Service icon and New Local Service button shown
If your order already has service(s), from the orders’ Navigation Menu > Order Information > Local Services, click the blue Create Service button. Just like when clicking the “New Local Service” button, the “Create Service” button opens the Local Service Details screen.
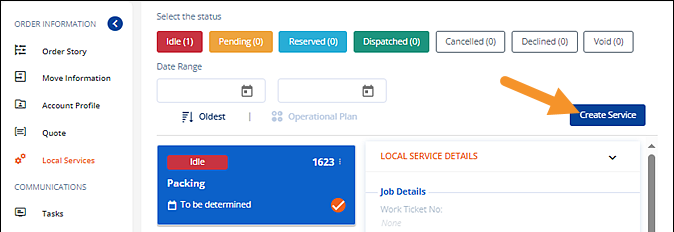
Figure 92: Add additional services by clicking the Create Service button.
Use the LOCAL SERVICE DETAILS screen (Figure 93) to add a local service added to a transaction. From LOCAL SERVICE DETAILS < Job Details section, select a Branch. All fields are inactive until Branch is set. Once the Branch is set, then the Operational Plan and Service fields become active. Enter an Operational Plan, if needed, and then enter a Service. Of those two fields, note that only Service is required, as indicated by the red asterisk. Selecting Service causes the page to become enabled with the appropriate fields for the service selected.
Tip: If Is Placeholder is checked, no work ticket can be associated with the service until it is removed.
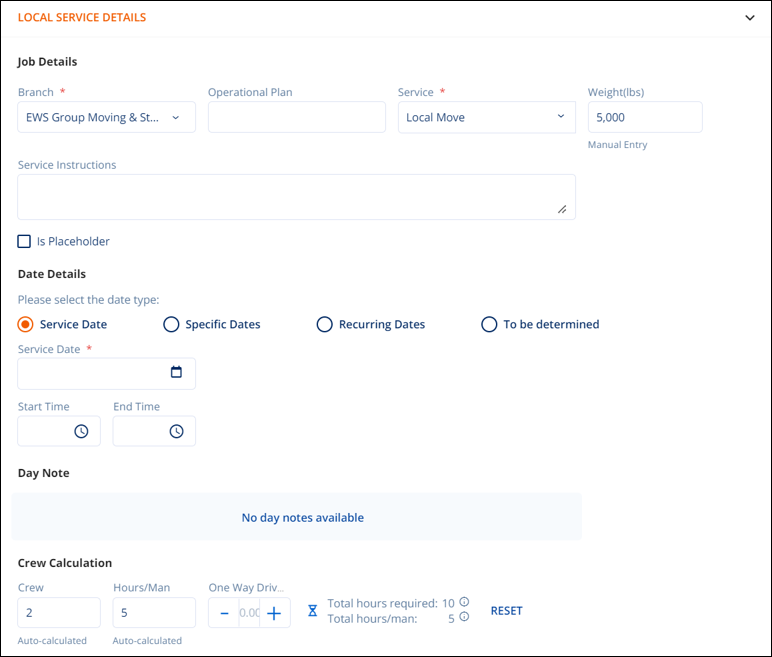
Figure 93: Local Service Details screen
Within the Date Details section, choose a date type option, and the options include Service Date, Specific Dates to choose more than one date, Recurring Dates which allows a date range and repeat schedule, or To be determined. The Service Date is a mandatory field for all date type options, except To be Determined.
Start Time and End Time can be defined. If times are entered, Crew Calculations will determine the number of Crew and Hours/Man per the service for that time frame. Set from Service Time will be noted under those fields. See these details within Figure 94.
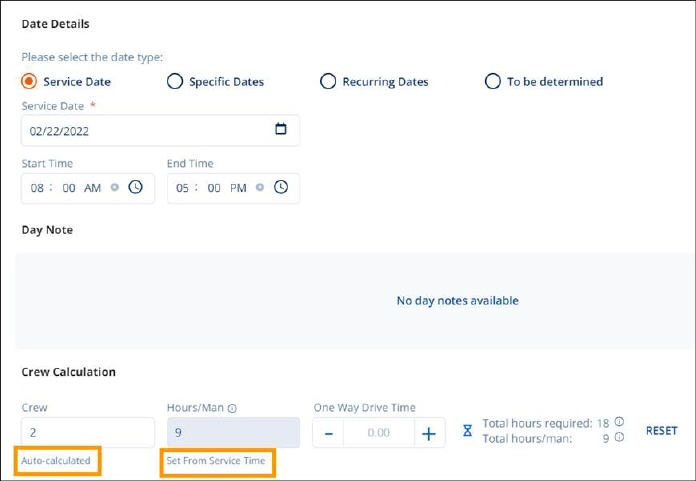
Figure 94: Crew Calculations
If no Start Time and End Time are entered, Crew Calculation will auto-calculate according to the service, weight, and other parameters set for the Service. In Figure 95, weight is set at 5,000 lbs. Notice under Crew and Hours/Man there is a tag stating “Auto calculated.”
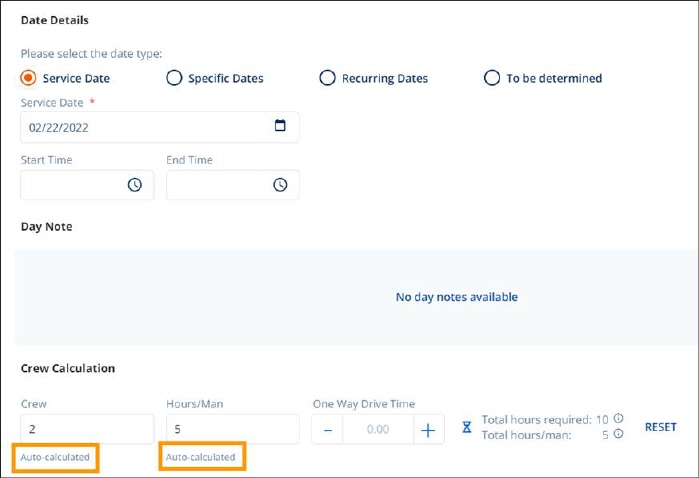
Figure 95: Auto-calculated Crew Times
It is possible to override auto-calculations and manually enter Crew and Hours/Man fields. To do so, remove a Start Time and/or End Time and then you can modify the Hours/Man. Remove a time by clicking the x icon in the Start Time or End Time fields. Note in Figure 96 that the Start Time and the End Times both have not been entered. This enables the ability to manually change both the Crew and Hours/Man. The quantity entered for Crew and Hours/ Man was manually entered. Manual Entry is shown beneath the fields.
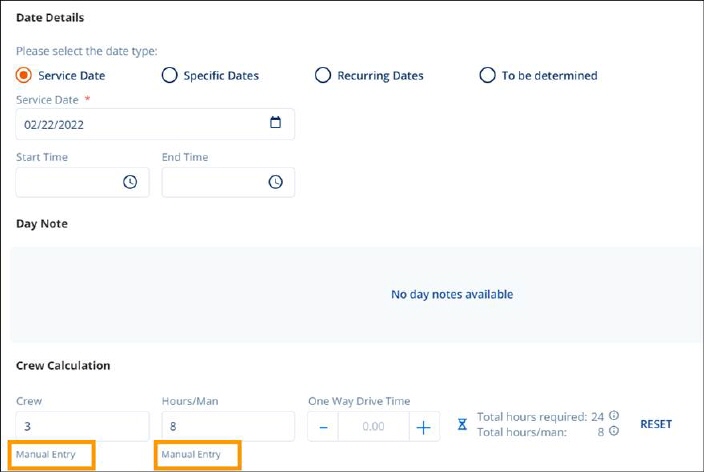
Figure 96: Manual Entry indicated for Crew Times
Day Notes, if entered by a dispatcher, will show under Day Notes.
Regarding the Additional Details section and tiles at the bottom of the screen, this section becomes active once a Service is set (at the beginning of these instructions). Any Additional Details tiles used will add that service option to that particular service. Continue entering services using the Additional Details tiles as required.
NOTE: Additional Details do not have to be added at this time. Once the service is saved, it creates a card that lists under Local Services. To add these options later, simple go to that service card, click on that card to open its details. Add any Additional Details to that service.
When all fields or information you wish to enter at this point are entered, click Save. If you try to navigate elsewhere before clicking save, this warning will appear. Choose Yes, discard if you decide not to keep the information entered and continue navigating elsewhere in MSWeb. Choose No, go back if you do want to keep the information and then click Save.
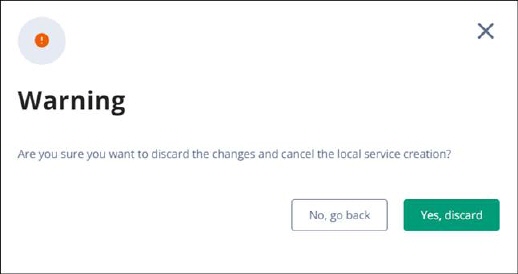
Figure 97: Warning to save or cancel changes
Scroll to the bottom of the screen and click Save.
When the service is saved, the service will appear on a card in the Local Services > Service Timeline, as shown below. The Status of Idle will remain until Dispatch chooses to accept or cancel the service.
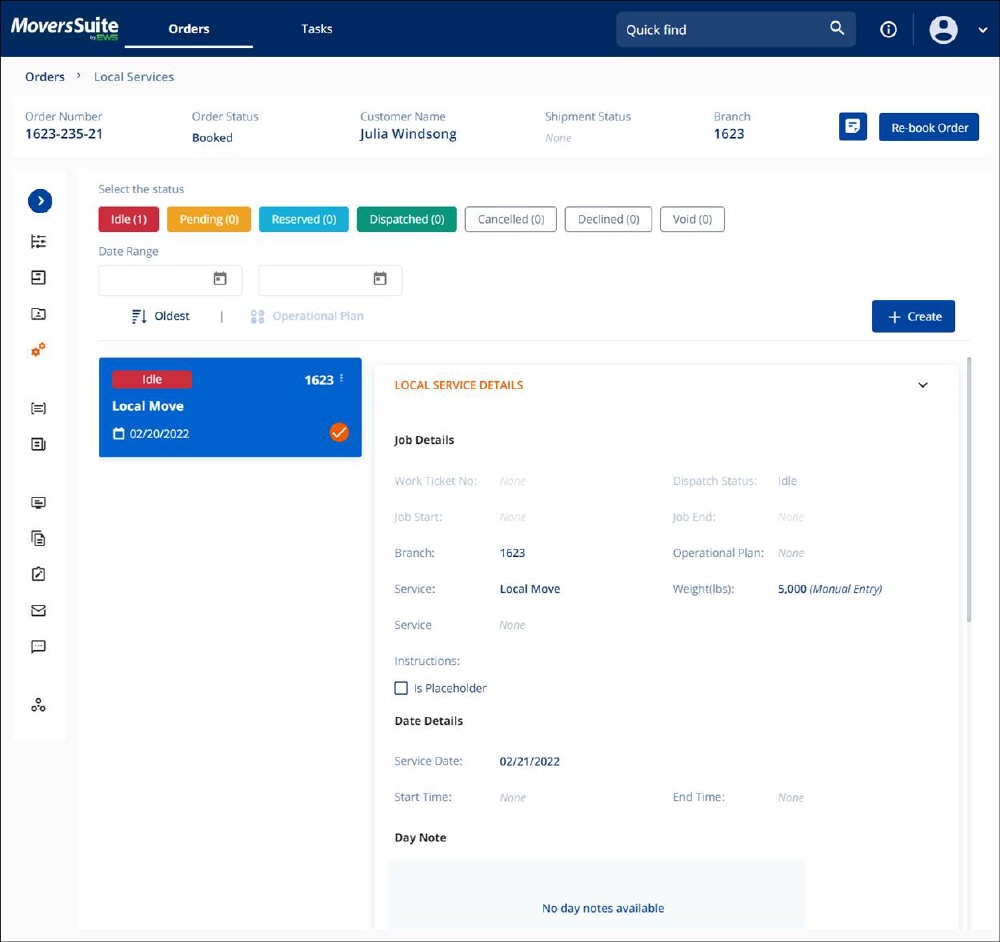
Figure 98: Service Timeline