
Sometimes also called Driver Chargebacks or Vendor Chargebacks, Personnel Chargebacks is used to deduct a specified dollar amount from an employee, such as for truck payments, driver chargebacks, or insurance payments as a few examples. The setup needed when creating Personnel Chargebacks require setup within three areas: XML Interface Setup, XML System Setup and Statement Payment Code Setup.
Though the Generic Import Setup can be followed, those instructions apply to all types of .CSV imports through Payment Management. These instructions detail the specific values to set within the three setup areas that are specific to this type of import.
1. Create an Interface to process imports within XML Interface Setup.
2. Create a System Data Type t system data types to process within XML System Setup.
3. Update or create supported payment codes to link to an interface within Statement Payment Code Setup.
v Optional, if the Auto Apply is to be used successfully, verify credentials with Personnel Setup are set to these parameters.
STEP 1: Establish an XML Interface
Create a record within XML Interface Setup. This establishes an interface that is assignable to other setup areas, such as XML System Setup needed in Step 2. From MoversSuite Administration > Administration > XML Interface Setup, create a new Interface by first clicking on Click here to add a new Interface (Figure 49).
Figure 49: Click highlighted area to start creating a new Interface record.
From the New Interface screen, enter a Vendor Name. The Vendor Name can be any value up to 50 characters. It is not necessary to add a Van Line Item nor a Branch Item on this record. Click Save.

Figure 50: XML Interface Setup
STEP 2: Establish the XML System
Create an XML System Setup record.
From MoversSuite Administration > Administration > XML System Setup, create a new System _____ by first clicking Click here to add a new XML System.

Figure 51: Click to add a new XML System record.
From the New XML System screen, enter the Interface that was created in Step 1. In this example, it is Driver Chargebacks. For Internal System and External System, use the name of the Interface. These fields can be named whatever you like; however, it is highly suggested that the Internal System and External System values be set to the same name as that of the Interface, for simplicity and clarity.
NOTE: The name entered under Internal System will be the name that will list under System Data Type (currently Column B) on the Generic Import File Format spreadsheet.

Figure 52: XML System Setup
Then, add an XML System Data Type Map by clicking Click here to add a new XML System Data Type Map. On the Add XML System Data Type Map screen and for Xml System Date Type, choose Statement from the drop down. Enter a Name. Again, the recommendation is to enter the newly created Interface name.

Figure 53: Add XML System Data Type Map
The Name entered within XML System Data Type Map must match the System Data Type value specified within the Generic Import File Format file. A tip to remember this association is to notice the similarities in their names: that XML System Data Type Map and System Data Type.

Figure 54: Details for this spreadsheet can be found within the Online Help by entering Generic Import File Format under Topics.
If the process cannot make a match, then an error like the one illustrated below (Figure 55) is returned to the person attempting the import.
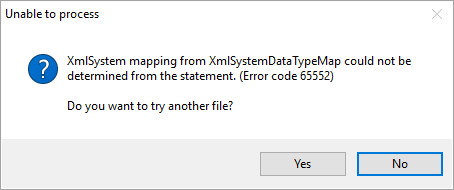
Figure 55: Unable to process error.
STEP 3: Establish supported payment codes
This code essentially tells the Interface what the payment type is for the import. For Personnel Chargebacks, it will be a Payable. This step will create the Interface so that, when importing, the import process matches the External Payment Code from the Statement Payment Code Setup record (Step 3) to the appropriate Interface (Step 1 and 2) to determine the type of payment.
From MoversSuite Administration > Accounting and Financial Services > Statement Payment Code Setup, click on the record named Payables. From the Payables record, click Click here to add a new Interface Item (Figure 56). From the drop down, choose the Interface created in Step 1. In this case, it is Driver Chargebacks. It will be immediately added to the bottom of the list.

Figure 56: Choose Payables.
Go to the new Interface listing. It will list under the name chosen from the drop down (and is most likely at the bottom of the list at this point.) Enter a value for the External Payment Code: For Personnel Chargebacks, enter “PAY” or “P”, as shown in Figure 57. Once the External Payment Code is set, the new Interface will sort alphabetically in the list. Check the Always Attach Driver checkbox. When checked, Always Attach Driver automatically apply the chargeback to the Driver's Vendor Record on their Personnel record. Click Save.

Figure 57: Example of External Payment Code.
External Payment Codes correlate to the Payment Type column within the Generic Import File Format (Figure 58).

Figure 58: Payment Type must correlates to an External Payment Set on Statement Payment Code record > Interface Item.
Optional: Verify criteria needed for CSV Imports is set, if Auto Apply is desired for personnel chargebacks.
Certain information must be set for Personnel Chargebacks to be automatically applied to a Driver (or other applicable personnel such as Sales). The information required is in three areas:
•The Labor Type assigned to the personnel must be available within Long Distance Dispatch. To determine if this is so, use the Advanced Search within MoversSuite Administration > Administration > Labor Type Setup to determine which Labor Type files are Available in Long Distance Dispatch. As shown in Figure 59, the Available in Long Distance Dispatch flag is checked. Click Search to find the Labor Types that meet this requirement.

Figure 59: Advanced Search within Labor Type Setup.
•On the employee’s Personnel Setup record > Accounting Tab, the Labor Type (available within Long Distance Dispatch) must be listed. Additionally, a Vendor must also be assigned on that tab.
NOTE: If all three areas are not set and the Auto Apply option is used on the CSV Import through Payment Management, the item will import; however, it will not auto apply.

Figure 60: The Accounting Tab lists the Labor Type needed and a Vendor is set.
•On the employee’s Personnel Setup record > Dispatch tab, the employee must have a Driver Number.

Figure 61: Driver Number is assigned on the Dispatch tab.
RELATED INFORMATION: