 . After the list is unfiltered,
scroll to find the line items and proceed to highlight a line item and click the
Double Up arrow to move each “Visible” item to the top of the list.
This tab is used to select the columns that are to be in the report and to set in the order for those columns in the report. If no columns are selected, the report will be blank. The functionality is available through several screens: Main Level Settings, Second Level Settings, Third Level Settings (See BI Tool Main Level Settings) and Details Settings (see BI Tool Details Settings.)
To include a column in the report:
1. Scroll down to find the column to be selected. A search function is available beneath Column Title to find columns, as well.
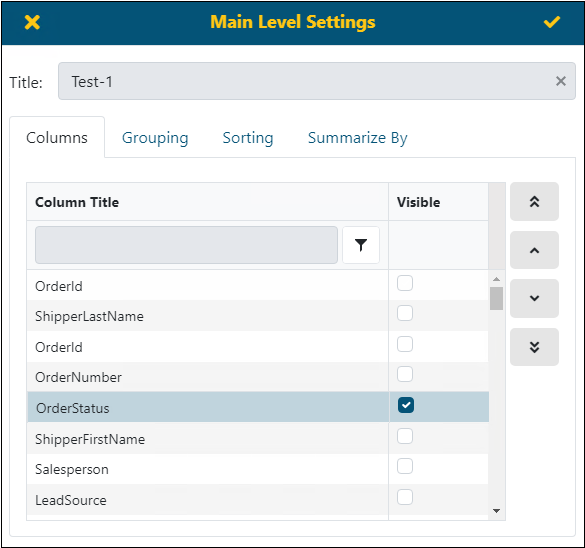
2. Click the corresponding checkbox in the Visible column, as shown in Figure 117.
The order of the columns within the report are determined by the order of the columns marked Visible in this tab. To organize the columns in the report, use these tips:
•At the time a column is clicked Visible, click the column name to highlight that column.
•Click the Double Up arrow icon. This will take that line item to the top of the list. *
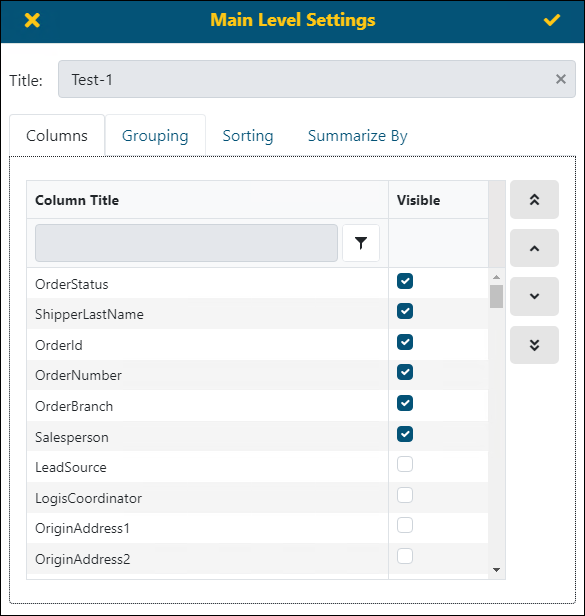
•After each line item that has been marked “Visible” has been moved to the top of the list, organize the columns in the report by clicking a line item and then the up or down arrow to move it up or down the list. The order in which the columns list from top to bottom will list from left to right in the report.
* If the search function was used,
you many need to remove the filter by clicking the Unfilter icon  . After the list is unfiltered,
scroll to find the line items and proceed to highlight a line item and click the
Double Up arrow to move each “Visible” item to the top of the list.

Figure 117: Columns tab with OrderStatus marked to be Visible on the report.

Figure 118: The order of the columns within the report are in the order listed in the Columns tab.
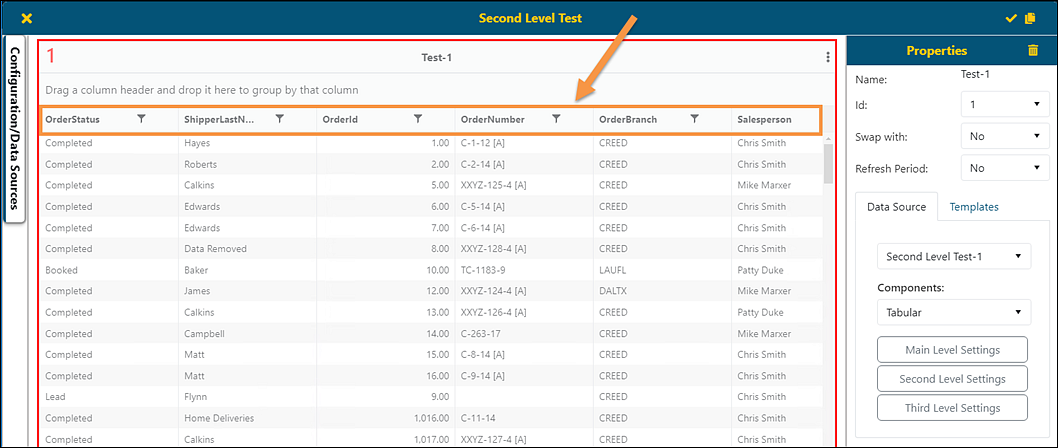
As an example, the Column Titles made Visible within Figure 118 are indicated in the report shown in Figure 119.

Figure 119: This image depicts the Columns made Visible within Main Level Settings .