MoversSuite Administration > Customer Service > Account Profile
Use this setup to define profiles for commonly referenced accounts assignable to orders through the Account Profile tab and through the Sales Lead Information screen when creating a lead and through the Select an Account Profile dialog when creating a MoversSuite order.
Within MoversSuite, the system sets default order values for field settings defined within this setup. Within the Office & Industrial module of MoversSuite, the system utilizes contacts and preset addresses for the Contacts and Locations referenced on an order and for Local Services requests.
The following table describes the fields and functions available within this screen.
|
Field/Function |
Description |
|
General tab |
|
|
Name |
Enter the name of the profile representing this record (up to 30 characters). The value entered here will show as options within the Account Profile field in Select an Account Profile, Sales Lead Information and Account Profile (up to 30 characters). |
|
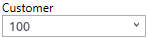
Customer |
Select a customer to be associated to the profile using the drop-down selector or Customer Quick Find. Enter a partial customer name or account number to populate the dropdown selector:
The selected customer is assigned to an order through Billing Information.
NOTE: Manage customer data through Microsoft Dynamics GP or through Customer Setup depending on your company configuration.
|
|
Bill To
|
Bill To This function opens the Choose Billing Address screen allowing a user to select an alternate billing address from a list of address records for the selected Customer.
Note: The Bill To fields on the right side of the screen is read-only data for the selected Customer.
|
|
Invoice Terms |
Set the default terms options for invoicing to this Customer or Account. Selecting “from System” instructs the application to look to the settings made within Invoice Terms Setup for the selected Account to determine the terms that print on an invoices associated to the Account. Selecting “from Customer” instructs the application to retrieve the invoice terms from the record for the selected Customer. Select “None” to not default Invoice Terms for this account. |
|
Account |
Select an account from the list of those defined within Account Setup. Selecting an account associates the profile to a default that links to the order through the National Account in Billing Information. If you select -none- for the Account, then the National Account is cleared on the order when the profile is selected. |
|
Inactive |
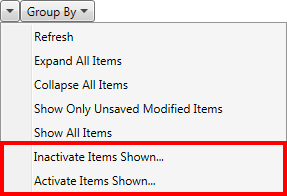
Setting this flag marks this record as inactive and users will no longer see this record as an option within the Account Profile menu found throughout MoversSuite, such as within the Account Profile and Sales Lead Information tabs. Marking a record as inactive is useful if you are unable to delete the records from the system and do not want it available as a selectable option within MoversSuite. Of note, you cannot delete a record that is assigned to an order. Options exist through the selected records option menu
(
Figure 26: Options menu for selected records
|
|
Rate Schedule for Labor |
Select a schedule from the available list to determine which rate to utilize for labor, such as regular, overtime, or double time rates. Refer to Rate Schedule for Labor for more information. |
|
General Notes |
Enter a memo that will be visible to users accessing the Account Profile tab. |
|
Account Profile Contact |
|
|
Use this section to define contact records for the profile. Add and edit records utilizing the Add Account Profile Contact dialog. Contact data displays within the Account Profile tab and are assignable to an Office & Industrial order through the Job Information tab. Note: You can also add contacts to a profile by utilizing the Add to Account Profile option within the Add/Edit Order Contact screen. | |
|
Order Defaults tab |
|
|
Set defaults in Order Information, Billing Information, and Move Information | |
|
|
Update Coordinator on Orders When the Coordinator default has changed, you can choose this option to open the Update Coordinator on Orders screen and optionally change the Transportation Coordinator set for all qualified orders associated to this particular profile. |
|
Task Definition |
Select a record from a list of those defined within Tasks Setup for a default for this profile. See Tasks for more information. |
|
Task Group |
Select a group assigned to the Task Definition to be a default for orders assigned to this profile. See Tasks Setup for group listing for the selected Task Definition. |
|
Salesperson |
Select a person to be the default salesperson assigned to orders associated to the profile. The person selected here will be the default Salesperson within Sales Lead Information and Name, Address, Phone. Salesperson is one with Status of “ACTIVE” and a Labor Type of “Sales” within Personnel Setup. |
|
Coordinator |
Select a person to be the default coordinator assigned to orders associated to the profile. The person selected here will be the default Transportation Coordinator within Name, Address, Phone. Coordinator is one with Status of “ACTIVE” and a Labor Type of “Coor” within Personnel Setup. |
|
Revenue Clerk |
Select a person to be the default revenue clerk assigned to orders associated to the profile. The person selected here will be the default Revenue Clerk within Order Information (Revenue Entry) and within Name, Address, Phone. Revenue clerk is one with Status of “ACTIVE” and a Labor Type of “Revenue Clerk” within Personnel Setup. |
|
Logistics Coordinator |
Select a person to be the default coordinator assigned to orders associated to the profile. The person selected here will be the default Logistics Coordinator within Name, Address, Phone. Coordinator is one with Status of “ACTIVE” and a Labor Type of “Coor” within Personnel Setup. |
|
Tariff/Rate |
Select the value to be the default set for the Tariff/Rate field within Billing Information and Billing Information (Revenue Entry) for orders associated to the profile. See Rating Systems for more information. |
|
Contract |
Select the value to be the default set for the Contract field within Billing Information and Billing Information (Revenue Entry) for orders associated to the profile. |
|
Valuation |
Select the value to be the default set for the Valuation field within Billing Information (Revenue Entry) and Move Information for orders associated to the profile. See Valuation Setup for more information. |
|
Per Pound |
If the selected Valuation requires a per pound specification, then select the amount to use as a default for orders associated to the profile. External applications, such as SIRVA, reference this setting. See Valuation Setup for more information. |
|
Sales Team Split |
Sales Team Split Enable splitting of the commission generated for the Salesperson by specifying Commissionable Employees and the percentage of the salesperson commission they receive. Once enabled, when commissions generate for the Salesperson (either automatically or manually added), a split is automatically created for each person defined in this section for the indicated percentage amount. The percentage specified is taken from what is generated for the commission. For example, if a coordinator is to receive 3% split of the $500 commission generated for the salesperson, then the amount the coordinator receives is $15. The split occurs when the commission of the Salesperson generates either automatically or manually through the Add Revenue Commission screen. Set the person receiving the split commission along with their percentage through the Add Sales Team Split dialog.
Note: Salesperson must be assigned to the order and on the Account Profile that is also assigned to the order to enable this functionality. Personnel receiving the split must be commissionable but do not need to be associated to the order to receive the split commission.
|
|
Services tab |
|
|
Use this tab to associate services offered by the account that display within the Account Profile tab. For each service associated, set a Status and Comment as needed. Services are defined within Account Profile Service Setup. | |
|
Status |
Select a default value for the service from the list of those defined within Account Profile Service Status Setup. Users are able to override this status through the Service Override screen in Account Profile. |
|
Comments |
Enter a default comment to display for this service (up to 256 characters). Users will be able to override this status through the Service Override screen in Account Profile. |
|
Special Instructions |
|
|
Special Instructions Origin |
Enter a memo for instructions needed at the origin of the move request. These instructions are visible within the Move Information tab. |
|
Special Instructions Destination |
Enter a memo for instructions needed at the destination of the move request. These instructions are visible within the Move Information tab. |
|
Preset Addresses |
|
|
Account Profile Preset |
Create default addresses, including phone and consign/consignee data and contact information, assignable to orders and services associated to this profile record. These address records appear as options within the Autofill Preset Address dialog. Add and edit preset address records by clicking on existing records or by pressing the “add a new” line. This opens the Add Account Profile Preset screen for address entry. Preset Addresses are referenced as Locations for an Office & Industrial order through the Job Information tab and when creating services through the Add Local Service. Note: Locations can be added to this record through the Add feature within the Locations section on the Job Information tab. |
|
Documents tab | |
|
Use this section to view, add, edit properties, and delete Account Profile Documents. | |
|
Account Profile Document |
Click on a record to edit the document properties or delete the document through the Add Account Profile Document dialog. The Add Account Profile Document dialog is also utilized to add a document to the database after choosing a document from your environment. Refer Account Profile Documents for more information. |
 ), available in the upper
right-hand corner of the screen that allow you to mark all records
displayed in the grid as inactive or active.
), available in the upper
right-hand corner of the screen that allow you to mark all records
displayed in the grid as inactive or active.