
The Quote tab is available throughout MoversSuite including Order Information, Revenue Entry, and Claims. This tab allows you to define quote items for one or more quotes per order. Options available to you include the ability to create a new quote based on an existing one, duplicate line items, generate groups of quote items, view quote report, and more.
Quote data is also available for custom letters and templates through the Forms Designer system.
Using the Quote tab
Reference the following when utilizing the Quote tab to create and manage your quotes.
NOTE: Only users with access to the branch of the order can add and edit quotes. This branch must be assigned to the user through the Branch tab within their Personnel Setup record.
Edit Existing Quotes
Existing quotes on the order display within the Quote drop-down.
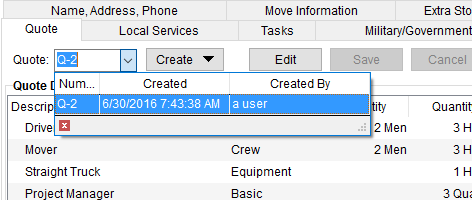
Figure 3: Quote selector within the Quote tab
Once you select a quote, the grid populates with quote details. You can press Edit, which expands the tab with group options and opens the Quote Details section for editing.
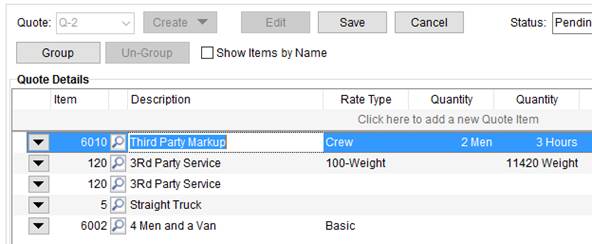
Figure 4: Quote tab in Edit mode
Press Save to keep changes made to the quote.
Adding New Quotes
The Create menu offers several choices allowing you to create a new quote. Options include the ability to start out with a blank quote, where you enter all the detail items manually, create a duplicate of the quote that you are currently viewing, import items established on one or more Operational Plans or Local Services requests, or create a quote based on an existing template.
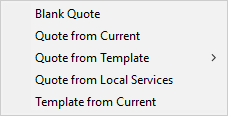
Figure 5: Create menu within Quote tab
Choosing any option other than Template from Current, opens the Quote Details for editing.
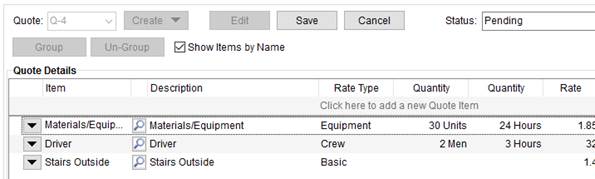
Figure 6: Quote tab
The Status defaults to “Pending” for new quotes and “Copy” for quotes created through the Quote from Current option. The Status must be set in order to save the quote record.
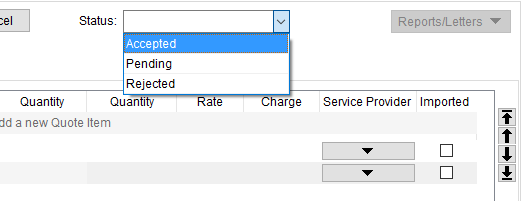
Figure 7: Status selector within Quote tab
The list of Status values is defined for your company through Quote Status Setup.
Quote Templates
You can create a new quote based on an existing template by choosing the Quote from Template option through the Create menu. This opens a new quote in Edit mode with all the details copied in from the template.
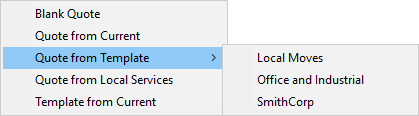
Figure 8: Create menu on Quote tab
The list of templates is from those available on your system as established through the Template from Current option and/or through Quote Template Setup. NOTE: If you wish to remove a template from this list, you must do so through Quote Template Setup.
You can create a template from an existing quote as well. This is ideal for a quote you or your staff plan to reuse. Once the quote is in the state you wish to save it in, choose the Template from Current option.
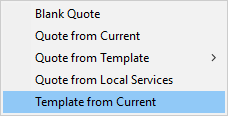
Figure 9: Create menu on Quote tab
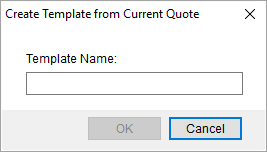
Choosing the option, the application prompts you to enter a name for the template, up to 64 characters. The new template will be available for all users with access to the Quote tab.

Figure 10: Create Template from Current Quote dialog
NOTE: Only detail line items are stored within a quote template. Any groupings in place are not saved to the template. Groups must be manually added to a quote.
Your company also has the option to create and manage templates through MoversSuite Administration. Refer to Quote Template Setup for details.
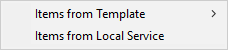
You can also insert a template into an existing quote through the Insert menu. Choosing a template through the Items from Template option inserts the details associated to the selected template directly into the quote.

NOTE: The Insert menu replaces the Create button when a quote is in Edit mode.
Quote from Local Services
You can build a quote based on items associated to one or more Local Services requests or Operational Plan records on an order.
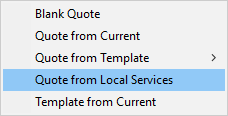
Figure 11: Create menu on Quote tab
Choosing Quote from Local Services, opens the Import from Local Services dialog from which you can make selections based on either Operational Plans or services by service date.
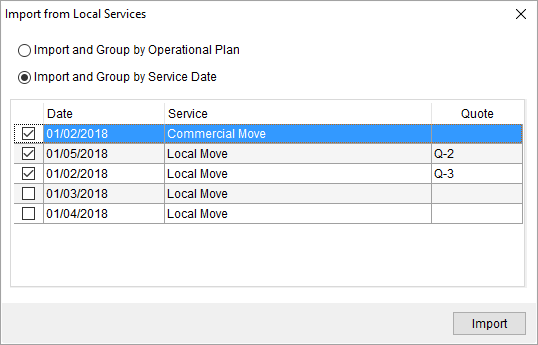
Figure 12: Import from Local Services dialog
Place a check next to the plans or services you want included in the new quote and press Import. The application opens a new quote in Edit mode with items grouped either by the plan name or by the service date.
You can also import Local Services into an existing quote through the Insert menu. Choosing Items from Local Service opens the Import from Local Services dialog, allowing you to insert items from one or more plans or services.
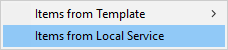
NOTE: The Insert menu replaces the Create button when a quote is in Edit mode.
Rating data associated to items is also pulled into a quote based on the Rate Plan assigned to the order. Specifically, rating information established for container (CPU) counts, labor requests, and equipment requests are referenced. Rates associated to Item Codes linked to Containers within Material Type Setup, Labor Type Setup, and to Equipment Type Setup records, respectively, are referenced within the Quote tab.
Adding Quote Items
In Edit mode, click in the Item column on the top row and select an Item Code. This sets the default Description, which you can click in and update.
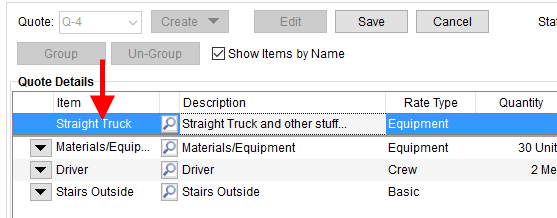
Figure 13: Quote in Edit mode
Also set are the Rate Type and Rate values depending on Rate Plan Setup. By default, only
Item Codes associated to the Rate Plan of the order (set through the Billing Information tab)
list within the Item drop-down selector. To select from a list of all Item
Codes, press the lookup icon ( ) to access
the Item Code Search
dialog.
) to access
the Item Code Search
dialog.
Press the Tab key to move between columns.
Select the appropriate Rate Type, Quantity, and Rate. The Charge computes for you.
The line item determines the revenue that generates for the item, as it appears on quotes, invoices, and in Revenue Entry.
If you wish to see the Item Code associated to the Item instead of the description, uncheck the Show Items by Name option.
Once a detail line exists, you can click on the  icon and duplicate or remove the
line.
icon and duplicate or remove the
line.
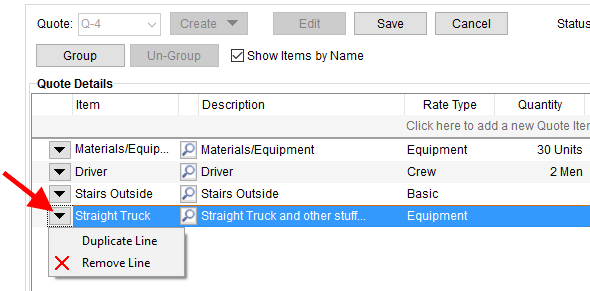
Figure 14: Line options within Quote tab
You can also associate the quote item to a third-party vendor by pressing the Service Provider button.
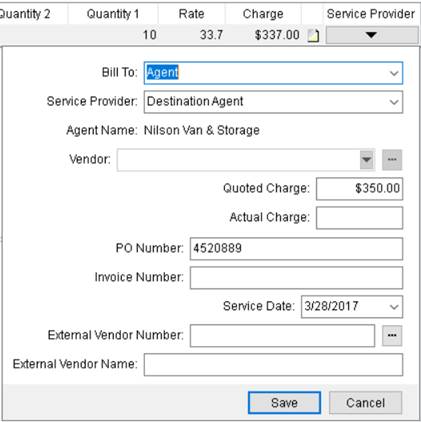
Figure 15: Service Provider menu
While adding charges in the Quote tab, you can use the UniGroup International Vendor Search option by clicking on the button right next to External Vendor Number. This will help you in searching the external vendors from the UniGroup’s database.
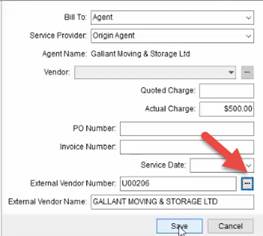
Figure 16: UniGroup International Vendor Search option
When all the data is established, press the Tab or down arrow button to save the quote item.
Once saved, additional options allow you to duplicate the item or remove it. You also have Group and Un-Group features available to you.
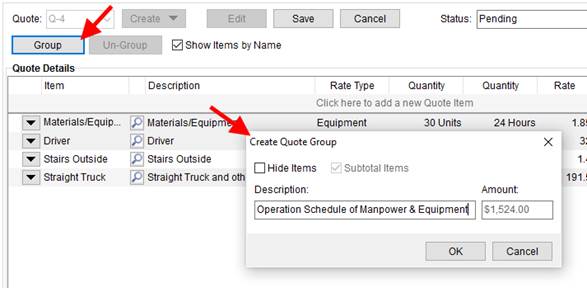
Figure 17: Group function in Quote tab
Arrow keys on the right side of the Quote tab allow you to move the selected item or group up or down in the list. The order in which the items and groups are arranged in the details section is how they appear in quote reports and when imported as revenue items in Revenue Entry.
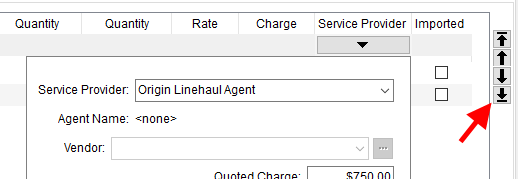
Figure 18: Quote item and quote group move buttons
You can utilize a quote template to build a list of detail items for your quote. Choose a template from the Quote from Template option to create a new template with details preset based on what is established for the template. You also have the option of selecting a template through the Insert menu when editing a quote.
Additionally, you can save a quote to a template to reference to create new quotes by choosing the Template from Current option. Refer to the Quote Template section (above) for more information.
Creating Quote Groups
In Edit mode, select one or more services (hold down either the Shift or Ctrl key and click on the records you want selected) and press Group. This opens the Create Quote Group dialog.
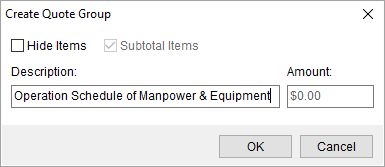
Figure 19: Create Quote Group dialog
Use the Create Quote Group to combine one or more quote items into a single line item (Hide Items checked) or list all the items under a specific Description. Optionally, provide a dollar Amount when Hide Items is checked and Subtotal Items is unchecked; use this if you wish to list the items without charge and write-in your own dollar amount for the collection of items.
Use the arrow keys to move quote items up or down within the group or to move the group up or down in the listing.
You cannot duplicate a group. However, you can choose Un-Group and create a different group.
Adding Notes
You can add a note to a detail line item or to a group on a
quote by pressing the note icon  . This
note is available when the quote is open in Edit mode. An in-line box appears
where you can enter the text of the message (up to 1,024 characters).
. This
note is available when the quote is open in Edit mode. An in-line box appears
where you can enter the text of the message (up to 1,024 characters).
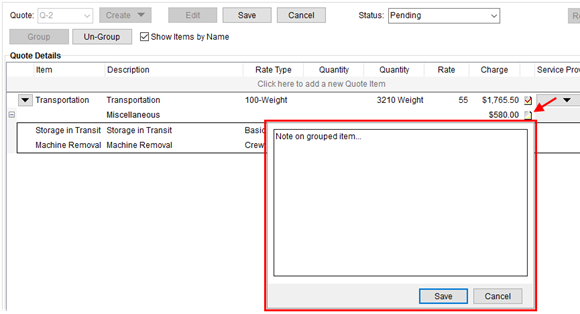
Figure 20: Note feature within the Quote tab.
Items or groups with a note associated to the record appear
with a checked note icon  . Clicking the
checked icon opens the note dialog from which you can view and modify the
text.
. Clicking the
checked icon opens the note dialog from which you can view and modify the
text.
The purpose of the note is to provide information regarding the particular item or group to the customer. The note appears on the standard Quote Form provided by MoversSuite. The information on the note appears on the report at the detail line level and within the group level.
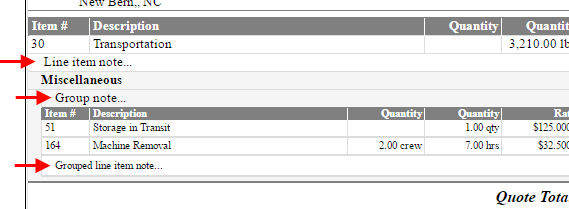
Figure 21: Notes at each level displaying on the Quote Form
Generating Quotes, Reports, and Letters
The Reports/Letters menu provides a list of available reports and bookmark documents that you can select from. Quote information is available through Bookmarks and Forms Designer Bookmarks to design and render custom quote letters and reports.

You can assign a contact to the quote through the Quote prepared for setting. The name and address of the person selected for this setting appears on the Quote Form in lieu of the customer name and address.
You can reference a variety of quote data through Quote Bookmarks, which display on email and documents generated through the Forms Designer system. Specifically, reference the Quotes group within Insert Bookmark to access quote data.
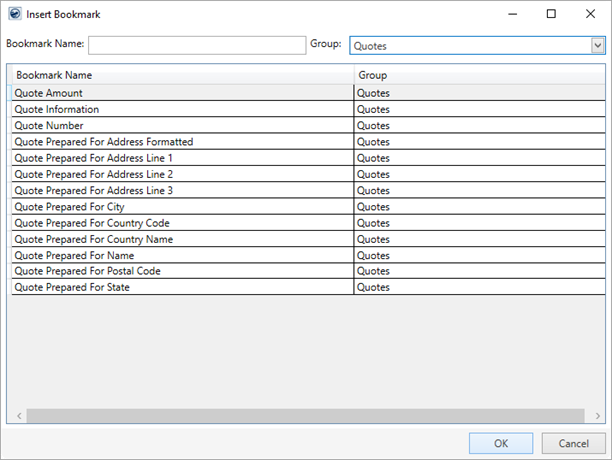
Figure 22: Displaying the Quotes group within Insert Bookmark
Importing Quote Revenue
Quotes with a status of “Accepted” appear automatically within the Revenue Import tab. Clerks can choose to import and invoice the items associated to the quote.
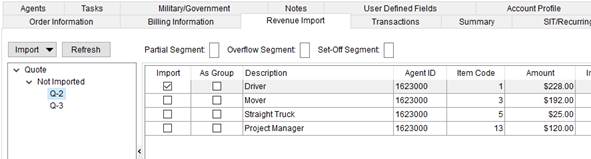
Figure 23: Quote imports in Revenue Import
Imported items show as Transactions items as determined by the associated Item Code.
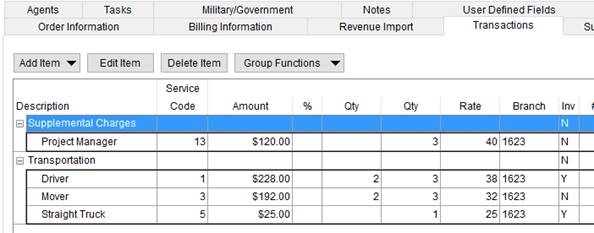
Figure 24: Transaction tab
Once quote items import into Revenue Entry, you can no longer edit these items from the Quote tab. You can update these items through the tab in Transactions.
If you wish to make changes to a non-posted, imported quote, you can delete this quote through the Transactions tab and update the record through the Quote tab; quotes deleted through Transactions show as “Not Imported” in Quote Import.
You are prevented from deleting posted quote items.
Rates associated to imported items are tied to the Rate Plan selected for the order.
Refer to the following topics for more information on importing revenue from a quote:
Technical Field and Function Information
The following table describes the fields and functions available within the Quote tab.
|
Function |
Description |
|
|
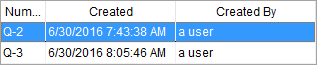
Quote Select from a list of existing quotes for the open order. The drop-down menu lists all quotes belonging to the order and include the following data columns that a user can sort the menu by:
Number – MoversSuite quote number Created – Date that the quote was created on Created By – MoversSuite user that created the quote
|
|
|
Create (Alt+C) This option allows you to create a new quote record or duplicate an existing one. The following options are available through the Create menu:
Blank Quote (Alt+C+B) Creates a new quote for the order with no quote details assigned to the record. The default quote status for a new quote is “Pending.”
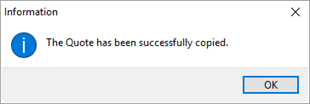
Quote from Current (Alt+C+C) This option is available when a quote exists for the order and is selected within the Quote selector. This option creates a new quote containing all the details and groupings of the copied quote. Once a quote is copied, a confirmation dialog appears.
Figure 25: Quote copy confirmation
The default quote status for a duplicate quote is “Copy.”
Quote from Template (Alt+C+Q) View a list of available templates to base a new quote on by hovering the mouse over this option. Selecting a template opens a new quote containing all the details of the quote from the template. The default quote status for a new template quote is “Pending.” Create templates by choosing the Template from Current option or through the Quote Template Setup.
Quote from Local Services You can create a quote based on items pulled in from details associated to one or more Local Services requests or Operational Plan records. Choosing this option opens the Import from Local Services dialog from which you can make your selections. The default quote status for a new Local Services quote is “Pending.”
Template from Current (Alt+C+T) Choose this option to create a template based on the quote you have open. You are prompted to enter a name for the template (up to 64 characters) through the Create Template from Current Quote dialog.
Figure 26: Create Template from Current Quote dialog
You can reference this template to create new quotes through the Quote from Template option. Manage quote templates through Quote Template Setup.
|
|
|
Insert The Insert menu replaces the Create menu when editing a quote. This feature allows you to insert from a template or from requests directly into the open quote.
Items from Template Inserts the details from an existing template directly into the open quote.
Items from Local Service You can insert items directly from one or more Local Services requests or Operational Plan records. Choosing this option opens the Import from Local Services dialog from which you can make your selections.
|
|
|
Edit (Alt+I) This option places the selected quote in edit mode, allowing you to manage quote details, groupings, and the status of the quote record. |
|
|
Save (Alt+S) This option saves any changes made to the new or existing records. This option is available when in Edit mode and the Status is set. |
|
|
Copy (Alt+C) This option closes Edit mode and discards any changes made to the quote. |
|
|
Status Set the status of the quote to one of the following defined for your organization through Claim Status Setup. The default status of a newly created template is “Pending.” If you duplicate a quote through the Quote from Current option, the status defaults to “Copy.” Quotes with a status of “Accepted” are available to Revenue Import in Revenue Entry. |
|
Connected |
A caption of “Connected” displays next to the Status selector when an accepted quote links to an external system and can be updated by that system. Only one quote per order can be connected to an external system. Refer to UniGroup International Interface for more information. |
|
|
Reports/Letters (Alt+L) This function displays a list of forms, letters, and reports available to generate quote-specific output within the Report Viewer. To appear as an option within this menu a report must have be assigned to a Report System Location of “Quote Reports/Letters.” The Quote Form is available as a default report within Report Setup. Quote information is available through Bookmarks (see Quote Bookmark Fields) and through Forms Designer (refer to Quote Bookmarks). |
|
Quote Details |
|
|
This section provides the individual quoted items and groups that comprise the quote record. | |
|
|
Group Select one or more quote items and press this button to group the items. Grouping allows you to categorize and summarize items for quote or invoice. Pressing this button opens the Create Quote Group dialog. |
|
|
Un-Group Choosing this option removes the grouping in effect on the selected record. |
|
|
Show Items by Name With this option checked, the application displays the description of the selected Item Code within the detail listing. Unchecking this option displays Item Codes by their numeric identifier. This option is checked by default. |
|
|
Quote prepared for Select a person from the available list to show as the contact person on the quote. The name and address of the contact displays on the Quote Form. The list of contacts available to this setting are those assigned to the Office & Industrial order through the Contacts section on the Contacts and Locations tab or those associated to the Account Profile on non-Office & Industrial orders. The quote contact information is available as Forms Designer Bookmarks. |
|
|
Add Contact If the contact you want on the quote is not available from the list of those found in the Quote prepared for setting, then you can press Add Contact to add a contact record to the order. Once added, the contact is available for selection through the Quote prepared for field. Pressing Add Contact opens the Add/Edit Order Contact dialog from which you can define the new contact record and optionally update the Account Profile. |
|
Quote Item | |
|
This section defines how the application applies the charge in Revenue Entry. | |
|
Item
|
Select a value from the list of those defined within Item Code Setup. This specification defines the record as a detail revenue line item. Selecting a value will affect rating values associated to the item including the remaining fields within the Quote Item section. Only Item Codes associated to the Rate Plan of the order (set through the Billing Information tab) display within the Item drop-down selector. To select an Item Code from a list of all available codes, press the lookup icon to access the Item Code Search dialog. An item code must be associated to the quote item in order to be available for Revenue Import. See Rating Systems or Rate Type Setup for more information.
Check Show Items by Name to list display the Item Code description within the Item field or unselect this field to display by the Item Code number. The selector includes both Description and Item Code that a user can sort by when searching for a value. |
|
Description |
Enter the quote description that will represent this record (up to 128 characters). This value will default to the selected Item Code. Users can update this field at any time. |
|
NOTE: Refer to Rating Systems for an overview of the rating data available to you through this screen. | |
|
Rate Type |
Select a type from the list defined within Rate Type Setup used to determine how transactions are calculated and how they appear on the invoice. Additionally, special logics exists for “100-Weight” and “Miles” types. These two types retrieve order data to assist in computing the rate. Refer to Rate Type Setup for details. The Rate Type affects other rating data on this item, including Rate, Quantity field(s), and Charge. Setting the Rate Type may trigger Advanced Rating as well. See Rating Systems for an overview and setup options. |
|
Rate As |
If the Apply Regular, OT and Double Rates flag is set for the selected Rate Type (and Rate Plan), then the Rate As Option appears. This option allows you to determine the default Rate for the item based on one of the following rates: Regular Rate Overtime Rate Double Time Rate
Refer to the Rate As Option topic for more information.
|
|
Quantity |
Enter the appropriate value according to the label provided after the Rate Type selected. |
|
Rate |
Enter the dollar amount applied to compute the total amount of the item. The rate applied to quantity values to compute the Charge. The Rate may set automatically based on the Rate Plan and Item Code (Item) assigned to the record. View the Advanced Rating topic for more information. |
|
Charge |
Rating selections will compute the Charge automatically. You can also manually set this dollar amount field. The sum of all item charges displays for a quote record show at the bottom of the Charge column. |
|
|
Quote Note In Edit mode, the note icon When a note is tied to the item, the note-attached icon
The note appears on the Quote Form. |
|
Service Provider | |
|
This section defines the quote item as a third-party payable. When the quote is accepted, the user is prompted to create an actual third party item based on this information. Refer to Add Third Party Item (Revenue Entry) for more information. | |
|
Bill To |
Identify the party being billed for the service. The options available include the following: Agent Shipper
This setting is referenced when exchanging data with an external interface. Refer to UniGroup International interface for details. |
|
Service Provider |
Select a provider from the list of participating agents assigned to the order as the third party payable on the quote. The provider will be either the Origin or Destination Agent assigned to the order and the drop-down menu will display the name of the agent, if set. The name of the selected provider will display alongside the Agent caption. See Agents for more information. |
|
Vendor |
If a vendor is the third-party on the quote, then use
the Vendor Quick Find
to locate and select a vendor to associate this record. The list of
options vendors pulls from those defined within Microsoft Dynamics GP or
from within Vendor Setup
(depending setup). You can also access a list of recent vendors through
the The Vendor selector includes the following columns to assist you making a selection: Vendor Name ID City State Status Hold Refer to Dynamics GP Status and Hold Information topic for more details. |
|
Quoted Charge |
Enter the amount of the third-party payable item. This field represents the amount of the total charge addressed by the Vendor. This field is required to import the quote item into Revenue Entry. A value is required when either Service Provider or Vendor is set. |
|
Actual Charge |
Enter the actual charged amount if the third-party payable quoted charge has already been accepted and billed. When this field is set, it will be the amount of the payable, instead of the Quoted Charge; i.e. Actual Charge supersedes Quoted Charge when the transaction imports into Revenue Entry. A value is required when either Service Provider or Vendor is set. |
|
PO Number |
Provide the purchase order identifier provided by the vendor (up to 30 characters). |
|
Invoice Number |
Enter the invoice number provided by the vendor (up to 20 characters). |
|
Service Date |
Enter the date of the service provided by the vendor (see Date Fields). |
|
External Vendor Number |
Enter the External Vendor Number in case of external vendors. Upon entering the number, the External Vendor Name auto-populates with the respective Vendor Name. |
|
|
Use this button to open the UniGroup International Vendor Search option. |
|
External Vendor Name |
Enter the External Vendor Name in case of external vendors. Upon entering the name, the External Vendor Number auto-populates with the respective Vendor Number. |
RELATED TOPIC:
Third Party Invoice Information


 button and utilize the
advanced
button and utilize the
advanced  .
.