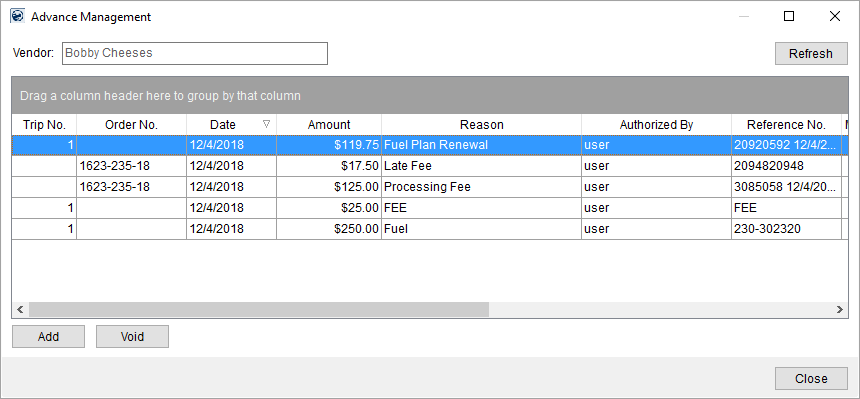
Use the Advance Management screen to generate advances for personnel in Local Dispatch and Long Distance Dispatch.
Figure 4: Advance Management screen
The Advance Management screen is available through the Advances button wihtin the Current Driver Activity tab in Long Distance Dispatch.
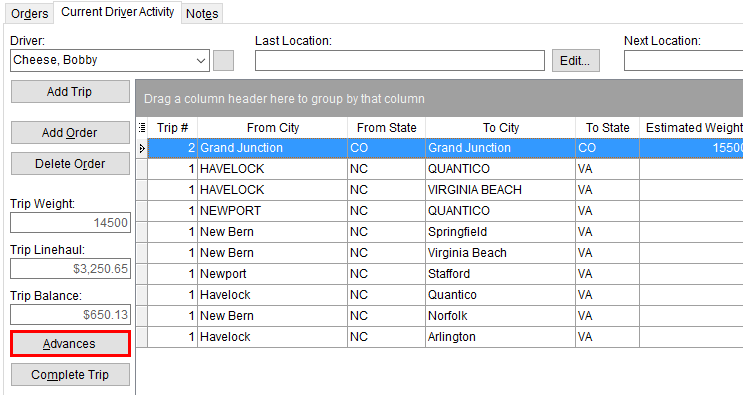
Figure 5: Current Driver Activity tab
It is also available through the Advances option from the right-click menu on the Current Driver Activity tab as well and from the Advance Management option within the right-click menu from the Dispatch Center in Local Dispatch.

Figure 6: Dispatch Center tab
Refer to the following for more information on accessing the Advance Management screen:
Right-Click Options (Local Dispatch)
Right-Click Options (Long Distance Dispatch)
Utilize the Add feature within this screen to access the Add/Edit Advance dialog, which allows you to create an advance
You can also Void an advance through the Advance Management screen. You can void any advance that does not have transactions generated for it.
Run the Driver Advances Report to view advance requests generated through Advance Management.
Entering advances within Advance Management does not create any accounting transactions. It only establishes a pending advance within the system and allows it to be available to the Advance Processing, where a user can generate the actual accounting transactions.
Technical Field and Function Information
The following table describes the fields and functions within this screen.
|
Field/Function |
Description |
|
Vendor |
The vendor assigned to the employee displays in this field. The application will generate transactions based on Vendor assigned to the employee through their Personnel Setup. |
|
|
Refresh This function updates the data behind the grid and vendor with the latest information from the database. |
|
Trip Number |
The trip the advance is associated with displays. |
|
Order Number |
The Order Number the advance is associated with displays. |
|
Date |
The created date of the advance displays. |
|
Amount |
The dollar amount of the advance displays. |
|
Reason |
Description provided for the need of the advance displays. |
|
Authorized By |
This field displays the user that created the advance. |
|
Reference Number |
Any provided reference information will display. |
|
Manual Banking Service Send |
This column displays the value selected for the Do Not Send to Banking Service option set within the Add/Edit Advance screen. A checkmark indicates that no information will be sent to the third-party service provider for this record when processing occurs through the Add/Edit Advance screen, i.e. a checkmark indicates that you wish to manually enter or upload data for this record to the third-party banking service provider. |
|
Posted Date |
This field displays the date transaction generated for the record through Advance Processing. |
|
Posted By |
The user that generated the transactions for this record through Advance Processing displays. |
|
Voided Date |
The date the advance was voided displays. |
|
Voided By |
The user that voided the advance displays. |
|
|
Add Open the Add/Edit Advance screen allowing a user to create a new advance for the specified Vendor. |
|
|
Void This function voids the selected record without prompting the user to confirm the request. The application will set the Voided Date and Voided By values. |
|
|
Close This function closes the screen. |


