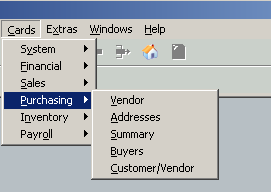
To enter new vendors, or vendor maintenance, in Dynamics GP
Cards>Purchasing>Vendor
TAB through the fields. Enter = Save in Dynamics GP.
The minimum to setup a vendor is the Vendor ID, Name and Class ID.
Enter the Vendor ID. (Required field) Tab.
Enter the Vendor Name. (Required field) Tab.
Short Name and Check Name auto complete from Name. These fields can be changed, if need to see differently. Tab through.
The tab will take you to Hold. Tab.
Status is a dropdown field. Leave as active for new vendors.
Enter or lookup the ClassID. ClassID will be used to run AP checks and driver/sales person commission statements.
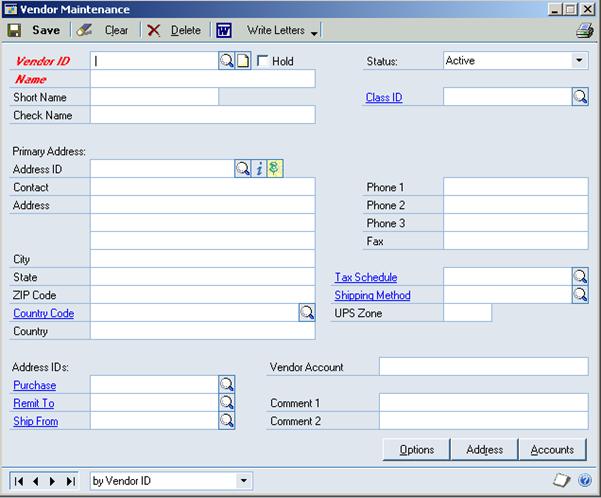
Address ID is PRIMARY for new vendors. Tab.
Enter Contact, Address, City, State, ZIP. Tab to Phone 1.
Enter Phone 1. Tab
Tax Schedule, Shipping Method and UPS Zones are not used.
Enter Address IDs (Purchase, Remit To, Ship From) if there are alternate addresses for them.
Enter Vendor Account and Comment fields, if wanted/needed.
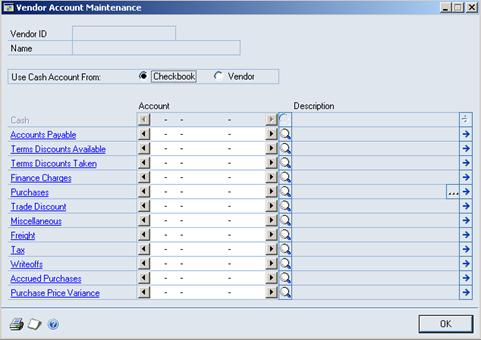
If you want to default in accounts for the expenses, click on the accounts button.
On the line for purchases, enter the expense account. If you want more then one line, click on the ellipses(…) and enter all of the breakouts for the expenses.
Click Ok when done.
On the main vendor card, click on the Option button.
Be sure the credit limit is unlimited. This does not control anything but the importing into Great Plains. It will not show through to Movers Suite.
Be sure to mark the vendor as a 1099 vendor, if they will be receiving a 1099 for commissionable earnings. This is a dropdown next to Tax Type.
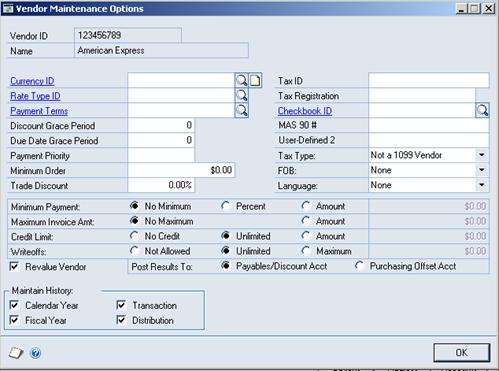
Click on OK.
On the main vendor card, click save.