
Documents uploaded with MSWeb are shared between users within the MoversSuite desktop application and MSWeb. Documents viewed within MSWeb are those added within MSWeb, the MoversSuite desktop application, and, with appropriate setup, documents added within third party applications. Documents are viewed within the MoversSuite desktop application through the Document Management Viewer. Documents are viewed within MSWeb from the MSWeb Order Timeline.
Within MSWeb, click the Documents button to attach a document to the order being viewed. In the image below, clicking the Documents button will add a document to the order. The document will be added to the order using Document Management.

Figure 98: How to Add Document(s)
Clicking the Documents icon opens the Add Document Screen. From the Add Document screen, click browse to add file.
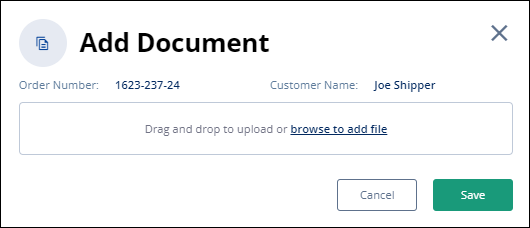
Figure 99: Add Documents screen
This opens your file manager. Locate the file(s) you wish to upload. Add more than one document at a time by holding down Ctrl while clicking on the needed files, or you many drag and drop the files. Note that when dragging and dropping a file, the file will open in another browser window as a preview. This can be helpful if you are not sure of the exact file needed. In our example below, notice the file is Bill of Lading. Press Open.
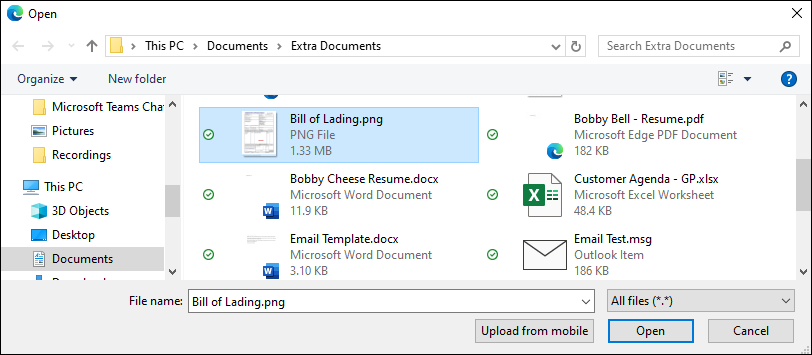
Figure 100: Choosing files from File Manager
The file is added to Add Document, as shown in Figure 101. Choose the Document Type and Description. Add a note if desired. Click Save to add the document to the order or lead.
If more than one document is added at the same time, documents will list individually (Figure 102.) Document properties can be added on a document-by-document basis using the scroll to access all documents. If all documents are the same document type, save time by clicking the Apply document properties to all button. This button will only appear if there is more than one document being added.
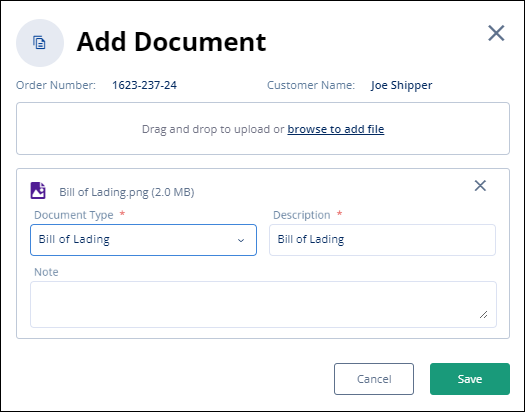
Figure 101: One document is added using Add Document.
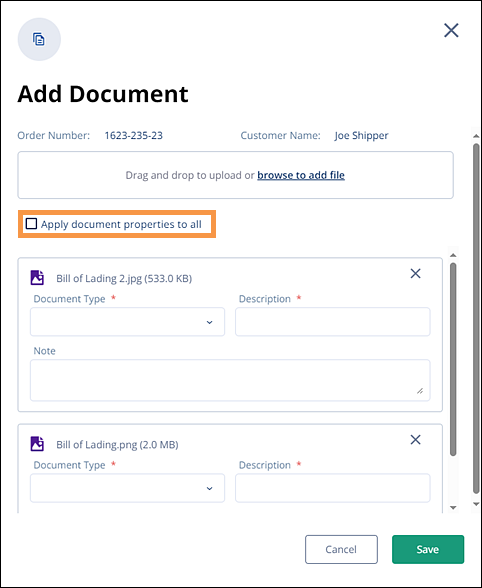
Figure 102: Example shows two documents being added at the same time within Add Document.
When using the Apply document properties to all button is clicked, the screen will condense, as in this example. Enter the Document Type and it will be applied to all documents. The Description will then autoload with Bill of Lading as well. Click Save.
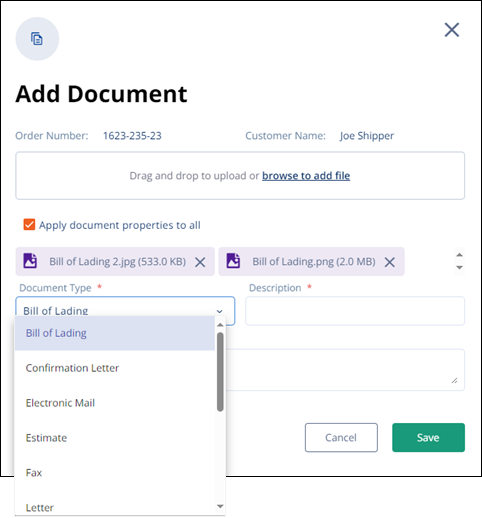
Figure 103: Partial list of Document Type options
The document will then appear on the MSWeb Order Timeline. To view, make sure the Documents button is active so that the timeline includes Documents. The status tile is yellow, as yellow is color coded to indicate documents. The activity is noted as Added in addition to the notation of the date and time the document as added. Additional details are in the corresponding box to the right, which include who added the document, the Document Type, the Document Description. A link to the document is also included for quick reference.
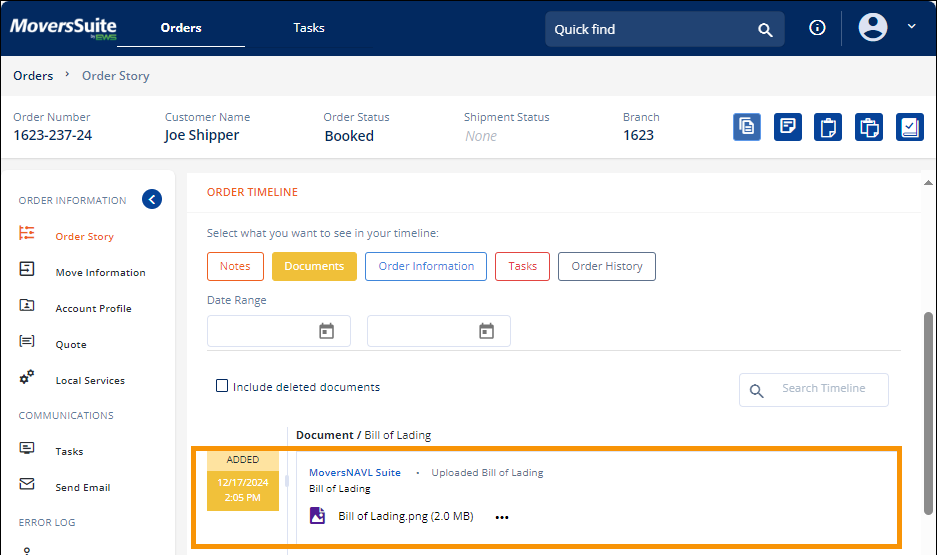
Figure 104: Order Timeline showing newly added documents
The file type accepted are:
|
Extension |
Format |
|
|
Portable Document Format file |
|
txt |
Unformatted text file |
|
jpg, jpeg |
Joint Photographic Experts Group photo file |
|
png |
Portable Network Graphics file |
|
gif |
Graphical Interchange Format file |
|
docx |
Microsoft Word document |
|
csv |
Comma-separated values file |
|
tif, tiff |
Tagged Image Format file |
|
xls |
Microsoft Excel workbook before Excel 2007 |
|
xlsx |
Microsoft Excel workbook after Excel 2007 |
|
doc |
Microsoft Word document before Word 2007 |
|
xps |
XML-based document |
|
zip |
Compressed file |
|
docm |
Microsoft Word macro-enabled document |
|
rtf |
Rich Text Format file |
|
bmp |
Bitmap file |
|
htm, html |
Hypertext markup language page |
|
xlsm |
Microsoft Excel macro-enabled workbook after Excel 2007 |
|
pptx |
Microsoft PowerPoint presentation |
|
m4a |
MPEG-4 audio file |
|
mov |
Apple QuickTime movie file |
|
wav |
Wave audio file |
|
wma |
Windows Media Audio file |
|
wmd |
Windows Media Download file |
|
wmv |
Windows Media Video file |
RELATED INFORMATION:
Knowledge Article: Best Practices for Attaching or Uploading Files to MoversSuite