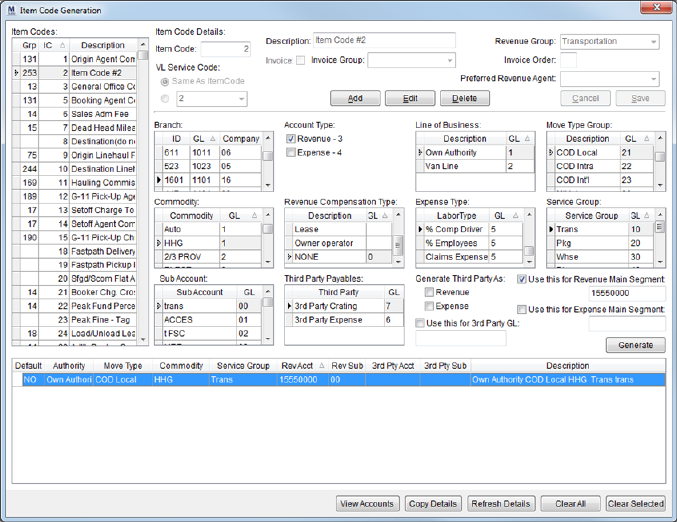
The following instructions are designed to assist you in mapping an Item Code to a specific general ledger account while ignoring the Authority, Move Type, and Commodity of the order. There are certain scenarios when a MoversSuite Item Code must post to specific general ledger account regardless of Authority, Move Type, or Commodity set on the order. For these cases, we suggest you create and reference non-commissionable Item Codes using the Item Code Generation screen (Fig. 1).
Figure 15: Item Code Generation screen
Map Non-Commissionable Item Code to a GL Account
|
STEP |
DESCRIPTION |
|
1. |
Open the older version of the MoversSuite Administration application. The executable of MoversSuiteAdmin.exe is located in the same folder that the MoversSuite application is installed to on your application server. |
|
2. |
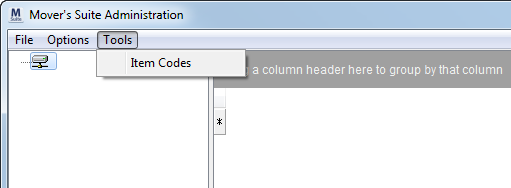
Select Tools > Item Codes from the main menu. This opens the Item Code Generation screen (Fig. 1).
Figure 16: MoversSuite Administration (old-style version)
|
|
3. |
Press the Add button. This clears the screen for a new Item Code entry. |
|
4. |
Enter Item Code, Description, and Revenue Group. |
|
5. |
Press Save. Once the Item Code is saved, it will display in the Item Code listing on the left side of the screen. |
|
6. |
Within the Item Codes listing, select the newly added Item Code record and press Edit. |
|
7. |
Set the following fields for this Item Code: Account Type to “Revenue – 3” Line of Business to any value Move Type Group to any value Commodity to any value Revenue Compensation Type to “NONE” Service Group to any value Sub Account to a GL value that matches an account used to post to this Item Code within Microsoft Dynamics GP, e.g. “00” |
|
8. |
Check the Use This Revenue Main Segment and enter the main segment of the GL account number used to post to this Item Code within Microsoft Dynamics GP, e.g. “15550000.” All other fields remain unchanged. |
|
9. |
Press Generate. |
|
10. |
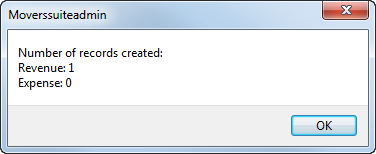
Once the mapping is created, a confirmation dialog appears. Press OK. The new mapping will display in the lower grid on this screen.
Figure 17: Record created dialog
|
|
11. |
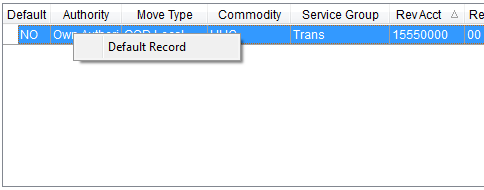
Right-click the mapping and select “Default Record.” This sets the Default column to “YES” and identifies this record as the default Item Code that MoversSuite will reference regardless of what is set for the Authority, Move Type, or Commodity of an order.
Figure 18: Map listing section displaying right-click option Transactions will now post to the GL account referenced by this mapping entry for this Item Code. |
|
OPTIONAL | |
|
12. |
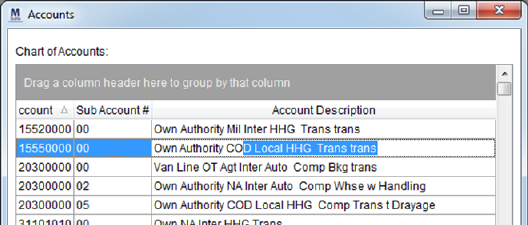
Optionally, you can change the Description generated for the mapping by pressing View Accounts, which opens the Accounts dialog; this is listing of all generated mappings for your company. Note: This Description is what appears for the item when transactions are generated. |
|
13. |
Locate the default entry in the list and click on the Account Description and change it as desired.
Figure 19: Accounts dialog
|
|
14. |
Press the Tab key. |
|
15. |
Press Close. |
|
16. |
From the Item Code Generation screen, press Refresh Details. This retrieves the changes made to the description from the database. |
RELATED TOPICS: