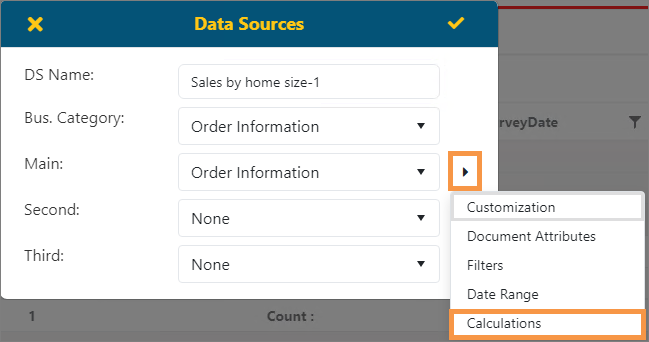
The Calculations screen is an option from the Data Sources screen (see BI Tool Data Sources). Of note, the functionality of this screen applies to the BI Tool Data Sources and Defaults Administration screen, as well, when the Calculations icon is selected.

Figure 66: Data Sources > click menu button to access Calculations.
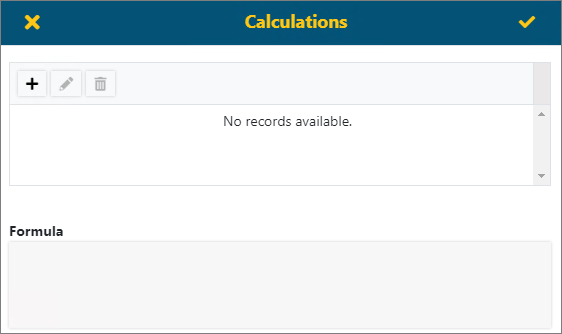
The Calculations option will allow you to create new fields that are calculations. This screen is also available for some Component options on the Properties screen (See BI Tool Properties). For example, this functionality is on the Matrix Setting screen under the Calculations tab (See BI Tool Matrix).

Figure 67: Calculations screen
To add a Calculation:
Note: As an example, the instructions are enter the simple calculation shown in XX.
1. Click the Add(+) button to add a new calculation. Clicking the Add icon will open the Add Calculated Column screen. This screen will be blank when you open it.
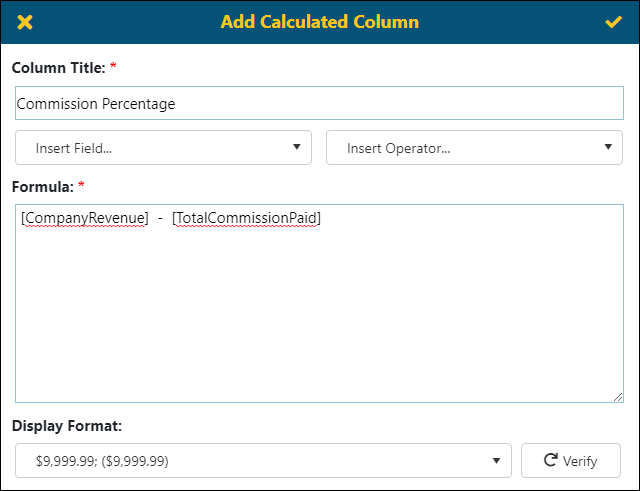
2. Enter a name for the Column Title.
3. Click Insert Field to choose a field. This field will be the first value in your calculation and listed under Formula. The first field chosen in the example was Company Revenue. The options will be the fields that are available within this data source.
4. Insert an Operator. The operator in the example is “-“. Users can manually type in a formula if they know the field names and functions. SQL functions and operators are allowed in a formula, which is dependent on your SQL server version.
5. Click Insert Field to choose another field. TotalCommissionPaid was the second field chosen.
6. Click the Verify button checks to make sure the entries (i.e., spelling of fields, the use of operators) is valid.
7. Click the checkmark to save this calculation. The BI Tool does not save any changes until you click the Save icon (the checkmark) in that screens header. The header name may change depending on where you accessed the functionality.
8. Once created, the field will be available to select as a column for display in the report.

Figure 68: Add Calculated Column screen
The Edit (Pencil) button will let users edit a selected row. Remove(X) will remove a selected row.