If your company is currently using the TechMate Manual Process and is updating to use the TechMate Automated Process, it is not necessary to complete all the steps within TechMate Automated Integration Setup as most of the steps were completed with the initial setup for TechMate Integration Setup (now renamed TechMate Manual Integration Setup.) The complete TechMate Automated Integration Setup is required only for customers new to the TechMate integration that are choosing to use the TechMate Automated Process.
To make the process for existing TechMate users, these are the only steps from TechMate Automated Integration Setup that need your attention. The step numbers correspond to the steps within TechMate Automated Integration Setup.
PREREQUISTE: Create a folder where the TechMate Automated Process will put the exports for retrieval by TechMate (Step 2).
STEP 1: Add a TechMate Vendor to XML Interface
Setup Area: MoversSuite Administration > Administration > XML Interface
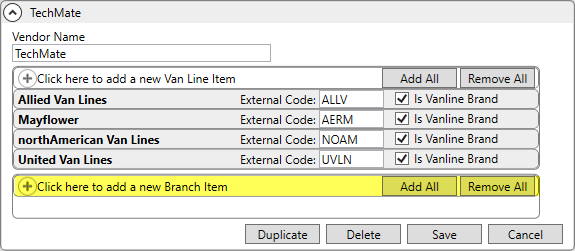
Within XML Interface Setup, update your existing TechMate record to add each Branch that will have leads and orders going through TechMate.

When clicked, choose from the dropdown the Branch to add to this integration. Continue to add each Branch. If you have multiple branches, use the Add All to quickly list all Branches. Enter an Authority Type, either option works with the integration. Nothing needs to be set within the External Code field.
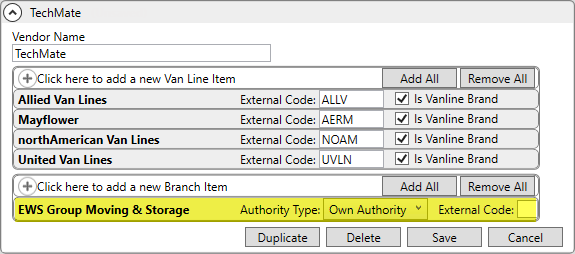
To reference, all the information on this XML Interface Setup record and the data required for it’s setup, see TechMate Automated Process.
STEP 2: Add an XML System Setup record for the TechMate Vendor
Setup Area: MoversSuite Administration > Administration > XML System
Update the TM (or TechMate) record within XML System Setup by adding an XML System Option. After clicking Click here to add a new XML System Option, set a Name and Value to create the XML System Option.
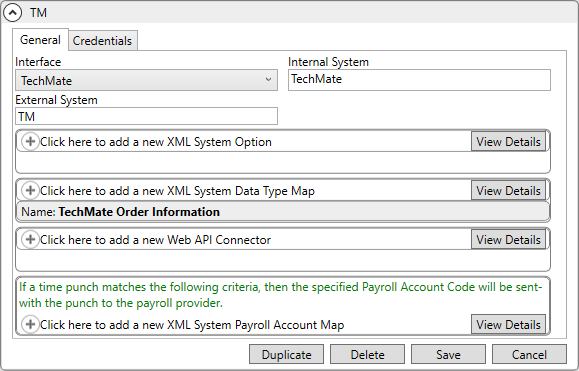
Click Click here to add a new XML System Option.
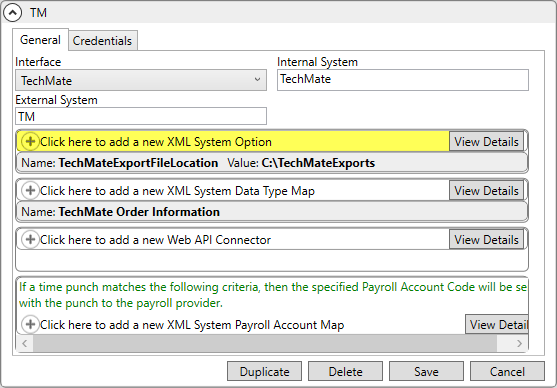
Set a Name, which must be: TechMateExportFileLocation.
The Value set is used as the path to the location that MoversSuite will put an XML file in when the user saves a new Lead. Create a folder, which can be whatever name you like and located whenever you choose (providing the location is on the machine that is running the API.) For the example below, our file path is C:\TechMateExports; therefore, the folder named TechMateExports in located directly on the C: drive.
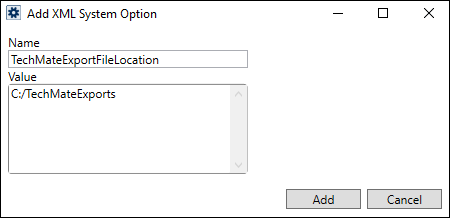
To reference, all the information required for this XML System Setup record is detailed within Step 2 within TechMate Automated Process.
STEP 7: Create a Queue Service Server record.
Setup: MoversSuite Administration> Queue Service > Queue Service Server Setup
From MoversSuite Administration> Queue Service > Queue Service Server Setup, create a new Queue Service Server record by clicking Click here to add a new Queue Service Server.

When clicked, the New Queue Service Server screen appears.
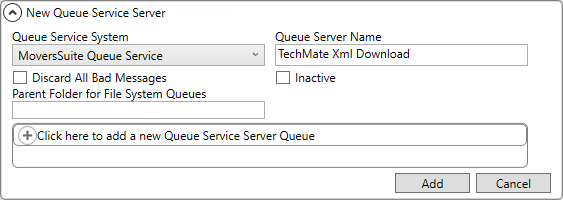
Enter the following information:
|
Field |
Value |
|
Queue Service System |
MoversSuite Queue Service |
|
Queue Server Name |
TechMate Xml Download |
|
Inactive |
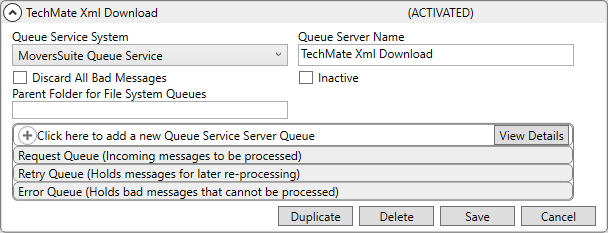
Important: This must be unchecked as shown in the image above. |
After entering the values in the table above, click Click here to add a new Queue Service Server Queue.
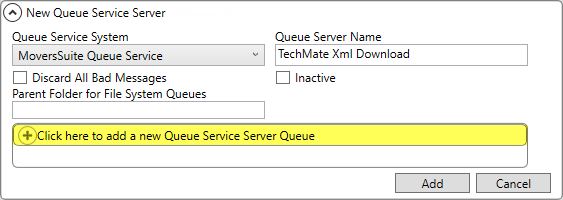
This opens the Add Queue Service Server Queue screen. This section needs to be completed three times with information detailed below to add the three Queue Service Server Queues required for this record. Each Queue Service Server Queue is detailed below with the information that needs to be entered and an image of the corresponding record after it is added. Of note, the choice of Queue Type will determine which fields are available.
1. Request Queue:

|
Field |
Value |
|
Queue Role |
Request Queue (Incoming messages to be processed) |
|
Queue Type |
File System Folder |
|
Queue Folder Name |
C:\TechMate\Request |
|
Filter |
Auto-populates as shown |
|
Minimum Message Age (in Milliseconds) |
Auto-populates as shown |
|
Message Type |
Auto-populates as shown |
2. Retry Queue:

|
Field |
Value |
|
Queue Role |
Retry Queue (Holds messages for later re-processing) |
|
Queue Type |
Microsoft Messaging |
|
Path to the Microsoft Messaging Queue |
.\private$\mss_TechMate_xml_retry |
3. Error Queue:

|
Field |
Value |
|
Queue Role |
Error Queue (Holds bad messages that cannot be processed) |
|
Queue Type |
Microsoft Messaging |
|
Path to the Microsoft Messaging Queue |
.\private$\mss_TechMate_xml_error |
The final record should look like this:
