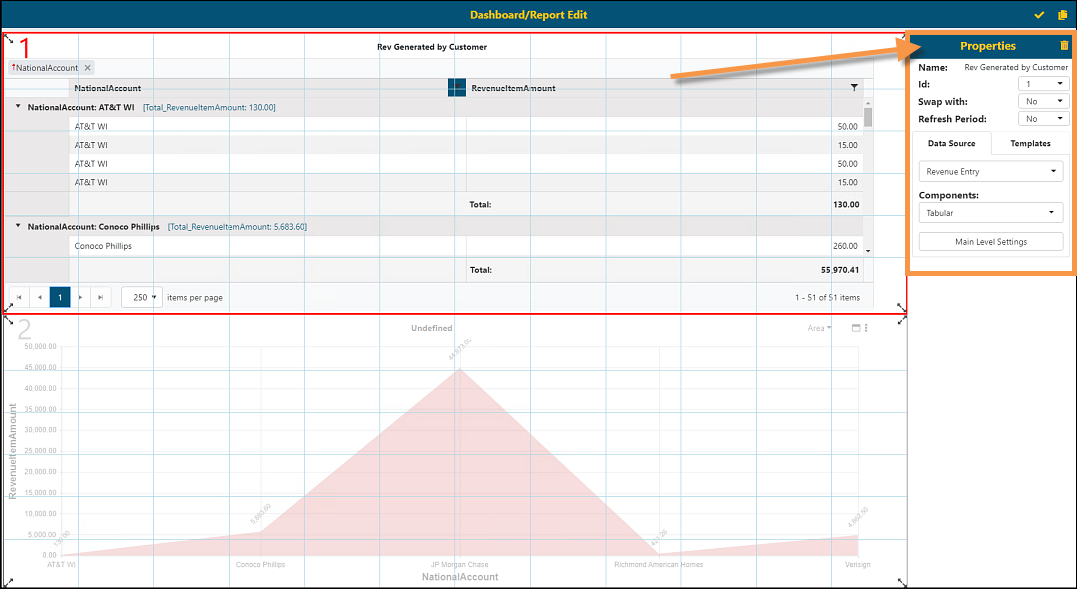
The Properties screen is located on the Dashboard/Reports Edit screen (outlined in orange in Figure 71).

Figure 71: Properties screen
The fields and their description include:
|
Field |
Description |
|
Name: |
This is the name of Data Source being used for this report. See BI Tool Data Sources for more information. |
|
Id: |
This is used to identify the area of the BI Tool Dashboard/Report Placement if more than one is being used. The area being used will be indicated by being outlined in red with a large number on that area. That number is the one identified in this field. In the example below, the number 1 is in red; therefore, the ID number will be 1. The parameters set on the Properties screen will be for ID number 1.
|
|
Swap with: |
Choosing another component on the dashboard would allow the user to swap components with the selected component or Id to move each component to another place on the dashboard. |
|
Refresh Period: |
User can set a time to refresh=h this component within the dashboard. |
|
Data Source Tab | |
|
Data Source: |
|
|
Components: |
Select the report (tabular or matrix), graphical, radial or web link component. Each of these components are described in detail in next section. See BI Tool Components for details. |
|
Template | |
|
This tab allows the ability to copy a component from one dashboard to another. | |
|
|
Add a template that can be copied into another dashboard by clicking this Add icon. |
|
|
Select a spot on the dashboard and click Apply icon to copy in Component (and will automatically copy Configuration as well as Settings) |
|
|
The Delete icon will delete template from list to reduce clutter of components available to copy. |
To further explain the ID field, in Figure 71 there are two components on the Dashboard/Report Placement area. One component is placed above the other and each area is numbered with the numbers 1 or 2. As area 1 is highlighted in red, that is the area indicated on the Properties screen in the ID field. Notice “1” is listed. Should area 2 be highlighted (by being clicked on and then outlined in red), the ID number in the Properties screen field would indicate 2.
NOTE: The remaining fields and information in use on the Properties screen are specific to the ID area identified in the ID number field only.