If your company consigns with a banking provider to factor Accounts Receivables, then you can use the Factoring screen within MoversSuite to build files to send to the factoring service provider for further processing. The process also creates a journal entry in Microsoft Dynamics GP for each batch processed.
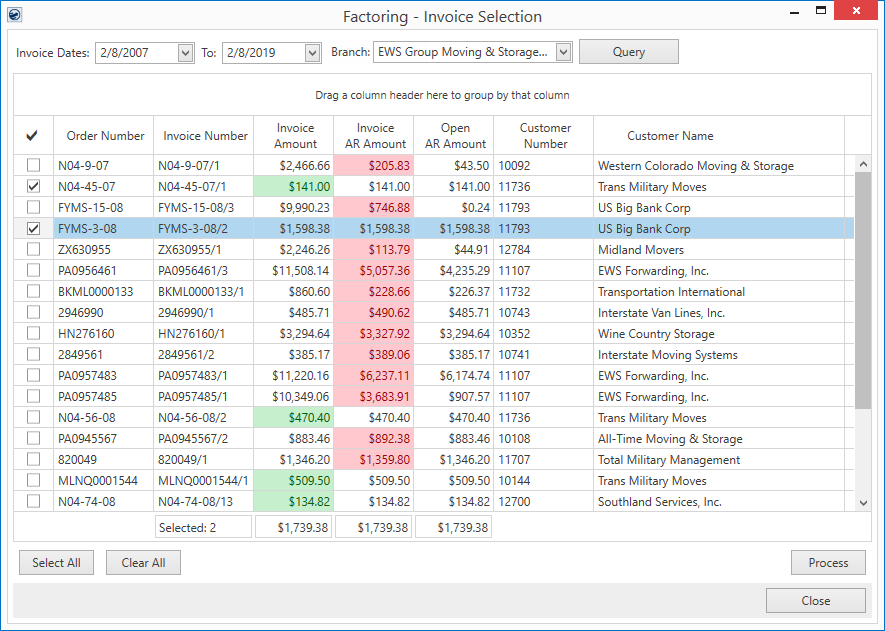
Figure 1: Factoring screen
Access to the Factoring screen is available to personnel through the Accounting Tools Menu option of Receivable Factoring.
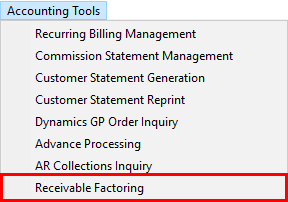
Figure 2: Accounting Tools Menu

The screen functions by allowing you to create a list of potential factored invoices based on the Invoice Dates range specified and the selected Branch. Select the dates using the Calendar Control. Once a date range is entered and branch selected, press the Query button to build the list. The list includes all invoices qualified as follows:
•The date of the invoice is within the specified Invoice Dates range.
•The invoice is associated to an order linked to the selected Branch.
•Customer on the invoice must be eligible as defined within Factoring Customer Setup.
•The invoice is attached to a branch that has been defined within Factoring Branch Setup.
•The invoice contains no pre-payment items as defined within Factoring Setup.
•The invoice has not previously been included in a factored batch.
•The invoice contains no adhoc items (these invoices show in the results, but you cannot select them – see the sections below)
NOTE: You can only see invoices associated to branches that you have Full access to the Factoring module for. See Factoring Initial Setup for details.

Place a check next to the invoices you wish included in the batch data. You can also utilize the Select All and Clear All buttons to add and remove invoices.
Utilize the date range and column totals to determine which invoices to include in the search. For example, you can set the dates to include invoices up to 60 days outstanding, place a check next to the invoices that you wish to include, then view the Selected totals at the bottom of the data grid, such as the total Open AR Amount, to determine what the final batch totals will be.
You can only select invoices where the Invoice Amount is
equal to the Invoice AR Amount. Invoices where the AR Amount and Invoice Amount
are note equal or the Open AR Amount is zero or negative show in red in the grid
for the Invoice AR Amount column. If you attempt to select these records, then
cancel  prompt appears. You will be
forced to cancel the selection prior to selecting any other record or processing
the batch.
prompt appears. You will be
forced to cancel the selection prior to selecting any other record or processing
the batch.

Figure 3: Example of line that must be cancelled (first record in grid)
Items that you can include when processing show in green for the Invoice Amount.
You can process a batch for negative amounts as well. If you do so, all selected invoices must have a negative Open AR Amount. Therefore, you can process a batch for all invoices with a positive amount or process a batch for all invoices with a negative amount.
NOTE: The data from Microsoft Dynamics GP is updated nightly. If you cannot see recent GP data, then you can contact your system administrator and request that they perform a Data Warehouse Refresh.

Once you have made selections within the grid, the Process button is enabled. You can press the Process button to generate the output files and create a batch journal entry for all selected invoices. You are prompted to provide the Journal Date and Document Date for accounting transactions through the Generating Transactions dialog.
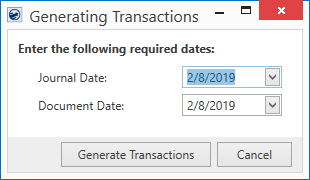
Figure 4: Generating Transaction dialog
The process generates output files that can be sent to the factoring provider. You are prompted to locate and select a parent directory to store the batch files through a Windows Explorer screen. NOTE: Once you establish a directory, the next time you process a batch the application opens the same folder automatically. Within the selected directory, the application creates a sub-directory for each batch. The sub-directory is named in the format of Batch XXXXXX, where XXXXXXX is the assigned batch number.
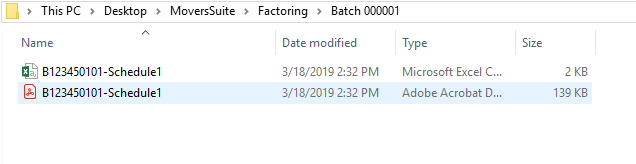
Figure 5: Sample batch output folder
The output of a processed batch includes an updated CSV file with and a separate PDF file containing all associated invoices.
The name of the CSV and PDF files created through Factoring now have the following format:
“B” + Client Code + Client Trade Style + “- Schedule” + Schedule Code
Where:
|
“B” |
File prefix containing the letter “B”. |
|
Client Code |
The Client Code set for the branch through Factoring Branch Setup. |
|
Client Trade Style |
The Client Trade Style number set for the branch through Factoring Branch Setup. |
|
“ – Schedule” |
A hard-coded space, dash, space and the word “Schedule”. |
|
Schedule Code |
The incremental count of the branch being processed. This counter increments automatically each time the branch is processed. For example, the first time the batch is run, the code is “1”. The 52nd time the batch is run, the code is “52”. |
Example:
If a branch contains Client Code of “1234501” and a Client Trade Style of one “01”, then the output files of the processed batch would be named B123450101 – Schedule1 for the first batch ran. For 52nd time this branch is processed, the name of the file would be B123450101 – Schedule52.
The CSV batch file provides entries for each invoice included. View the Factoring File Record Layout topic for file details.
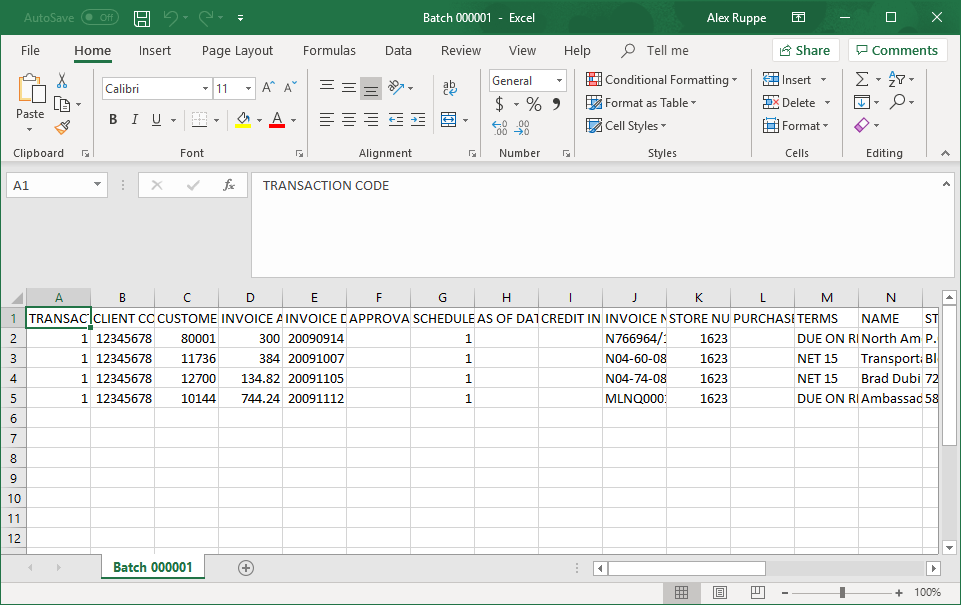
Figure 6: Sample batch output file
The information contained within the output folder can be sent to the factoring provider for further processing.
Missing Invoice Image
If an image for an invoice cannot be located, then the application produces a warning during the process and indicates which invoices are missing. Additionally, the application places an empty file in the batch folder to indicate that the invoice is missing. For example, if the image for 1623-235-19/1001 is not available, then the batch folder contains an empty Text file titled 1623-235-19_1001.pdf_MISSING.txt in the batch folder.
For all missing images, you must open the order associated to the invoice and reprint the invoice report through the View function within the Summary tab in Revenue Entry.
Accounting Transactions
At the completion of factoring process, a Generated Transactions Results prompt appears affirming the items generated for factoring.
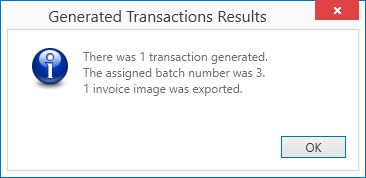
Figure 7: Generated Transactions Results prompt
The application creates a single journal entry transaction for the total open AR amount of the batch. The application debits the Due From GL account and credits the Contra GL account defined within Factoring Setup. The journal entry also contains a description of “Factor Assignment - #”, where # represents the batch number incremented for each batch processed through the Factoring screen.
Each accounting document assigned to an invoice included in the factored batch are marked as factored and are not included in any future factoring. All document numbers for transactions generated through the Factoring process start with the “FT” as the module indicator followed by the standard document format.
An option within the AR Trial Balance Report ran through Microsoft Dynamics GP allows you to choose from the following:
Exclude Factored Documents
Include Factored Documents
Only Include Factored Documents
Once the batch is processed, invoices show as factored within the Collections grids. A Factored column displays and is checked when the item is associated to factored invoice. The Factored column is available through the AR Collections Inquiry screen and through the AR Detail grid within AR Credit & Collections.
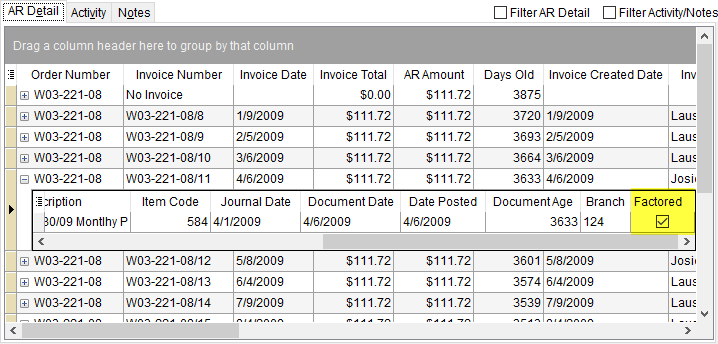
Figure 8: AR Detail screen within AR Credit & Collections
Setup Information
Content Information
Technical Field and Function Information
|
Field/Function |
Description |
|
Invoice Dates |
Set the date range to include in your search when Query is pressed. You can type in the date in MM/DD/YYYY format or use the drop-down Calendar Control. |
|
Branch |
Select the branch that you wish to process. Branch-specific files will be created and list under the appropriate batch folder. The branches available to this selector are those defined within Factoring Branch Setup.
NOTE: The branch processed is the branch of the order associated to the invoice and not necessarily the branch associated to transactions included on an invoice. This is to ensure that there is only one branch per processed invoice.
|
|
|
Query Once the Invoice Dates are set, press Query to view a list of possible invoices to include in a factoring batch. Reference grid totals for the Selected columns along with grid sort and filter features to assist you in determining whether to continue generating the batch. |
|
Grid Data |
|
|
|
Checkmark column. Those records with a checkmark are included in the batch created when Process is pressed. |
|
Order Number |
This column displays the Order Number associated to the invoice. |
|
Invoice Number |
The Invoice Number displays. |
|
Invoice Amount |
The dollar amount associated to the invoice. |
|
Invoice AR Amount |
The Accounts Receivables amount associated to the actual documents on the invoice. This represents the amount needing to be factored, which must equal the Invoice Amount. |
|
Open AR Amount |
The amount of Accounts Receivables associated to the invoice. This represents the unpaid portion remaining on the invoice. This amount cannot be negative or zero. |
|
Customer Number |
Name and identifier for the customer associated to the invoice displays. The customer information is established through Microsoft Dynamics GP display in these columns. |
|
Customer Name | |
|
Selected |
Totals display for all selected records in the grid for the Invoice Amount, Invoice AR Amount, and Open AR Amount columns. The count of the records selected appears next to the Selected label. |
|
|
Select All Mark all qualified records in the data grid with a checkmark to include each in the batch created when Process is pressed. The application only selects those records that have an Invoice Amount equal to the Invoice AR Amount. |
|
|
Clear All Unselect all records in the data grid. |
|
|
Process This button becomes active once selections have been made within the grid. Pressing Process prompts you to enter transaction dates for the journal entry created for the batch. You are also prompted to select a location for the output files that are sent to the factoring provider. |
|
|
Close Exit the screen. |
RELATED TOPICS: