This functionality of the Document Storage Management Setup feature allows you to delete unwanted documents from your main documents database. As clear by the name, it permanently deletes the documents from the documents database, and they cannot be retreated unless a backup was already made using the Archive Documents feature. It is useful when your main image database is growing excessively, and you want to completely get rid of documents from certain orders.
|
Tip |
|
A read-only version of the purged documents is still available to be viewed through the Document Management Viewer via a right-click option of “View Deleted Documents”. |
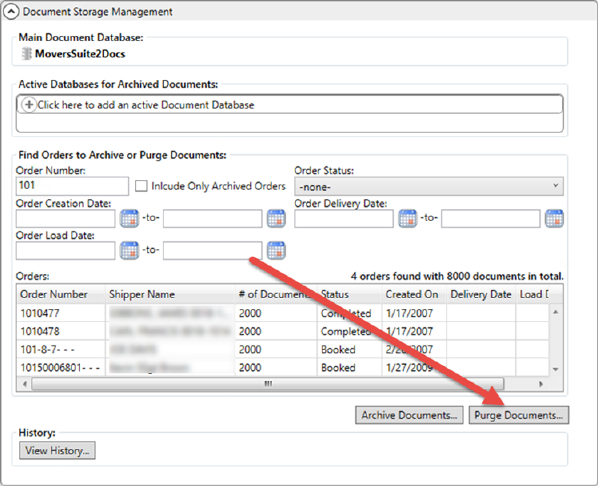
The feature is accessible through the Purge Documents button present at the Document Storage Management Setup screen.

Figure 43: Document Storage Management Setup screen
Upon opening the Document Storage Management Setup screen, your main documents database is auto loaded in the ‘Main Document Database’ section. In this case, it is MoversSuite2Docs.
The ‘Active Databases for Archived Documents’ is exclusive to Archive Documents functionality. Use the Find Orders to Archive or Purge Documents section to narrow down your search results for Purge Documents functionalities.
Use the below-mentioned six filtering options to narrow down your search results:
1. Order Number (minimum 3 characters required)
2. Include Only Archived Orders
3. Order Status
4. Order Creation Date (To and From)
5. Order Delivery Date (To and From)
6. Order Load Date (To and From)
NOTE: Checkmark the “Include Only Archived Orders” flag to search only the orders marked as Archived in MoversSuite. The orders will appear having a “[A]” sign appended to their order number. Also, orders with active storage are included in the search for you to keep all the pertinent documents, such as invoices, for active customers.
Refer to the Find Orders to Archive or Purge Documents topic for more details on using the filtering options.
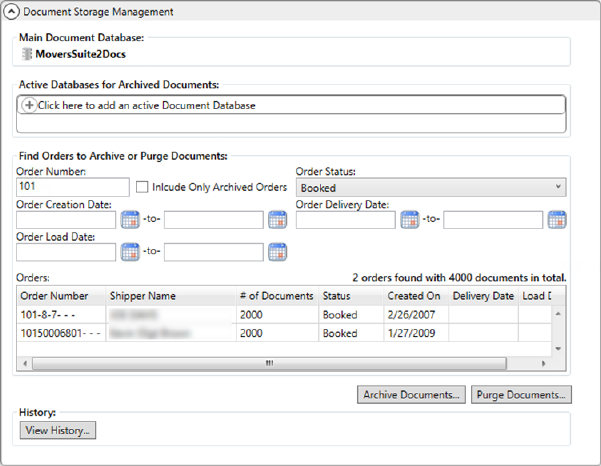
Figure 44: Document Storage Management Setup screen
The purging is performed across all the documents of certain orders as opposed to only deleting some of the documents.
Use any or all of the search criteria and your ‘Orders’ grid will populate accordingly. The ‘Orders’ grid is populated with the following columns:
•Order Number
•Shipper Name
•# of Documents
•Status
•Created On
•Delivery Date
•Load Date
With orders narrowed down to your desired results, you can click the ‘Purge Documents’ button on the Document Storage Management Setup screen. As this is a permanent delete and an irreversible process, a warning is displayed for you to confirm the action.
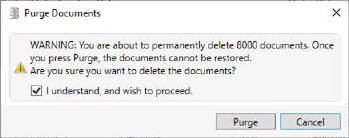
Figure 45: Purge Documents Warning
If you agree, checkmark the “I understand, and wish to proceed” flag and click ‘Purge’.
The purged documents can be viewed in the Document Management Viewer by right clicking on the viewer to prompt the menu which offers “View Deleted Documents.”
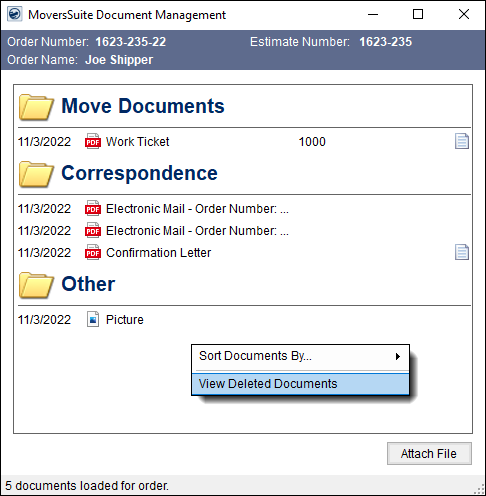
Figure 46: Document Management Viewer
To view the deleted document’s Properties, right click on the document to prompt a menu. Choose Properties.
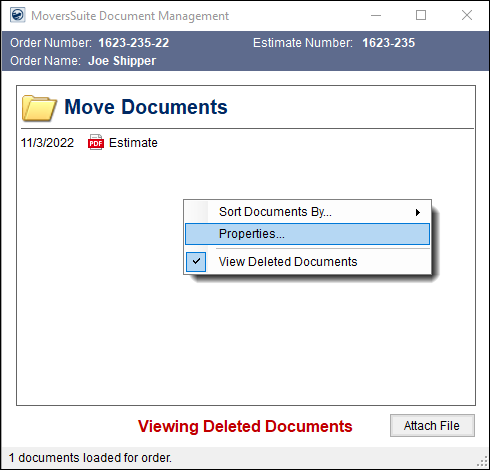
Such documents are in a view-only state and display the details in the following format:
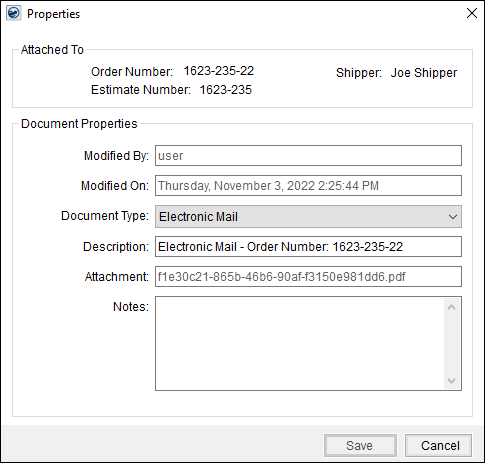
Figure 47: Properties screen
At any point during the purging process, you can stop the process by clicking the ‘Stop’ button on the prompt. This will stop purging the documents and will let you know of the total documents that have been purged during that time.
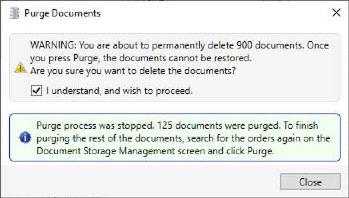
Figure 48: Purge Documents Warning
|
Due to the data-sensitive module of this feature, it is recommended that an administrator with full knowledge of how this action can affect your documents database, should perform this action. |
You will be updated when the purging process is complete.
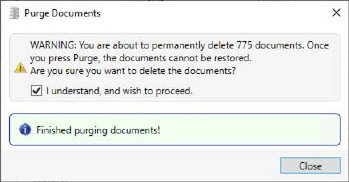
Figure 49: Purge Documents Warning
RELATED TOPICS:
Document Storage Management Setup
Find Orders to Archive or Purge Documents
Add Active Database for Archiving
Document Archive/Purge History