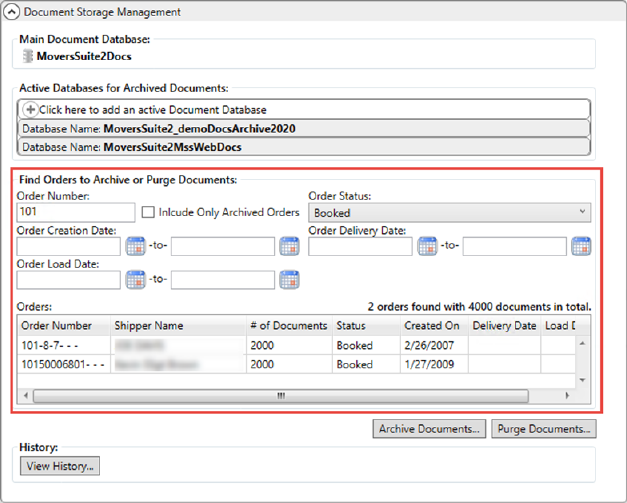
This section is common for both Archive Documents and Purge Documents functionalities. Use the below-mentioned six filtering options to narrow down your search results:
1. Order Number (minimum 3 characters required)
2. Include Only Archived Orders
3. Order Status
4. Order Creation Date (To and From)
5. Order Delivery Date (To and From)
6. Order Load Date (To and From)

Figure 31: Document Storage Management Setup
Use any or all of the search criteria and your ‘Orders’ grid will populate accordingly. The ‘Orders’ grid is populated with the following columns:
•Order Number
•Shipper Name
•# of Documents
•Status
•Created On
•Delivery Date
•Load Date
Of note, you can also use the wildcard character ‘%’. For example, ‘%101’ finds orders that contain 101 somewhere inside of their order number.
NOTE: During this search, the application automatically includes all archived orders having a “[A]” sign appended to it. Also, orders with active storage are included in the search for you to keep all the pertinent documents, such as invoices, for active customers.
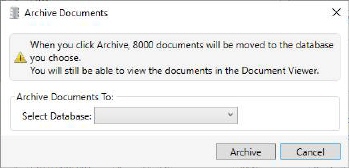
With orders narrowed down to your desired results and at least one active database for archived documents in place, you can hit the Archive Documents button below the ‘Orders’ grid, and you will be prompted to select a database.

Figure 32: Archive Documents screen
The Archive Documents prompt tells you the number of documents in total that you are about to archive. The ‘Select Database’ dropdown contains all the active databases so you can select one and click Archive.
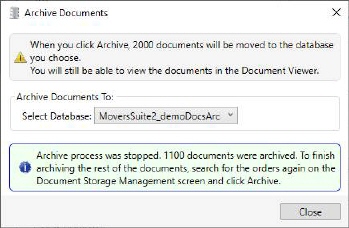
At any point during the archiving process, you can stop the process by clicking the ‘Stop’ button on the prompt. This will stop archiving the documents and will let you know of the total documents that have been archived during that time.

Figure 33: Archive Documents screen
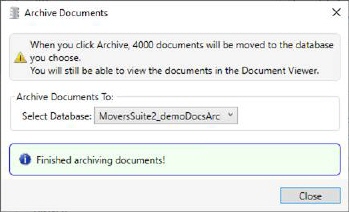
If you continue the archiving process without stopping, the prompt will update you when the process is complete.

Figure 34: Archive Documents screen
RELATED TOPICS:
Document Storage Management Setup