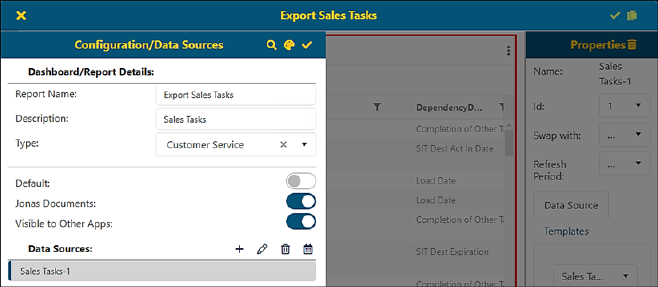
Setup Area: BI Tool Homepage
These are the steps to import a report into the BI Tool from the file directory on your system. Following this list are the details for each step.
1. Click Add Report (+) icon.
2. Click “Import Report” icon from header.
3. Click the” Import File” icon from Import Report screen.
4. Choose the report file to be imported.
5. Review data in the “Import Report” screen.
6. The report opens on the homepage.
STEP 1: Click Add Report (+) icon.
From the header, click the Add Report(+) icon to create a new report.

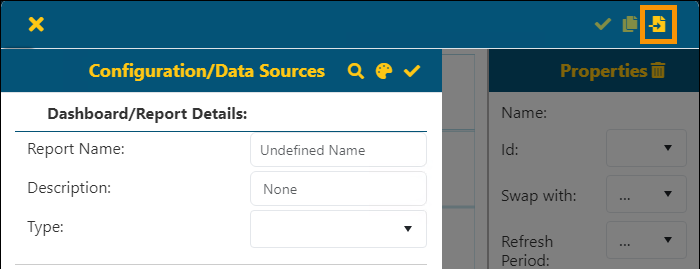
STEP 2: Click Import Report icon.
Clicking the Add icon (+) opens the BI Tool Configuration/Data Sources screen. Click the “Import Report” icon, which is in the upper right corner. When using the Import Report function, it is not necessary to enter a Report Name or enter a Data Source, as the name of the file, its location, and its Data Source will be included in the import.
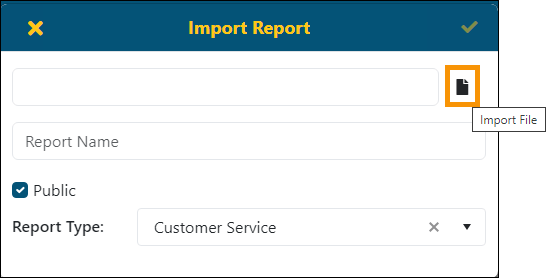
STEP 3: Click the Import File icon.
From the Import Report screen, click the “Import File” icon, which opens your file directory to locate and choose the report to be imported.
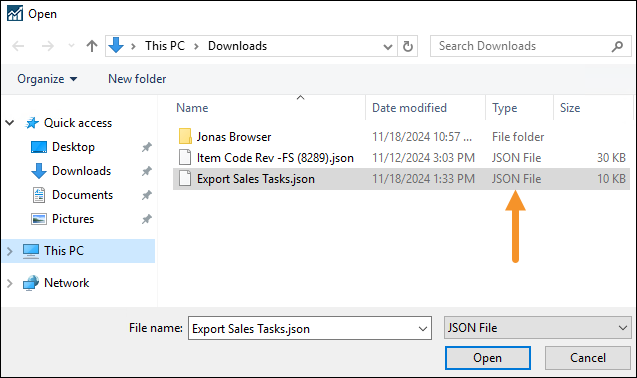
STEP 4: Choose the report file to be imported.
Click the file to be imported. Be sure the file chosen is in the JSON File format. Click Open.
STEP 5: Review data in the Import Report screen.
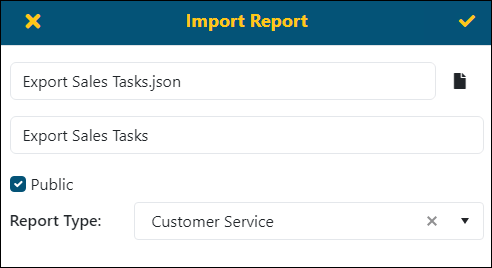
The import file auto-fills the Import Report screen. The first field indicates the file to be imported. The second field will be report name. It auto-fills the file name, which is “Export Sales Tasks” in the example below; however, this is editable to enter whatever name you like. The “Public” checkbox and the Report Type field dictate where the imported report is to be located within the BI Tool Report Listing. Since the “Public” checkbox is checked, the file will be stored under “Public Reports” and within the Report Type folder named “Customer Service.” Click the dropdown within Report Type to select another file. Or, uncheck “Public” to file the report under “My Reports” and the file names currently within “My Reports” will list in the dropdown. Click the checkmark in the upper right corner to import the report with those settings.
STEP 6: The report opens on the homepage.
The report imports and opens on the BI Tool Homepage.

Clicking the edit icon and then the Configuration/Data Sources tab reveals the settings within this report. (See BI Tool Configuration/Data Sources for details.)
