MoversSuite Administration > MoversConnect > VendorConnect
Use this setup area to manage vendors defined on your system that can use VendorConnect and to assign branches to support data exchange by the vendor. Please note that vendors are currently defined and managed within MoversConnect by EWS Group Professional Services (aka our Support Team). You can also reference this setup to refresh and upload changes made through MoversConnect for your vendors.
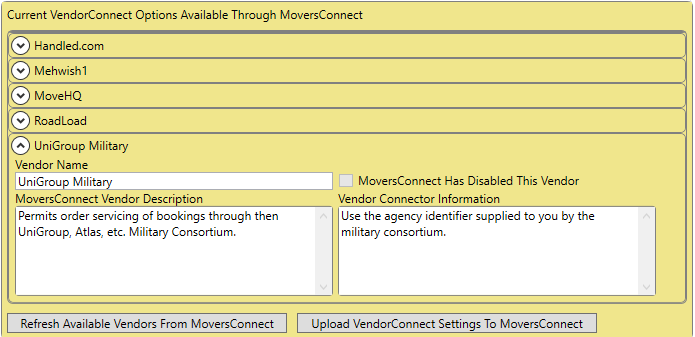
The top part of VendorConnect Setup provides information on which vendors you have defined on your system, along with options to refresh and upload this list.
Figure 3: VendorConnect Setup
NOTE:
Please make sure that you have gone through the MoversConnect Setup and Administration process by the help of EWS Professional Services team and your MoversConnect Api Service is running before using the feature.
Import Vendors From MoversConnect
To see the active vendors/identifiers along with their details such as name, description and any additional information, press the Refresh Available Vendors From MoversConnect button.
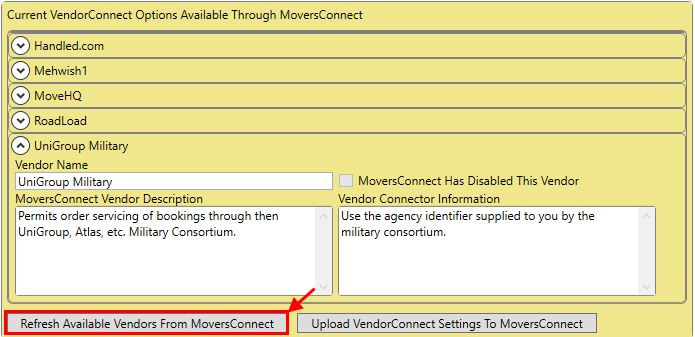
Figure 4: VendorConnect Setup
This will fetch all the active records from Integrator Index menu of MoversConnect.
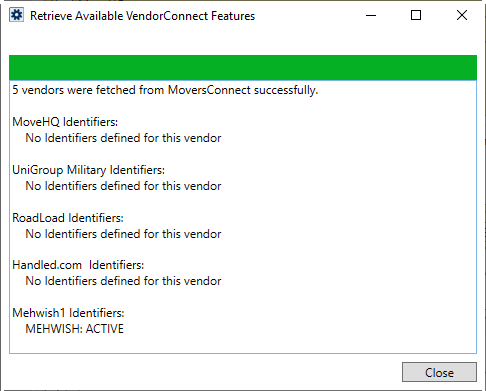
Figure 5: VendorConnect Setup
Create Assignable VendorConnect Records
Now, to create VendorConnect records out of these VendorConnect identifiers, use the New VendorConnect screen.
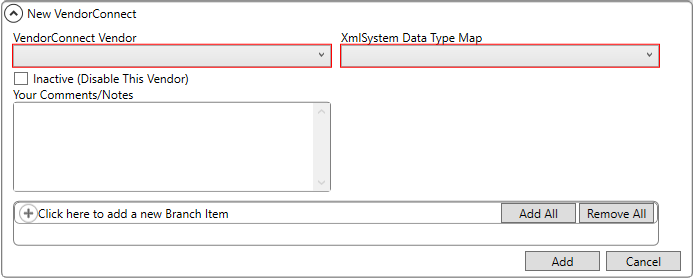
Figure 6: VendorConnect Setup
|
IMPORTANT |
|
The combination of VendorConnect Vendor, XmlSystem Data Type Map, attached Branch Items and their relevant external codes decides whether to grant permission to the users for sending data or not so make sure that relevant combination has been added for each VendorConnect record. |
Export Vendors to MoversConnect
Once you have created new VendorConnect records or made any updates to the existing records, you will need to export it to MoversConnect so that the cloud system is synchronized with any changes made through MoversSuite Administration. For that purpose, use the Upload VendorConnect Settings To MoversConnect button.
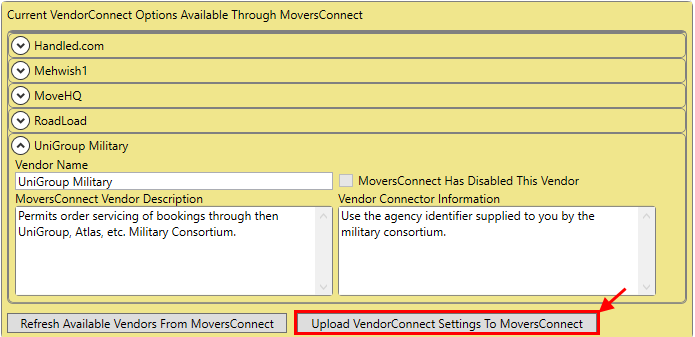
Figure 7: VendorConnect Setup
NOTE:
If you navigate to any other setup area without uploading the settings, an error will prompt you to do so, to avoid synchronization errors.
Upon successful upload, a window will prompt you for each connector (specified in the external code field for each branch item) activated for the respective vendor.
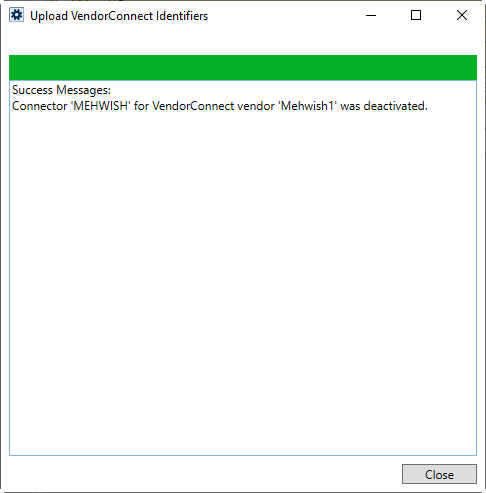
Figure 8: Upload VendorConnect Identifiers prompt
Technical Field Information
The following table describes the fields available within this setup area.
|
Field |
Description |
|
Current VendorConnect Options Available Through MoversConnect | |
|
Vendor Name |
Displays the vendor name imported from MoversConnect. |
|
MoversConnect Has Disabled This Vendor |
Check mark this option if you want to disable the vendor from MoversConnect side. |
|
MoversConnect Vendor Description |
Displays the vendor description imported from MoversConnect. |
|
Vendor Connector Information |
Displays vendor connector information imported from MoversConnect. |
|
Refresh Available Vendors From MoversConnect |
Press this button to import all the available VendorConnect identifiers into the VendorConnect Setup screen. |
|
Upload VendorConnect Settings To MoversConnect |
Press this button to upload any changes made in the VendorConnect Setup to VendorConnect and to synchronize it with MoversConnect. |
|
Add and Edit VendorConnect Settings NOTE: For a successful upload, the combination of VendorConnect Vendor, XmlSystem Data Type Map, Branch and External Code has to be a unique one. | |
|
VendorConnect Vendor |
Choose one of the available VendorConnect identifiers from those shown above. |
|
XmlSystem Data Type Map |
Choose one of the available XmlSystem Data Type Map options defined in XML System Setup. |
|
Inactive (Disable This Vendor) |
Checking this box will disable the record. |
|
Your Comments/Notes |
Add any comments or notes related to the record in this section. |
|
New Branch Item | |
|
Branch Name |
Select any of the available branches, defined in Branch Setup. |
|
External Code |
Provide an external code which will be referred as a connector for the concerned record. |
|
Inactive |
Checkmark this option to inactivate this particular branch record. |
RELATED TOPICS:
MoversConnect Setup and Administration
VendorConnect Setup Information