
Setup Area: Config tab > Customers
Manage your Customers, Locations and Contacts for your frequent customers/companies. This includes adding, updating, managing, and/or removing. Customers are added to this in two ways. The first way is when the Customer is added when creating a new move opportunity: however, not all the information entered is stored within this tab.
To ensure all the information is available and an option within Picklists, enter Customer information within the Customers tab.
To enter a new Customer:
From Config tab > Customers, clicking Customers prompts the listing all your frequently utilized customers/companies.
To add a new customer, click the + button at the top right of your screen.

You will then be brought to a screen for a New Customer. Enter the Customer/Company Name in the Name field.
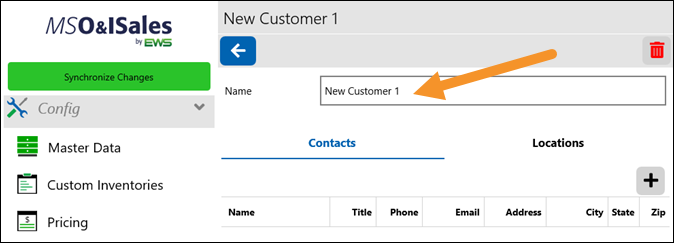
When the name is entered, the page changes from “New Customer 1” to what was entered, which is Health Equity in the example.
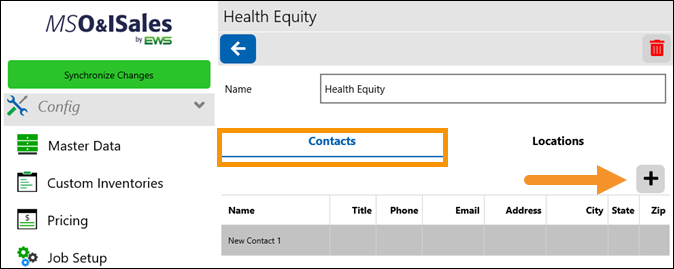
Notice the two tabs below the Customer/Company Name, which are Contacts and Locations. As Contacts has the blue underline, the information shown will relate to that tab. Each tab is discussed below:
CONTACTS: To add new contacts
To add a New Contact, click on the + button near the right side or your screen within the Contacts Tab.
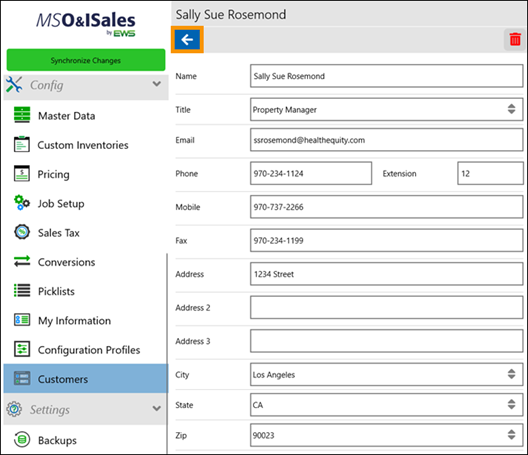
Complete all the appropriate data within the New Contact Screen. Choose from picklists or enter new data within the search box. In either case, click the checkmark to select the option or entry. Once complete, click the back arrow button at the top of your screen.
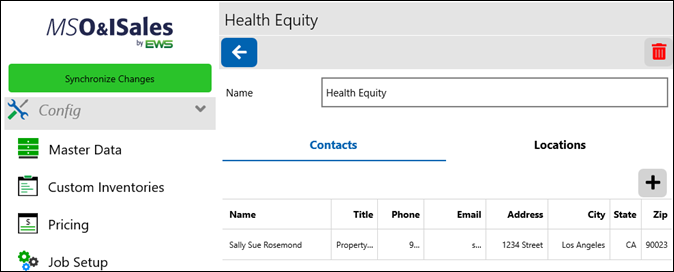
Added Contacts will list for that company under the Contacts tab. Continue to add new contacts by clicking the + button, as needed.
CONTACTS: To update contacts
To update any contact, click on the contact, update the data and click the blue arrow to save and return to the Contacts List.
To remove any contact, click on the contact, then click the red trash can at the top right of the screen.
LOCATIONS: To add a new location
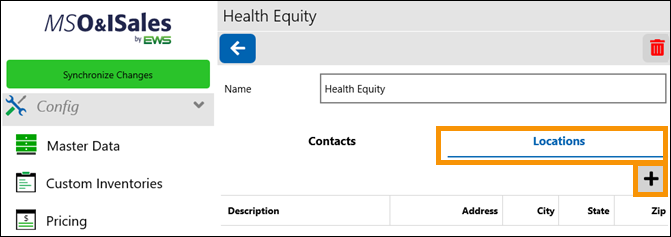
Information regarding Locations is found under the Locations tab within Conf > Customers > Locations tab.
To add a new location (address, building, etc.) click the + button under the Locations tab.
Complete all the appropriate data. Choose from picklists or enter new data within the search box. In either case, click the checkmark to select the option or entry. Once complete, click the back arrow button at the top of your screen.
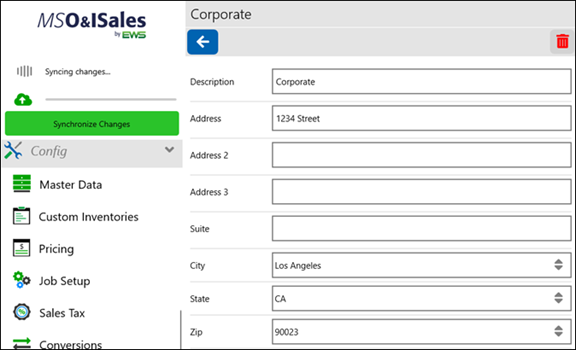
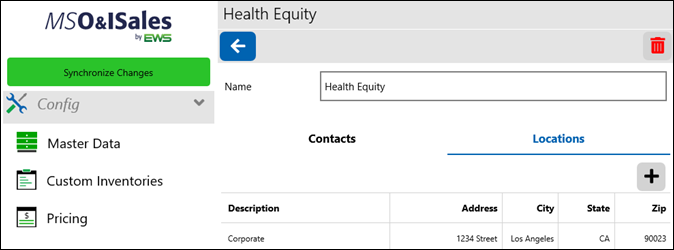
Complete all the appropriate data within the New Location Screen. Once complete, click the back arrow button at the top of your screen. The new Location is now added to the Locations list. Continue to add new contacts by clicking the + button, as needed.
LOCATIONS: To update locations
To update any location, click on the location, update the data, and click the blue arrow to save and return to the Locations List.
LOCATIONS: To delete a location
To delete a location, click on the location and then click the red trash can at the top right of the screen.