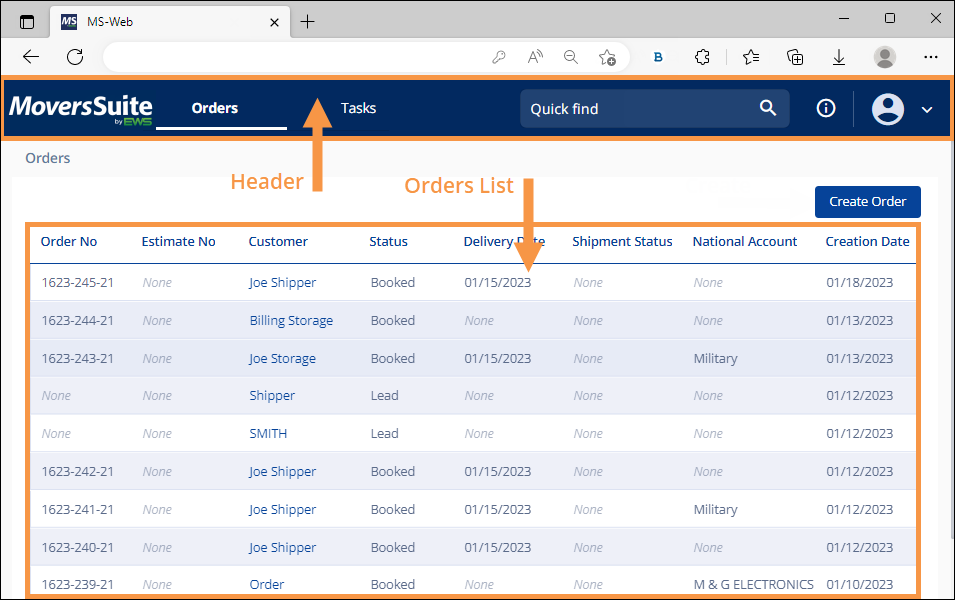
When you log in, you are prompted to the Homepage. Navigate from this page using the Orders List or Quick Find.

Figure 3: MSWeb Homepage
Header
The Header is the blue bar at the top of the screen.

Figure 4: MSWeb Header
The components of the Header are as follows:
|
FIELD |
DESCRIPTION |
|
|
This menu appears when the screen is greatly reduced and the Orders tab, Tasks tab, and the Log Out icons are not available on the header. Click the menu to access those functionalities. |
|
|
Clicking Orders shows the Orders List.
When underlined, as shown, Orders is the page displayed. |
|
|
Clicking Tasks shows the Tasks List. (Coming soon.)
When underlined, as shown, Tasks is the page displayed. |
|
|
Search Quick find for an order using the Order Number, the Container Number, the GBL Number, the Invoice Number, and even a Phone Number. Use the Quick find Information icon for instructions on how to perform these searches. Also, you may search for any order – not just those that are not assigned to you.
Click the Quick Find Help icon |
|
|
This icon represents the Quick Find Help. Click the icon to show the Quick find instructions on what is searchable and how to perform the Quick Find. Essentially:
For Order Number, Invoice Number, Container Number, GBL Number, enter a number or partial number.
For Phone Number, enter P then the numbers or partial number to find all phone numbers including those numbers anywhere in the phone number.
For example, if this is entered: P 978 This will return (970) 987-1234 and (212) 255-0978 and links for corresponding order or lead.
Click the icon within MSWeb for more detailed instructions on using this feature. |
|
|
This icon represents Account Profile. Click to log off. |
|
|
This icon represents the dropdown icon. Click to log off. |
Orders List
On the MSWeb Homepage, the Orders List is a list of up to 100 open orders specific to the person logged on and include open orders assigned to that person. Any order or lead – open or closed - is accessible to any user by searching the Quick Find (MSWeb). Orders with a completed status will not be part of the list. It is possible to hide orders with certain statuses from being included in the Orders List, for example Cancelled orders. See Order Status Setup for information on this functionality.
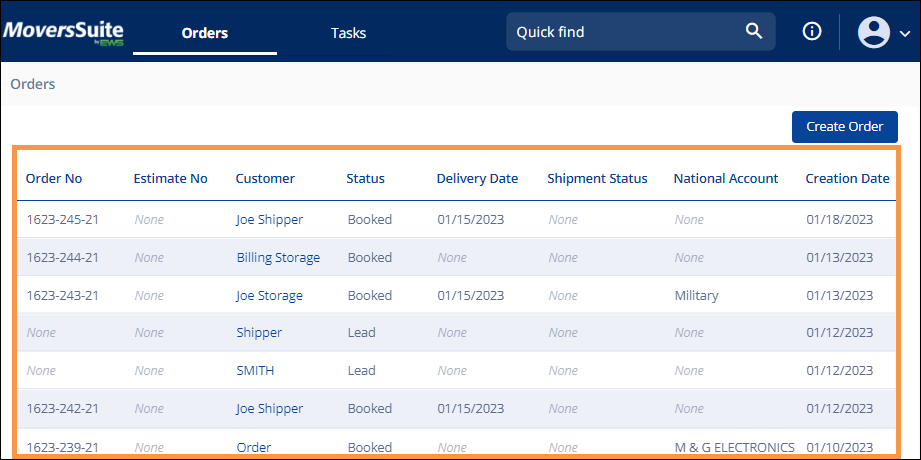
Figure 5: Orange section designates the Orders List
Each column has a Sort feature to arrange the orders in an ascending or descending order. The default Sort order is based on the Creation Date. To Sort, click on the column name and an arrow appears. It will appear either pointing up for the ascending sort or pointing down for the descending sort. To change the Sort, click the column name a second time. The Sort feature icon is the arrow shown in the picture below.
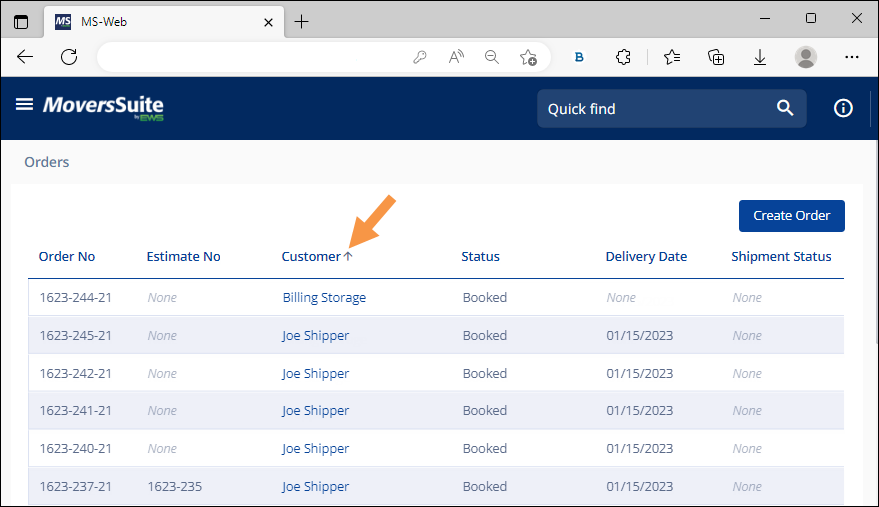
Figure 6: Status Sort indicator
Also, it is also possible to Sort by more than one header. Hold the Shift key and click another header to further refine the Sort. Notice the headers now show numbers beside the header to show Sort Order. This is important to know when using more than one sort. The list is first sorted by the column showing 1. That list is further sorted into a sub-sort according to 2. This can continue for multiple headers. To clear the sorts, click anywhere on the Order List.
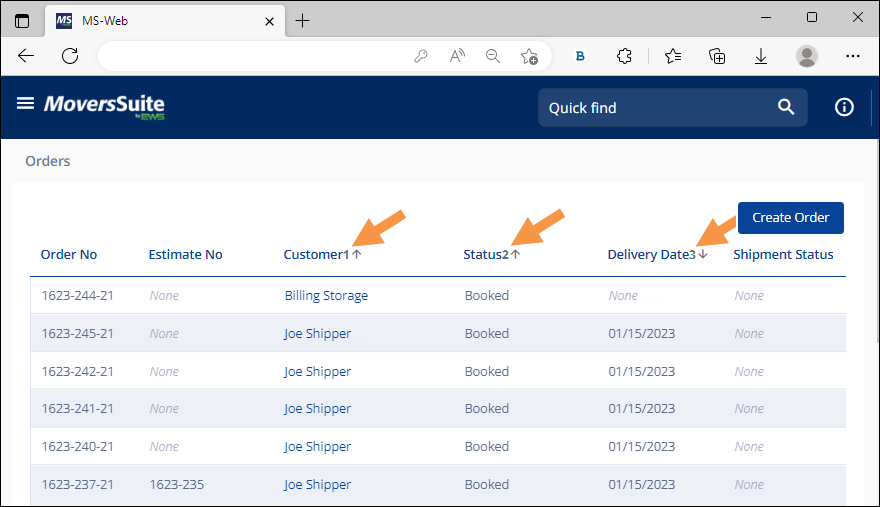
Figure 7: Multiple Sort Orders
When an order is selected either from this Order List or from using the Quick Find, you will be redirected to the Order Story of the order.
Create Order Button
Clicking the Create Order button on the MSWeb Homepage directs you to the Create Order Page. Use the Create Order Page to start a lead or an order.
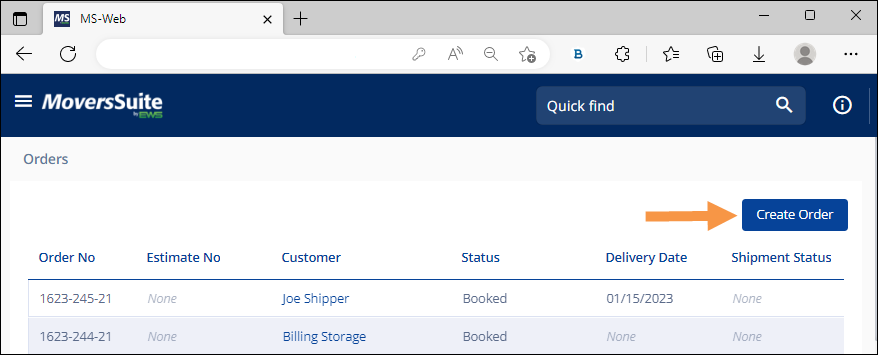
Figure 8: Create Order Button