When services are complete, you can access the Enter Actuals screen to enter final numbers labor, service time, equipment quantities, materials and more. Updating the service data assists in generating accurate revenue for the services for accurate reporting.
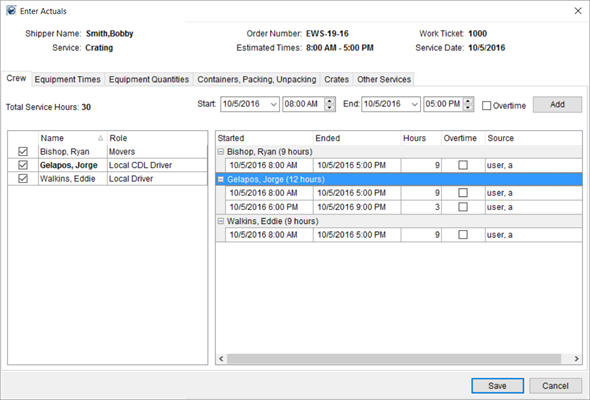
Figure 33: Enter Actuals screen
Accessing this Screen
Access the Enter Actuals screen through the following:
In the Dispatch Center of Local Dispatch, select a service and press Enter Actuals
In Revenue Entry on the Order Information (Revenue Entry) tab, open the Work Tickets tab, select a work ticket, press Enter Service Actuals
Entering Service Actuals
The Enter Actuals screen displays service specific information at the top of the screen. The screen also provides tabs related to the work performed on the service. Make changes in each of these tabs, where applicable, and press Save to keep the changes or press Cancel to close the screen without saving all changes made in any or all tabs.
For Crew, Equipment Times, and Equipment Quantities, these tabs appear only if utilized for the service. For example, if no crew was utilized for the service, then the Crew tab does not appear.
The following tabs are available through the Enter Actuals screen:
|
Tab |
Topic Link |
|
Crew |
|
|
Equipment Times |
|
|
Equipment Quantities |
|
|
Containers, Packing, Unpacking |
|
|
Crates |
|
|
Other Services |
To enter service times or quantity values in any of these tabs, select the record you wish to update by placing a check in the box corresponding to the record.
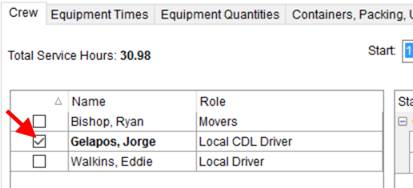
Figure 34: Selecting a crew member within the Crew tab
You can also select all records by right-clicking on one of the records and choosing Check All.
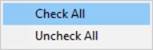
Figure 35: Right-click option on crew pane
Enter appropriate data next to the Add button. This is the data you wish to enter for the selected/checked record. NOTE: If the service time crosses the midnight boundary, confirm this by entering an appropriate End date, i.e. the next day.

When the data is complete, press Add. The application adds an entry to the grid for the selected item.
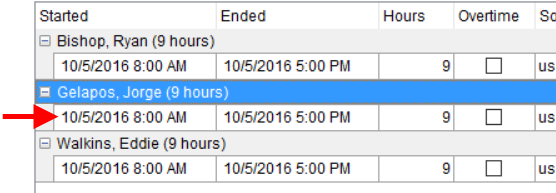
Figure 36: Sample time entry
You can continue to add entries as needed. Again, The Add feature creates an entry for each selected record. You can remove an entry through a right-click menu.
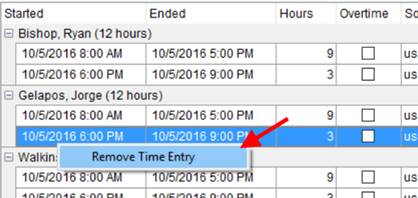
Figure 37: Remove Time Entry option
To update materials counts, open the Containers, Packing, and Unpacking tab, click in the Actual column corresponding to the entry you wish to update and enter the value.
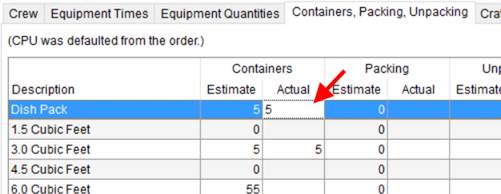
Figure 38: Entering a value within the Containers, Packing, Unpacking tab
For Crates and Other Services, open additional dialogs through the Add buttons to enter data through the following dialogs:
Importing Revenue
Personnel can import actuals into Revenue Entry through the Import Actuals function available through the Transactions tab. Once imported, items associated to the service display as transaction items that can be invoiced.
If the service you are viewing through the Enter Actuals screen has been imported into Revenue Entry through the Import Actuals function, then the application displays IMPORTED just below the Service Date.
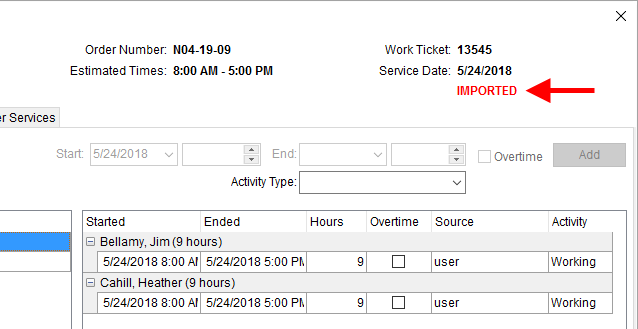
Figure 39: Enter Actuals
Technical Fields and Functions Information
The following table describes the tabs, fields, and functions available through the Enter Actuals screen.
|
Field/Function |
Description |
|
Shipper Name |
Name of the shipper on the order (set through the Name, Address, Phone tab.
Office & Industrial For Office & Industrial orders, the Last Name/Company Name and First Name fields set within the Contacts and Locations tab displays. |
|
Service |
Description of the requested service (set through Add Local Service). |
|
Order Number |
Assigned Order Number displays. |
|
Estimated Times |
The original times entered for the service display. This time range is the default for time-based crew and equipment services. Originally estimated times are set through either Add Local Service or Set Service Time functionality. |
|
Work Ticket |
The Ticket Number assigned to the service displays. Set the Work Ticket number through the Dispatch Center. |
|
Service Date |
The date the service is scheduled to be complete displays. This date is set through Add Local Service. |
|
IMPORTED |
If the service has been imported into Revenue Entry through the Import Actuals function, then IMPORTED displays below the Service Date. |
|
Crew |
Open the Crew tab to view and set the actual times for personnel assigned to the service. |
|
Equipment Times |
Open the Equipment Times tab to view and set the actual times for equipment resources provided on a service. |
|
Equipment Quantities |
Open the Equipment Quantities tab to view and set the number of resources used on and returned from a service request. |
|
Containers, Packing, Unpacking |
Open the Containers, Packing, Unpacking tab to view estimated quantities and set the actual quantities for CPU/Materials associated to a service. Refer to Update Containers, Packing and Unpacking for details on this tab. |
|
Crates |
Open the Crates tab to view and add crating items utilized on the service. Refer to Crating Information for details on this tab. |
|
Other Services |
Open the Other Services tab to view and add services that may affect revenue generation. Refer to Crating Information for details on this tab. |
|
|
Save (Alt + S) Press Save to keep all changes made since opening the screen. The Save captures all changes made in any tab, therefore you only need to press Save once when you are finished with all changes. |
|
|
Close (Alt + C) Pressing Cancel closes the screen without saving any changes made since the screen opened. |
RELATED TOPICS:

