The dialog appears when a user evokes the Insert Bookmark option from within the Letter Designer. You use this screen to select a bookmark from those listed within the data grid. Once you find and highlight the bookmark, press OK and the application inserts the bookmark tag within the document.

Figure 11: Insert Bookmark dialog
Start typing in the Bookmark Name field and the application automatically filters the results. For example, entering “date,” the application lists only those bookmarks that contain “date” somewhere in their name.
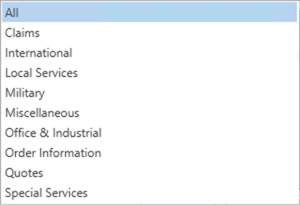
Filter the list of bookmarks by choosing a Group. The application arranges the groupings by functional area and accessibility. For example, the Claims group lists all claim-specific fields, which are only available when the document generates within the Claims module.

Figure 12: Group menu
You also have the option to sort the grid by the Bookmark Name and/or by Group.

Figure 13: Insert Bookmark with Group sorting
Use the following links to view the bookmarks available for each group listing.
|
Group |
Available Bookmarks |
|
Claims |
|
|
International |
|
|
Military |
|
|
Miscellaneous |
|
|
Office & Industrial |
|
|
Order Information |
|
|
Quotes |
|
|
Special Services |
View the Forms Designer Bookmarks topic for a complete listing.
RELATED TOPICS