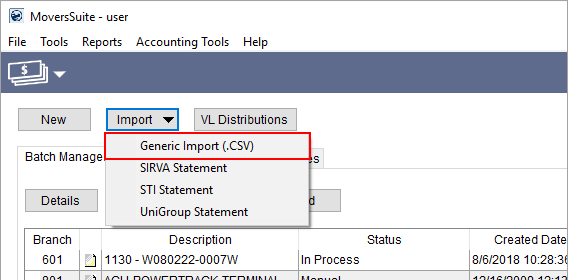
The Generic Import option allows you to include payment information directly into Payment Management through a comma-delimited (.CSV). file The Generic Import (.CSV) option is available to you through the Import Menu.
Figure 31: Import menu within Payment Management
When you select the Generic Import (.CSV) option, the application prompts you to select a file to import. The file must be correctly formatted and stored as a comma-delimited file (.CSV). The layout and options of this file are documented within the Generic Import File Format topic. Details on what each column is for and how to use it are within Generic Import File Format.
|
|
Avoid using commas, double quotation marks, carriage returns, line feeds, dollar signs and other special characters when entering values in the spreadsheet. Once all values are entered, save the file as a “CSV (comma delimited).” |

Figure 32: Sample CSV file
The file location of the import must be one that you can access and write to. The application automatically creates a Processed folder and put its on your Desktop. The Processed files are those that were imported into Payment Management through the Generic Import process.
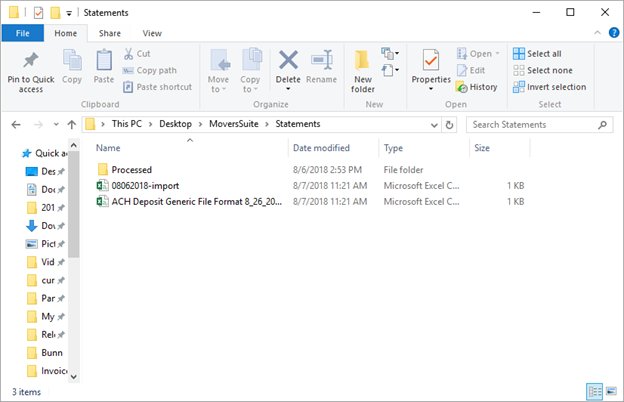
Figure 33: Select Payment Management Import File dialog
If the file is formatted and saved correctly, then the Statement Import Summary screen appears. From this screen, you can correct any payment codes, change or set the order, update the Import Auto Apply Options, and more.

Figure 34: Statement Import Summary
You can control the behavior of auto applying of batch items through the Import Auto Apply Options screen. Refer to the Import Auto Apply Options topic for details.
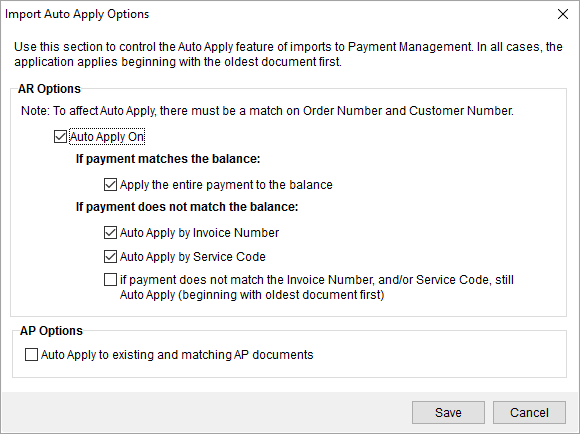
Figure 35: Import Auto Apply Options
Common errors encountered during import include Invalid Payment Code and Order Number not found. These errors can be corrected directly from this screen through the Associate Order and Assign Payment Code options. Alternatively, you can Cancel out of the summary, make correction within the CSV file, and re-import it.
Once imported, the file shows as a batch with a Status of Open (for General Payments) or System (for Cash Receipts) within the Batch Management grid. The batch can be processed through the Detail Processing tab as well as through Payment Application.
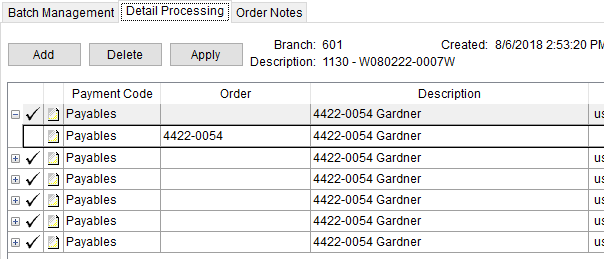
Figure 36: Detail Processing tab
Importing a file through the Generic Import process allows you to reduce errors by eliminating duplicate data entry. Further, each item is assigned its own cash receipt number when imported as a Cash Receipt making it easier to verify and reconcile with deposits.
Common usages for this type of processing includes checks for lock box and non-temp storage, in addition to advances charged back to drivers for Comdata imports. The following is a summary of these common usages.
|
Import Type |
Description |
|
Lock Box |
Import a list of checks directly into Payment Management. Each line item is its own cash receipt number making it visible within Cash Receipts and easy to reconcile. |
|
Comdata or T-Chek |
Driver advance processed by banking services such as Comdata or T-Chek can be imported and charged-back to the driver. |
|
Non-Temp Storage |
A check is treated as a single deposit and all orders underneath are treated as their own cash receipt. |
|
Van Line |
Carrier payments and charges can be imported into Payment Management. |
Refer to the Generic Import Setup topic for additional information.
RELATED TOPICS:
Payment Management Setup and Administration
