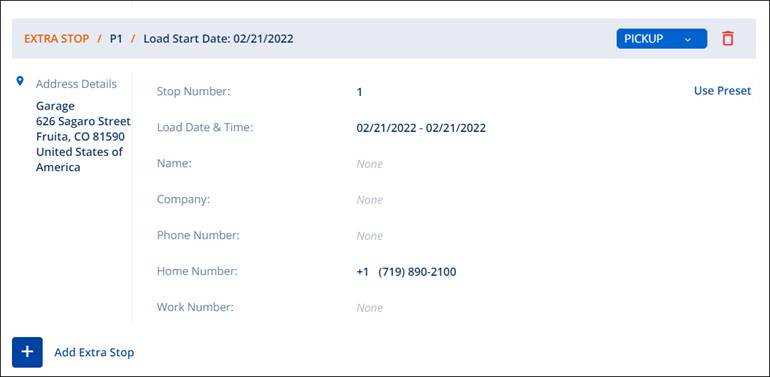
At the bottom of the Move Information (See MSWeb Move Information) card is EXTRA STOP. Enter the details for any stop in the delivery that is to happen between the pickup at the origin location and delivery to destination location.
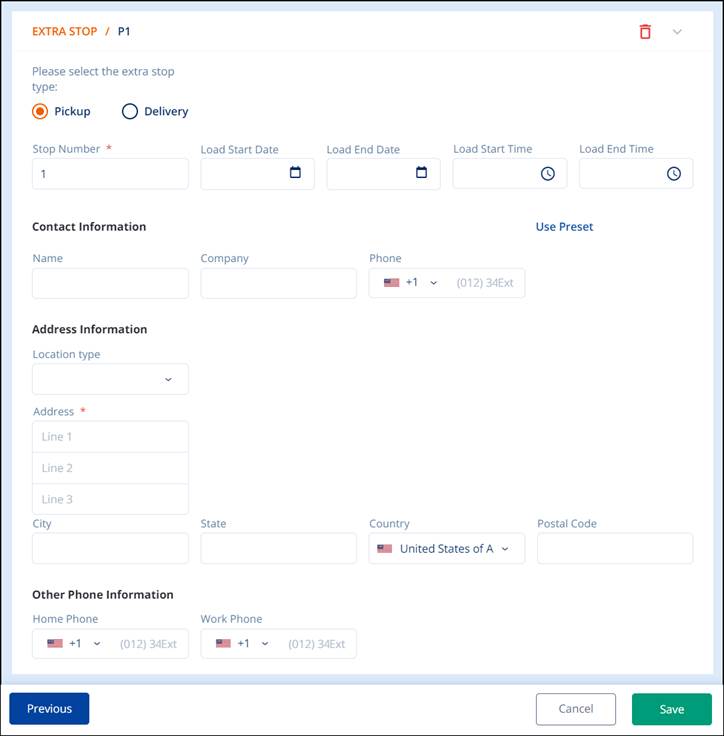
When Add Extra Stop is clicked, the screen below opens. The extra stop can be designated as a Pickup or Delivery. Enter all information known about this stop and Save.

Figure 9: Add Extra Stop
Notice the box’s header: EXTRA STOP / P1. If the Extra Stop was designated as a delivery, it would read: EXTRA STOP / D1. Further, if more Extra Stops are entered, they will be designated P2 (or D2), then P3 (or D3) and so forth.
If needed, the extra stops can be rearranged by changing the Stop Number. Click the field so the edit icon (blue appears).

Figure 10: Extra Stop Number
Change the Stop Number and click the green check to confirm or the red x to cancel the action.
The following table describes the EXTRA STOP part of the MOVE INFORMATION card. MOVE FROM details the destination location.
|
FIELD |
DESCRIPTION |
|
P1 or D1 |
The Stop Number defined for that location. P is for Pickup and D is for Delivery. |
|
Pickup or Delivery |
Designates which part of the transaction this location pertains. |
|
Stop Number |
Where in the order of Extra Stops this location is to occur. Extra Stops can be reordered by changing this field. |
|
Load Start Date Load End Date Load Start Time Load End Time |
Use these fields to schedule the pack date and time. |
|
Contact Name Company Phone |
This is the name of who to contact if there are questions on site at this Extra Stop. |
|
Location Type |
This informs the crew what type of location this is so they can be prepared. |
|
Address City State Country Postal Code |
The physical address of the destination location. |
|
Other Phone Information |
Use these fields to add additional phone numbers for the Contact on this Extra Stop. |
Click the Delete icon (red trashcan) to delete the Extra Stop entry. A confirmation will appear that asks: Delete this extra stop? Click the green check to confirm deletion or the red x to go back to the entry and not delete it.
See MSWeb Extra Stop for more information about this topic.
To go to the ORDER INFORMATION card, click ORDER INFORMATION or the Previous button.
To save the information entered at any time, click Save.